Symptoms of a Bad Upper Control Arm: 7 Signs & How to Check
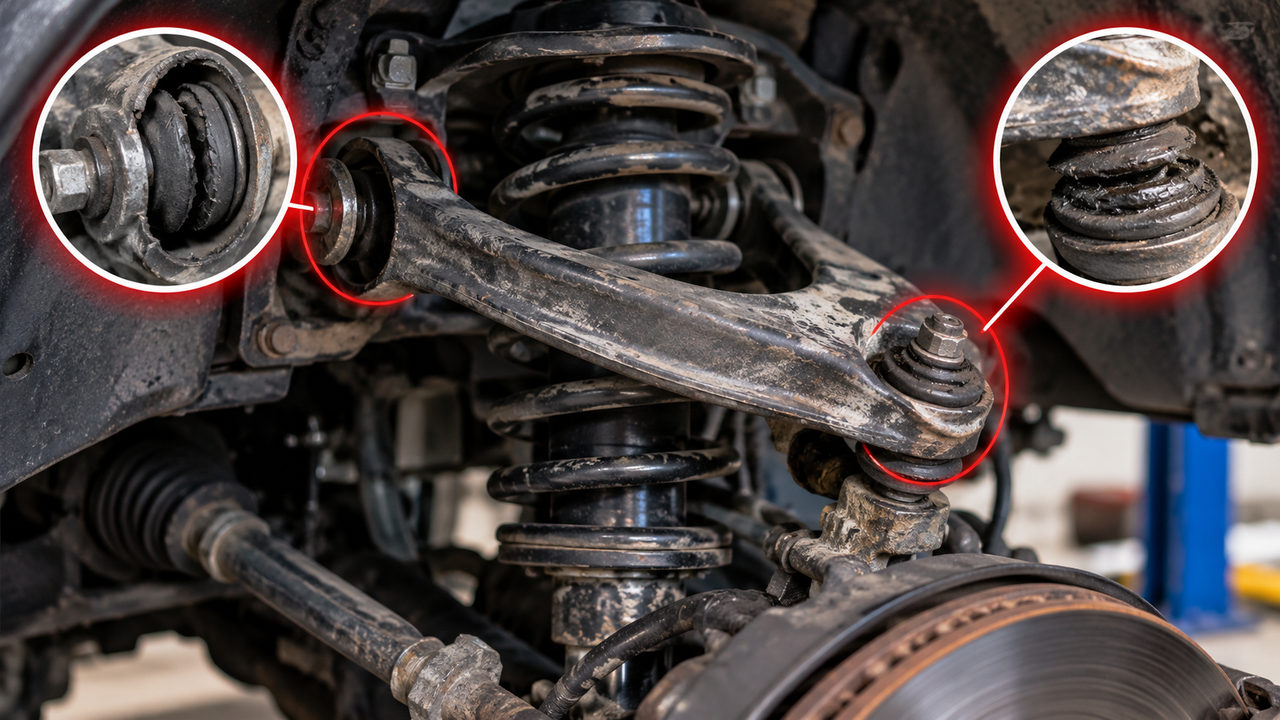
The most common symptoms of a bad upper control arm are clunking over bumps, loose or wandering steering, pulling during braking, uneven tire wear, vibration, creaking noises, and visible damage or excessive movement at the suspension joints. The symptoms usually come from worn bushings or an upper ball joint rather than the metal control arm itself.
There is an important catch: none of those driving symptoms proves the upper arm is faulty. A loose tie rod, damaged lower control arm, worn wheel bearing, or ordinary alignment problem can feel remarkably similar. The useful question is not simply whether the suspension makes noise, but which connection is allowing movement it shouldn’t.
We’ll cover seven warning signs, what a failing upper control arm sounds like, how to distinguish bushing wear from ball joint problems, and what you can safely check before authorizing a repair.
Safety warning: If a front wheel appears tilted or displaced, steering suddenly becomes unpredictable, or a suspension joint has severe looseness, stop driving and arrange professional inspection or towing. An upper ball joint or control arm mounting failure can compromise wheel control.
What Actually Goes Bad on an Upper Control Arm?
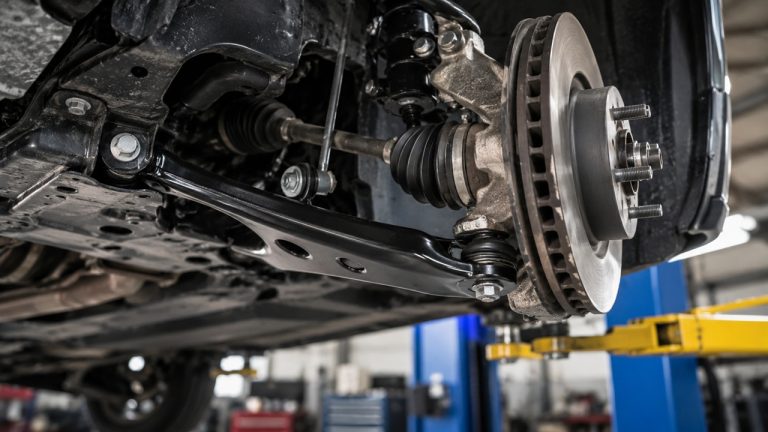
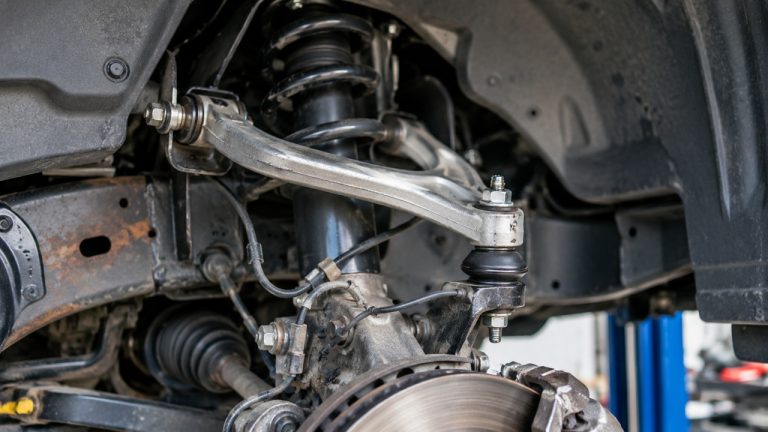
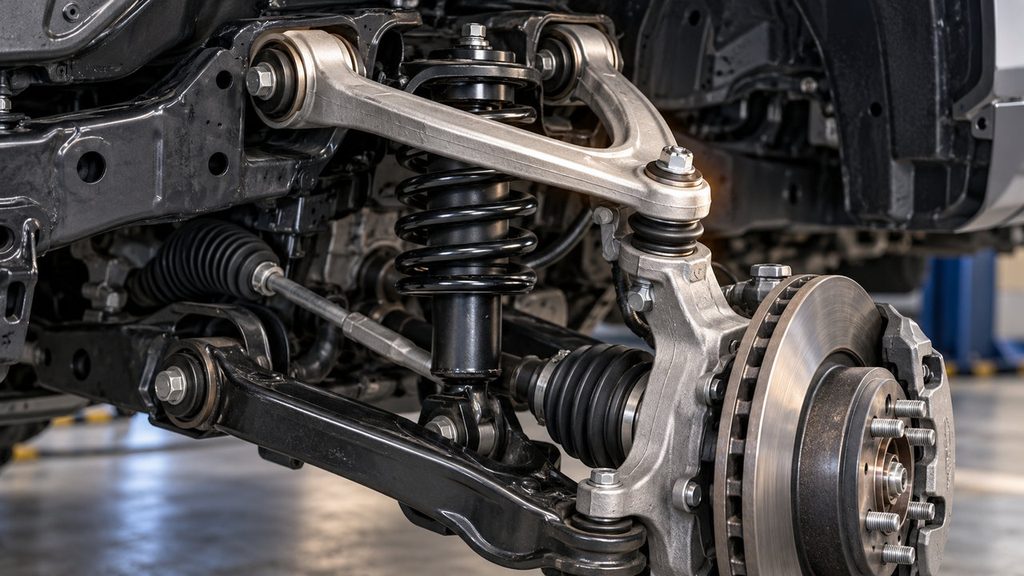
When a mechanic says your upper control arm is bad, that doesn’t necessarily mean the arm has cracked or bent. On a typical double-wishbone suspension, three different areas can cause trouble: the bushings where the arm mounts to the chassis, the ball joint near the steering knuckle, and the arm or its mounting points themselves.
| Problem area | What fails | Useful diagnostic clues |
|---|---|---|
| Upper control arm bushings | Rubber separates, deteriorates, or allows excessive pivot movement | Dull clunks, movement at chassis mounts, changes in steering feel under load |
| Upper ball joint | Ball-and-socket joint develops excessive clearance or damage | Knocking, looseness at the knuckle connection, damaged dust boot |
| Metal upper control arm | Arm bends, cracks, corrodes severely, or suffers impact damage | Visible deformation, altered wheel geometry, damage after a collision or curb strike |
| Mounting hardware or bracket | Fastener loses its secure mounting or attachment point becomes damaged | Movement between components that should remain securely attached |
Those distinctions matter because the solution isn’t always a complete new arm. Some vehicles allow the upper ball joint or bushings to be replaced individually. Others use assemblies with components that are not intended to be serviced separately.
First, though, let’s look at what you might notice while driving.
7 Common Symptoms of a Bad Upper Control Arm
These signs can develop gradually as the joints wear, or appear suddenly after a hard impact. Don’t expect every symptom to occur together. An upper arm can have a visibly deteriorated bushing without making much noise, while a worn ball joint may produce a noticeable knock before the driver feels obvious steering changes.
1. Clunking or Knocking Over Bumps
A solid knock from one front corner is one of the more familiar upper control arm complaints. It may occur when crossing a driveway entrance, hitting a pothole, or driving over broken pavement.
There are two common ways this happens. A worn bushing can allow the arm to shift farther than intended at its chassis mounting point. Alternatively, excessive clearance inside the upper ball joint can let connected metal components move against one another when the suspension changes direction.
People sometimes describe the sound as a hollow thud rather than a sharp metallic click. Unfortunately, sound descriptions aren’t reliable enough to separate the two failures. Noise also travels through the frame, which can make a lower suspension problem seem as though it’s coming from the upper arm.
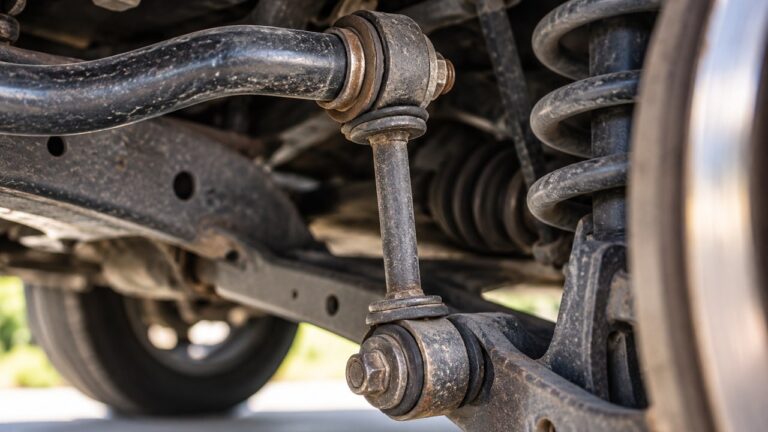
If a knock happens mainly over small, repeated bumps, inspect sway bar links and nearby mounting hardware too. Our guide to suspension clunks and rattles explains how the timing of a noise helps narrow down the possible sources.
2. Loose Steering or a Car That Wanders
Perhaps the truck used to track straight with very little steering correction. Now it seems to drift slightly, especially on uneven pavement. You find yourself making small adjustments more often than before.
An upper control arm helps maintain the steering knuckle’s position as the suspension moves. When a bushing or ball joint allows excessive movement, the knuckle can shift under road forces instead of following its intended geometry.
The result may be steering that feels less precise, or a vehicle that reacts differently to bumps and cornering loads. Changes in camber and caster can influence how the front wheels track and return toward center.
But don’t automatically blame an upper arm for steering wander. Tire pressure differences, damaged tires, incorrect alignment, worn tie rods, and steering gear problems can all produce similar symptoms.
A useful clue is whether the loose feeling appears alongside a suspension knock or visible movement at the upper arm’s mounting points. That combination deserves a closer inspection, although it still isn’t a definitive diagnosis.
3. Pulling or Shifting Direction During Braking
A vehicle that changes direction when the brakes are applied may have a suspension component moving under load. Worn control arm bushings are one possibility.
When braking forces act on the wheel, the suspension must keep the steering knuckle located correctly. If an upper control arm mounting has excessive movement, the geometry can change slightly as the load increases.
That said, braking pull is not a reliable upper-control-arm-specific symptom. Lower control arm bushings, a sticking brake caliper, tire problems, and uneven braking forces may be more likely on some vehicles.
Pay attention to the pattern. Does it happen every time you brake? Does the direction change depending on road conditions? Does the steering wheel jerk, or does the entire car drift? Those observations can help a technician distinguish a braking fault from suspension movement.
If braking stability changes significantly, don’t attempt repeated road tests to investigate it.
4. Uneven or Rapid Front Tire Wear
An upper control arm doesn’t touch the tire, but it plays an important role in determining the wheel’s position. When the arm or its joints allow abnormal movement, wheel alignment can change as the suspension travels.
Depending on the geometry and the failure, you may notice unusual wear on the inner or outer shoulder of a front tire. Some vehicles develop irregular wear across the tread because the wheel’s alignment is no longer stable under load.
Don’t assume that inner-edge wear always means a bad upper control arm. Excessive negative camber, incorrect toe, worn lower suspension components, and previous alignment changes can produce the same pattern.
A tire showing cupping or scalloped wear can also point toward damping or tire-related problems rather than the upper arm itself.
If you discover abnormal wear, have the suspension checked for looseness before paying for an alignment. Adjusting wheel angles while a joint is moving excessively won’t correct the underlying problem.
5. Steering Wheel Vibration or Front-End Shimmy
Excessive movement at an upper ball joint or control arm bushing can contribute to vibration, particularly when the front wheels encounter bumps or changing road loads.
Instead of a smooth, predictable response, the front end may feel unsettled. The steering wheel might shake over rough pavement or seem to transmit more movement than it did previously.
Vibration is a weak clue on its own, though. If the steering wheel shakes at a narrow range of highway speeds, tire imbalance, wheel runout, tire damage, or a wheel bearing issue deserves attention before an upper control arm is condemned.
An upper-arm problem becomes more plausible when vibration accompanies other evidence, such as clunking, a damaged bushing, or measurable play at a suspension joint.
6. Creaking, Squeaking or Popping During Suspension Movement
Not every failing upper control arm announces itself with a clunk. Some produce a creak as the suspension compresses or rebounds, particularly at low speeds.
A deteriorated rubber bushing can make noise as it twists or shifts in its mounting. A ball joint with a damaged protective boot, contamination, or inadequate lubrication may also squeak during articulation.
On trucks fitted with aftermarket upper control arms, the answer can be more complicated. Certain upgraded arms use polyurethane bushings, serviceable joints, or uniball-style bearings with maintenance requirements that differ from factory rubber-bushed designs.
A squeak from one of those components doesn’t necessarily mean the entire upper arm has failed. It may indicate a lubrication, contamination, fitment, or maintenance problem that requires the correct manufacturer-specific inspection.
Avoid spraying random lubricant around the control arm as a diagnostic shortcut. It may temporarily change the sound without correcting a damaged joint, and the product may be incompatible with nearby rubber or brake components.
7. Visible Bushing Damage, Ball Joint Play or a Bent Arm
This is where the evidence becomes more useful than the driving symptoms.
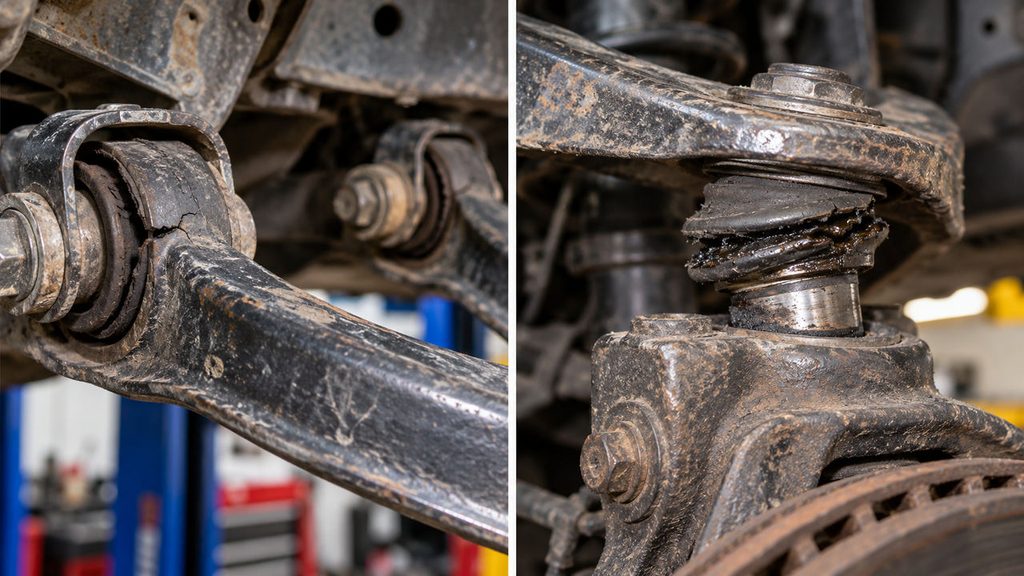
Visible deterioration at an upper control arm mounting may include torn rubber, separation from a metal sleeve, unusual displacement, or contact marks showing that components have been moving against one another.
At the upper ball joint, look for a missing or split dust boot, escaping grease, severe corrosion, or obvious joint displacement. A damaged boot raises concern about contamination, although it doesn’t automatically prove the joint exceeds its allowable play.
Inspect the metal arm itself after a curb strike, collision, or major pothole impact. Bending, cracks, buckling, damaged welds on applicable designs, or a visibly displaced mounting point require professional assessment.
One caution: small surface cracks in an aging rubber bushing aren’t the same as complete separation or excessive movement. Likewise, some bushing voids and shapes are intentional design features. Compare what you see with the correct component specifications before declaring it defective.
A confirmed loose joint, displaced mounting connection, or structurally damaged arm is much stronger evidence than a clunk that merely seems to come from the upper front corner.
Upper Control Arm Bushings vs. Upper Ball Joint: How the Symptoms Differ
Both components belong to the same assembly on many vehicles, yet they perform different jobs. The bushings allow the arm to pivot at its chassis mounts while controlling unwanted movement. The upper ball joint connects the arm to the steering knuckle and allows articulation as the wheels steer and the suspension travels.
Because either failure can change the knuckle’s position, the driving symptoms overlap. The more useful difference is where the unwanted movement occurs during an inspection.
| Inspection clue | Worn upper control arm bushing | Worn upper ball joint |
|---|---|---|
| Location | Inner arm mounting points at the chassis or frame | Outer connection between upper arm and steering knuckle |
| Typical wear | Torn, separated, compressed, or excessively compliant bushing material | Excessive clearance or damage inside the ball-and-socket joint |
| Possible noise | Dull clunk, thud, or creak as loads change | Knock, pop, or squeak during steering or suspension movement |
| Most useful evidence | Excessive movement at the bushing or its mounting sleeve | Excessive movement between the ball stud and joint housing |
| Visual clues | Rubber separation, abnormal displacement, damaged mount | Damaged boot, grease leakage, corrosion, joint looseness |
| Possible repair | Bushing or complete upper arm replacement | Ball joint or complete upper arm replacement |
Imagine a mechanic inspecting a truck that clunks when crossing a driveway. If the inner mounting sleeve shifts relative to the arm because the rubber has separated, that suggests a bushing problem. If the upper ball joint stud moves excessively inside its housing, that points toward the joint instead.
The sound may be almost identical in both situations. The physical inspection is what distinguishes them.
How to Tell If Your Upper Control Arm Is Bad
You can gather useful clues without dismantling the suspension. Confirming internal wear, however, may require a professional inspection with the suspension supported and loaded in a very specific way.
Important: Never work beneath a vehicle supported only by a hydraulic jack. Follow the vehicle manufacturer’s lifting and inspection instructions. Springs and suspension components can store substantial energy, and the correct support points depend on the suspension design. Do not loosen upper ball joint fasteners, control arm pivots, or spring-related components merely to perform these checks.
Step 1: Confirm That Your Vehicle Has an Upper Control Arm
Many pickups, SUVs, and cars with double-wishbone or short-long-arm suspension have upper and lower control arms. The upper arm is normally mounted above the lower arm and connects near the top of the steering knuckle.
Look for an A-shaped, triangular, or curved suspension link extending from the frame toward the knuckle. Its exact shape varies by vehicle.
Not every car has this component. A conventional MacPherson-strut front suspension generally uses the strut assembly to locate the upper portion of the knuckle rather than a separate upper control arm.
If you’re unsure which suspension your vehicle uses, check its original-equipment parts diagram before ordering anything.
Step 2: Inspect the Upper Arm and Bushings Visually
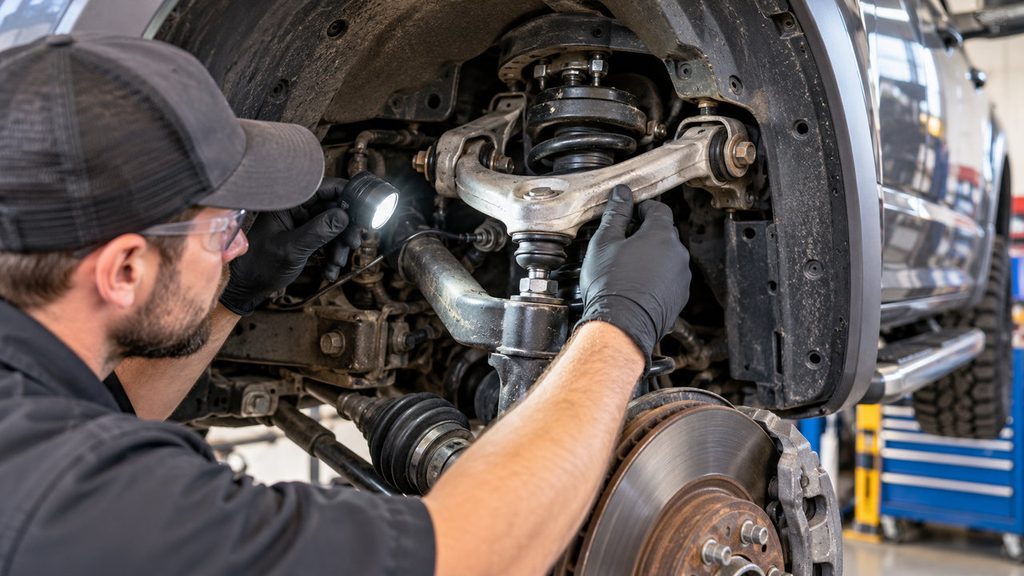
With the vehicle parked securely on level ground, use a flashlight to examine the visible upper arm and its mounting points from outside the wheel area.
Look for separated rubber, bushings displaced from their housings, corrosion around the mounting brackets, obvious bends, or fresh metal contact marks. Compare the left and right sides where possible, allowing for normal differences in component layout.
Pay particular attention if the symptoms began immediately after striking a curb or a deep pothole. A sudden change in steering-wheel position or wheel alignment after an impact can indicate damage even when the arm doesn’t look dramatically bent.
Don’t mistake normal rubber flex for excessive looseness. The inspection should identify separation, damage, or movement outside the manufacturer’s permitted range.
Step 3: Check the Upper Ball Joint’s Boot and Mounting
Find the connection between the outer end of the upper control arm and the steering knuckle. On many designs, this is the upper ball joint.
Inspect its protective boot for tears, missing clamps, escaping grease, and contamination. Check for obviously damaged mounting hardware without attempting to loosen or tighten it.
Some upper ball joints are replaceable as individual components. Others are integrated into the arm, and certain performance suspension systems use a different joint or bearing design.
A clean-looking boot doesn’t guarantee that the internal joint is healthy. Conversely, a torn boot is a reason for further inspection, not a universally valid measurement of internal play.
Step 4: Have the Joint Checked for Excessive Movement
This is the most important diagnostic step—and the one most likely to be done incorrectly using generic online advice.
A mechanic may check the wheel assembly for vertical or lateral movement, observe the ball joint while loads are applied, or use a dial indicator to measure clearance. The correct method depends on the suspension design and the role of the joint.
For example, upper and lower ball joints can be classified as load-carrying or non-load-carrying follower joints. The support point and suspension position used for inspection can differ accordingly. A joint that appears tight under one loading condition may need to be tested differently to reveal excessive clearance.
You’ll often see advice to grip a raised tire at the 12 and 6 o’clock positions and rock it. That may reveal movement somewhere in the wheel assembly, but it does not identify the upper ball joint by itself. Wheel bearings, lower ball joints, and other components can affect the result.
The technician should observe where the movement occurs and compare the finding with the manufacturer’s specifications. Some joints permit a specified amount of movement, while others have different inspection criteria.
Do not improvise with a pry bar near a loaded spring or place your fingers between moving suspension components. If you cannot inspect the joint using the correct procedure and equipment, leave that part of the diagnosis to a qualified technician.
Step 5: Rule Out Other Steering and Suspension Problems
A properly diagnosed upper control arm problem should explain the symptoms and have corresponding physical evidence. If neither its bushings nor the ball joint has abnormal movement, keep looking.
Have the technician inspect the lower control arm, tie rods, wheel bearing, sway bar links, steering gear mountings, tires, and other nearby components as appropriate.
If the main complaint is loose steering or tire wear, our guide to bad tie rod symptoms explains another common source of front-end looseness and how the relevant joints are inspected.
It’s entirely possible to have one deteriorated bushing and a separate alignment issue at the same time. Identifying all relevant faults is better than replacing the upper arm and hoping every symptom disappears.
Bad Upper Control Arm or Something Else?
Several faults around the same front wheel can create nearly identical sensations from the driver’s seat. The following comparisons are useful starting points, not substitutes for checking the actual components.
| Possible problem | Common clue | What helps distinguish it |
|---|---|---|
| Upper control arm bushing | Clunking or unwanted movement during changing suspension loads | Visible separation or excessive movement at the upper arm’s inner pivots |
| Upper ball joint | Knocking, looseness, or abnormal knuckle movement | Excessive play isolated to the upper ball-and-socket joint |
| Lower control arm or lower ball joint | Similar clunks, wandering, or changes under braking | Movement located at the lower arm or joint during the correct inspection |
| Tie rod end | Steering play, wandering, knock when steering direction changes | Looseness at the inner or outer steering linkage joint |
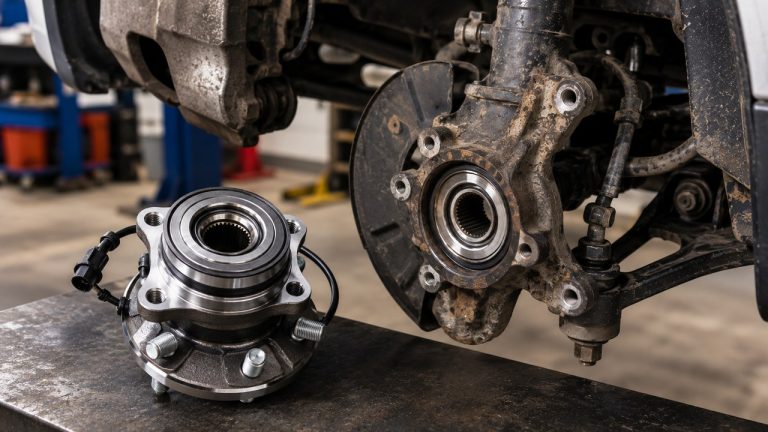
| Wheel bearing | Humming, growling, or wheel-related looseness | Hub and bearing inspection rather than control arm movement |
| Tire or alignment issue | Pulling, speed-related vibration, or abnormal tread wear | Tire condition, pressure, balance, and measured alignment angles |
| Sway bar link | Rattle or clunk over small, repeated bumps | Wear or movement at the sway bar connection |
Here’s a useful example. If a truck clunks over speed bumps but the steering feels normal and the upper arm joints have no excessive play, a sway bar link may deserve more attention than the upper arm.
Likewise, if a car pulls consistently to one side without suspension noise or measurable joint looseness, tire condition and alignment measurements are reasonable places to investigate.
The most expensive mistake is treating a familiar symptom as proof of a specific failed part.
Front vs. Rear Upper Control Arm Symptoms
Most searches about a bad upper control arm refer to the front suspension, especially on trucks and SUVs. Front upper arms help locate the steering knuckle, so faults may affect steering feel, camber, caster, and how the vehicle tracks.
Some independent rear suspensions also use upper control arms or links. Their job is different because they locate the rear wheel carrier rather than a front steering knuckle.
A worn rear upper link may produce clunking, unusual rear tire wear, or a feeling that the rear of the vehicle shifts slightly during acceleration, cornering, or over bumps. Depending on the suspension geometry, bushing movement can influence rear camber or toe.
However, rear multilink systems vary widely. A component called an upper control arm on one vehicle may perform a different geometric role from a similarly named link on another.
Use the correct rear suspension diagram and locate the actual worn joint before attributing rear-end instability to an upper arm.
Why Do Upper Control Arms Go Bad?
The arm itself is usually a durable structural part. Routine wear tends to affect the components that allow it to move.
Aging and Deteriorated Bushings
Rubber bushings repeatedly deform as the suspension moves. Over time, exposure to heat, moisture, road salt, ozone, and mechanical loads can change their condition.
Rubber can harden, tear, or separate from its metal sleeve. Fluid contamination may also damage certain rubber compounds.
Age alone isn’t enough to declare a bushing failed. The question is whether the material still locates the arm correctly without excessive movement or structural deterioration.
Ball Joint Wear and Contamination
Ball joints articulate as the suspension moves and the front wheels steer. Their internal bearing surfaces gradually wear under changing loads.
A damaged protective boot can allow road grit and water into the joint, accelerating wear. Some aftermarket joints have grease fittings and require periodic maintenance; others are sealed and cannot be serviced that way.
Grease cannot restore worn bearing surfaces or safely repair a joint that has already developed excessive clearance.
Potholes, Curbs and Collision Damage
A severe impact can bend a control arm, damage its ball joint, deform a bracket, or affect the alignment of its mounting points.
Even if the arm doesn’t look obviously damaged, a hard strike can change the geometry enough to create pulling, steering-wheel misalignment, or unusual tire wear.
Structural damage is different from ordinary bushing wear. A cracked or bent upper control arm should not be heated, welded, or straightened without an explicitly approved manufacturer repair procedure.
Suspension Lifts and Aftermarket Geometry
Upper control arms are especially relevant on lifted trucks. Changing ride height can alter suspension travel, ball-joint operating angles, caster adjustment range, and clearances around the arm.
Some aftermarket upper arms are designed to accommodate those changes. They may use revised geometry, different bushings, or alternative joints.
If a lifted truck develops squeaking, contact marks, or unusual handling, check that the installed components match the lift and suspension setup. Incorrect geometry or interference isn’t necessarily evidence that the upper arm has worn out.
Also inspect the installation procedure. Certain bonded-rubber bushing designs require final pivot-fastener tightening with the suspension at its specified ride position. Tightening them in an incorrect position can place unwanted twist in the rubber and shorten its service life.
Can You Drive With a Bad Upper Control Arm?
It depends on which component has failed and how severe the damage is, but a confirmed upper control arm problem shouldn’t be ignored.
A bushing showing minor superficial deterioration is not the same situation as a ball joint with severe play or a bent arm following a collision. Those faults carry very different risks.
When an upper control arm can no longer locate the steering knuckle correctly, steering geometry may change unpredictably. In a severe failure, a joint or mounting connection can separate and compromise control of the wheel.
When You Should Stop Driving
Arrange professional recovery rather than driving to a shop if any of the following occurs:
- A front wheel suddenly appears tilted, displaced, or incorrectly positioned.
- The vehicle becomes difficult to steer or changes direction unpredictably.
- An upper ball joint has severe play, visible separation, or suspected imminent failure.
- The control arm or its mounting point is visibly cracked, bent, or structurally damaged.
- A loud suspension impact is followed by a major change in steering or braking control.
- A technician identifies a safety-critical defect in the arm, joint, or retaining hardware.
There is no meaningful universal answer to how many miles you can drive with a failing upper control arm. A joint’s remaining service life cannot be estimated from the sound of a clunk or the number of miles on the odometer.
If symptoms are mild but unexplained, schedule a prompt inspection rather than using regular highway driving to see whether they worsen.
What Happens if the Upper Control Arm Is Confirmed Bad?
The repair depends on the failed component and how the vehicle manufacturer designed the assembly.
Some upper control arms accept separately replaceable bushings or ball joints. Others are normally replaced as complete assemblies, particularly when the joint is integrated into the arm or the replacement already includes new bushings.
A structurally bent or cracked arm generally requires replacement rather than a routine bushing or ball joint service. Damaged mounting points may require additional inspection and repair.
Before agreeing to replacement, ask the technician to identify the exact failed part and explain whether the complete arm is required. If the problem is confined to one side, the opposite arm should be inspected but doesn’t automatically need replacing.
For repair prices, parts versus labor, and whether a complete assembly is worthwhile, see our upper control arm replacement cost guide.
Do You Need an Alignment After Upper Control Arm Replacement?
An alignment should generally be checked after replacing an upper control arm, especially when the repair involves a component that influences camber, caster, or the steering knuckle’s location.
The need for adjustment depends on the suspension design, which mounting points were disturbed, and whether the replacement changes the geometry.
Some trucks have upper or lower control-arm alignment adjustments using eccentric bolts. Other vehicles use different arrangements or have limited factory adjustment.
Any worn joints and damaged mountings should be corrected before final alignment measurements. Adjusting an unstable suspension is not a lasting fix.
Our guide to alignment after replacing suspension parts
Frequently Asked Questions
What is the first sign of a bad upper control arm?
Clunking over bumps or a change in steering precision may be noticed early, but there’s no universal first symptom. Some deteriorating bushings cause little noticeable noise. Visible separation or excessive joint play found during inspection is more meaningful than the order in which symptoms appear.
What does a bad upper control arm sound like?
A bad upper control arm assembly may produce a dull clunk, metallic knock, creak, or occasional pop as the suspension moves. Worn bushings and ball joints can sound similar, and sway bar links or other suspension parts can produce the same noises. The sound alone cannot confirm the faulty component.
How do I know if my upper control arm bushings are bad?
Look for rubber separation, tearing, abnormal displacement, or excessive movement at the arm’s chassis mounting points. Dull clunks and steering changes under load may accompany the wear. A qualified inspection should determine whether the bushing exceeds the manufacturer’s permitted movement.
Can a bad upper control arm cause a car to pull?
Yes. Excessive movement in a worn joint or bushing, or a bent arm, can alter suspension geometry and contribute to pulling. But tire pressure, tire construction, brakes, alignment, and lower suspension components can also cause a vehicle to pull. The direction of the pull doesn’t identify the faulty upper arm.
Can a bad upper control arm cause uneven tire wear?
Yes. An upper control arm helps locate the wheel, and excessive wear can allow unwanted alignment changes. However, abnormal tire wear isn’t specific to the upper arm. Tire condition, camber, toe, and the rest of the suspension must be checked before replacing components.
Can you test an upper control arm by shaking the tire?
A controlled wheel-movement check can help reveal looseness, but it cannot identify a bad upper control arm by itself. Wheel bearings and other joints may contribute to movement. The correct lifting, loading, and play-measurement procedure depends on the specific suspension and ball joint design.
Do you have to replace the whole upper control arm if a bushing is bad?
Not always. Some bushings can be replaced independently, while other applications favor a complete arm assembly. The condition of the ball joint, the arm, parts availability, labor requirements, and manufacturer’s service instructions determine the appropriate repair.
Do bad upper control arm symptoms differ from lower control arm symptoms?
They overlap considerably. Upper and lower control arm faults can cause clunking, wandering, vibration, and tire wear. The distinction depends on which joint or mounting point has excessive movement. Suspension geometry and whether the upper or lower ball joint carries load also affect the correct inspection method.
The Check That Matters Most
A clunk over a pothole, a wandering steering wheel, or a tire wearing along one shoulder may be the first reason you suspect an upper control arm. But those symptoms are shared by too many suspension components to justify ordering a replacement on their own.
What matters is locating the fault. Inspect the bushings where the arm mounts to the chassis, check the upper ball joint using the correct suspension-loading procedure, and examine the arm for impact or structural damage. If those components are sound, don’t stop the diagnosis there.
A properly identified failure leads to the right repair. Guessing from a noise can leave you with a new upper control arm, the same old clunk, and a steering problem that still hasn’t been fixed.