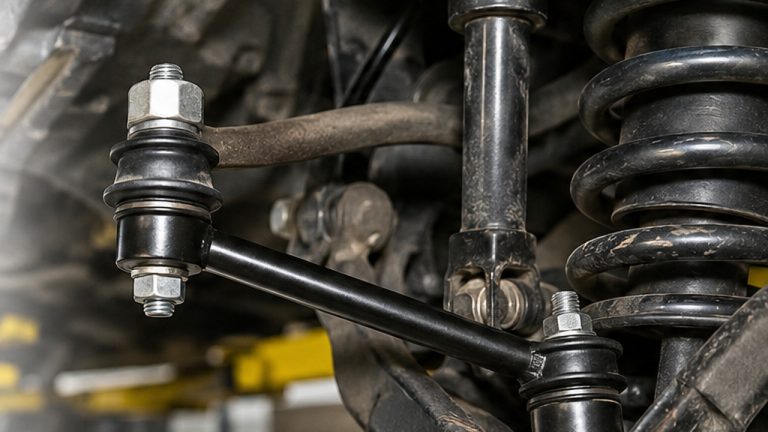
How to Replace an Upper Control Arm: DIY Removal and Installation
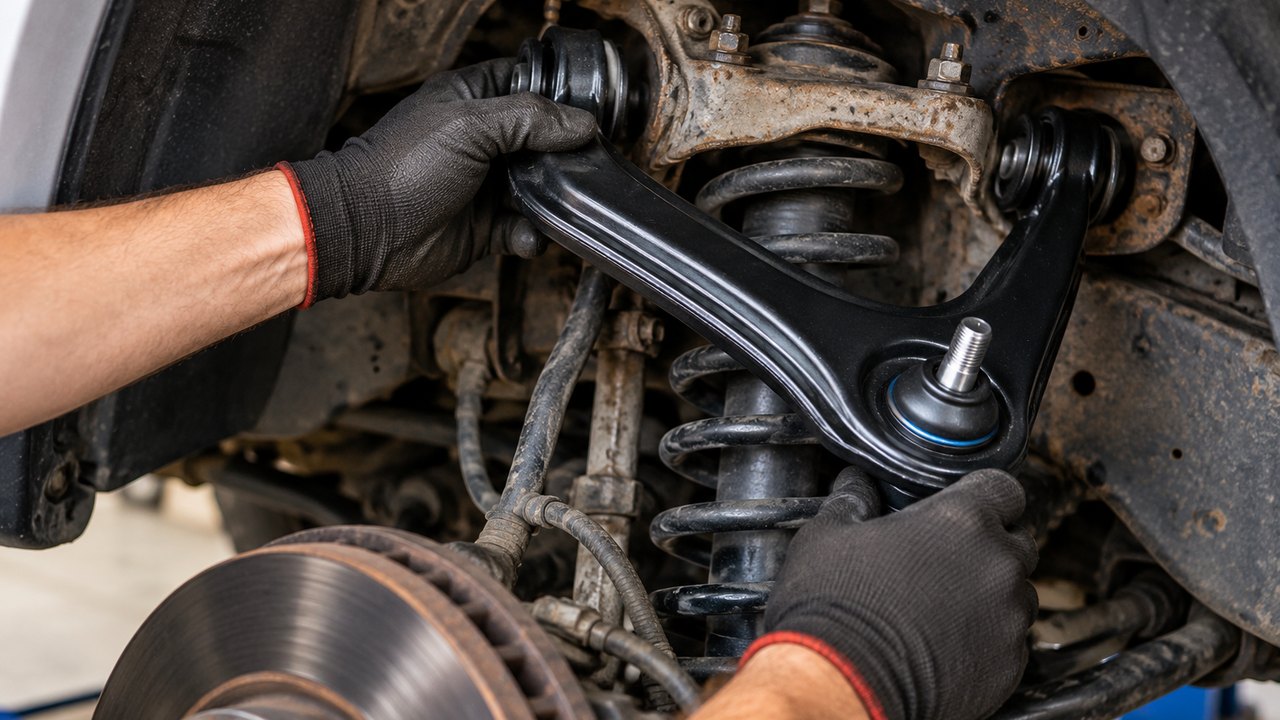
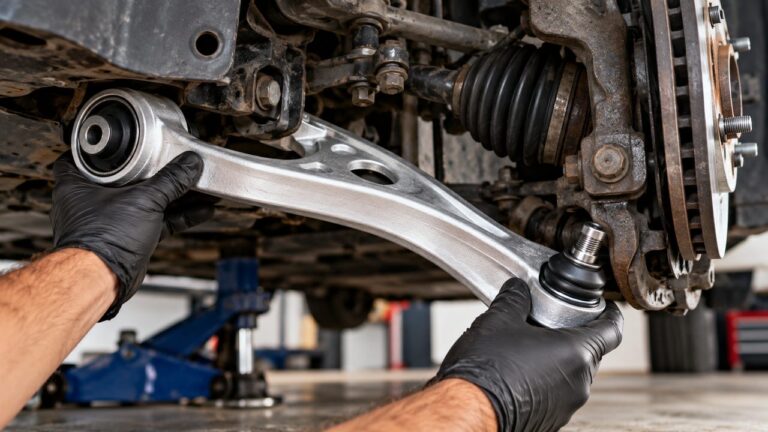
To replace an upper control arm, safely raise and support the vehicle, secure the steering knuckle, disconnect the upper ball joint, and remove the arm’s inner mounting bolts. Install the matching replacement assembly, reconnect the ball joint, and tighten the mounting hardware to the manufacturer’s specifications. If the arm uses bonded-rubber bushings, the inner bolts generally need final tightening at the specified suspension position, often normal ride height. Finish by checking the wheel alignment.
On many trucks, SUVs, and double-wishbone suspensions, replacing the complete upper control arm is a reasonable job for an experienced DIY mechanic. The difficult part isn’t necessarily getting the old arm out. It’s dealing with a seized ball joint, finding room to remove the inner bolts, and making sure the new bushings aren’t tightened in the wrong position.
Here’s the basic upper control arm replacement procedure:
- Confirm the upper control arm is faulty and purchase the correct replacement assembly.
- Check the suspension design, spring loading, and required tools.
- Raise and securely support the vehicle, then remove the wheel.
- Record any alignment adjusters and disconnect attached wiring brackets.
- Support the steering knuckle and separate the upper ball joint connection.
- Remove the inner mounting bolts and take out the old control arm.
- Position the replacement arm and install the mounting hardware.
- Reconnect the upper ball joint using the specified fasteners.
- Tighten the inner mounting bolts at the required suspension position.
- Reinstall the wheel, inspect the repair, and arrange a wheel alignment.
This guide focuses on replacing a complete front upper control arm with its bushings and, where supplied, the ball joint already installed. Some vehicles use different mounting arrangements or require additional suspension disassembly, so the factory service procedure always takes priority.
Important safety warning: Never assume the upper control arm is free of suspension spring forces. Coil springs, torsion bars, and other suspension components can store dangerous energy. Identify how your vehicle carries its spring load and follow the specified support and unloading procedure before separating a structural suspension connection. Never loosen a loaded spring-retaining component or work beneath a vehicle supported only by a hydraulic jack.
Before Replacing an Upper Control Arm, Check the Suspension Design
Not every car has an upper control arm. You’ll commonly find them on double-wishbone or short-long-arm (SLA) suspensions, including many Chevrolet Silverado, Ford F-150, Ram 1500, and Toyota Tacoma applications. They also appear on some passenger cars and performance vehicles.
The upper arm connects the vehicle’s frame or body to the upper portion of the steering knuckle. On a typical design, its inner ends pivot through bushings while an outer ball joint allows the knuckle to move as the suspension travels and the wheels steer.
Many MacPherson-strut suspensions don’t have a conventional upper control arm because the strut performs part of the wheel-locating function. Check your suspension layout before ordering parts simply because a repair estimate mentions a control arm.
Complete Upper Control Arm vs. Replacing Individual Parts
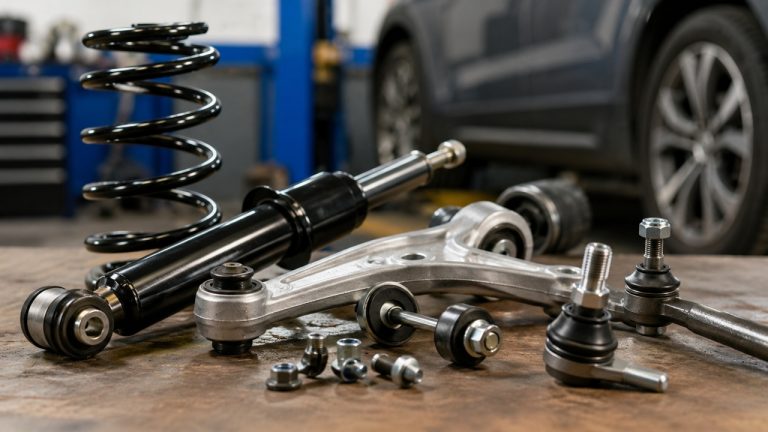
A complete replacement assembly can save considerable work. Instead of pressing old bushings out of the original arm or replacing a separately serviceable ball joint, you install the new components as one unit.
However, not every replacement arm includes the same parts. Check what comes in the box before assuming the assembly is ready to install.
| Replacement Type | What’s Involved | Main Consideration |
|---|---|---|
| Complete upper control arm | Replace the arm with its installed bushings and included joint | Usually the simplest complete-arm repair |
| Upper ball joint only | Remove and replace a separately serviceable joint | May require pressing or special retaining hardware |
| Upper control arm bushings only | Remove the original bushings and fit replacements | Requires suitable extraction and installation equipment |
| Aftermarket upgraded upper arm | Install an alternative arm designed for a specific application | May have different alignment, clearance, or maintenance requirements |
If only the bushings are damaged and the metal arm is otherwise serviceable, individual replacement may be possible. Our guide to removing control arm bushings without a press covers that separate operation and its limitations.
For this tutorial, we’ll assume you’ve selected a complete, correctly matched upper arm. Confirm the left or right mounting position, ball joint design, bushing type, and compatibility with any factory or aftermarket suspension modifications.
Tools Needed for Upper Control Arm Replacement
On an uncomplicated vehicle, the job mostly involves sockets, wrenches, and a ball joint separator. But the details matter. A rusty pickup may require far more effort than a clean passenger car, and certain upper arms are difficult to remove without taking nearby components out of the way.
- Correct replacement upper control arm: Verify the vehicle application, side, ball joint arrangement, bushings, and included hardware.
- Vehicle-specific service information: Needed for spring-loading precautions, disassembly order, tightening specifications, and alignment settings.
- Floor jack and rated jack stands: For safe lifting and supporting the vehicle.
- Wheel chocks: Prevent movement while the vehicle is raised.
- Socket and combination wrench sets: Include the correct sizes for the ball joint nut and inner pivot fasteners.
- Breaker bar: Useful for stubborn mounting hardware.
- Torque wrench: Essential for correctly tightening structural suspension fasteners.
- Ball joint separator: Preferably a suitable screw-type puller for releasing a tapered joint.
- Penetrating oil and wire brush: For accessible rusted fasteners and exposed threads.
- Needle-nose pliers: For removing and installing cotter pins where required.
- Paint marker and camera: Helpful for recording alignment hardware, washer positions, and bracket routing.
- Suitable suspension and knuckle support equipment: Use the arrangement specified for the vehicle.
- New specified mounting hardware: Some bolts, nuts, and cotter pins must not be reused.
- Safety glasses and work gloves: Protect against corrosion, dirt, and unexpected component movement.
You may also need special counter-hold tools, a manufacturer-specific puller, or equipment to control the suspension position during installation. Check those requirements before removing any parts.
How to Replace an Upper Control Arm: Step-by-Step Instructions
The steps below cover a common front upper control arm arrangement with two inner mounting points and an outer ball joint connection. They provide a practical overview, but they’re not a substitute for the repair manual for your exact vehicle.
Step 1: Confirm the Upper Control Arm Needs Replacing
Make sure the diagnosis is correct before starting the repair.
A worn upper ball joint, deteriorated control arm bushings, or a bent arm may justify replacement. But a clunk over bumps doesn’t automatically mean the upper arm is bad. Loose sway bar links, damaged lower suspension joints, wheel bearings, and other problems can sound surprisingly similar.
Look for confirmed excessive joint movement, damaged or separated rubber bushings, cracks, deformation, or other defects identified by the manufacturer’s inspection procedure. If you’re still trying to identify the failed component, our upper control arm symptoms and inspection guide explains the warning signs and how they differ from other suspension faults.
Once the fault is confirmed, compare the replacement with the original installation. Pay attention to the inner pivot arrangement, ball joint stud, mounting angle, and any brackets used for brake hoses or wheel-speed sensor wiring.
Aftermarket arms for lifted trucks deserve extra attention. Some are designed to provide additional ball joint clearance or revised alignment geometry. That doesn’t make them interchangeable with every factory arm or suitable for every lift height.
Step 2: Identify Spring Loading and Prepare the Vehicle
Before lifting the vehicle, determine which suspension components carry the spring force and how they must be supported during upper control arm removal.
On many double-wishbone suspensions, the spring or coilover acts through the lower control arm. However, the correct unloading procedure still depends on the vehicle, and some designs use torsion bars or other arrangements that can create dangerous movement when a joint is separated.
Consult the service manual for the correct support points and suspension position. Never assume that the upper arm is unloaded simply because the wheel is hanging or the spring appears to be attached elsewhere.
Park on solid, level ground, apply the parking brake, and secure the wheels that will remain on the ground with suitable chocks. Prepare the replacement hardware and identify any special equipment required for the suspension.
If the approved procedure requires unloading a torsion bar, controlling a compressed spring, or dismantling a loaded spring assembly, the operation may exceed a straightforward home repair. Do not improvise spring restraints or release spring-retaining hardware without the specified equipment and training.
Step 3: Raise the Vehicle and Remove the Front Wheel
Loosen the wheel nuts slightly while the tire is still on the ground. Lift the vehicle using the approved jacking point and secure it with adequately rated jack stands at the manufacturer’s specified support locations.
Confirm the vehicle is stable before removing the wheel. A hydraulic jack alone is never an acceptable substitute for proper vehicle support.
With the wheel removed, locate the upper control arm above the steering knuckle. You’ll usually see its outer ball joint connection and two inner mounting points attached to the frame or body.
Take a moment to inspect the space around the inner bolts. On some trucks, they’re easy to reach from the wheel well. On certain passenger cars, the bolts run close to a spring, shock absorber, or body bracket, making removal more involved than expected.
Check the available clearance before loosening the first bolt. Discovering that a long pivot bolt cannot slide out because a coilover blocks its path is much less frustrating now than halfway through the repair.
Step 4: Mark Alignment Adjusters and Disconnect Attached Brackets
Some upper control arms use eccentric cam bolts, offset washers, or alignment shims at their inner mounting points. These components affect the position of the arm and can influence camber and caster.
If your vehicle has adjustment hardware, photograph its arrangement before removing anything. Where the service procedure permits, use a paint marker to record the original positions of eccentric washers, alignment tabs, or shims.
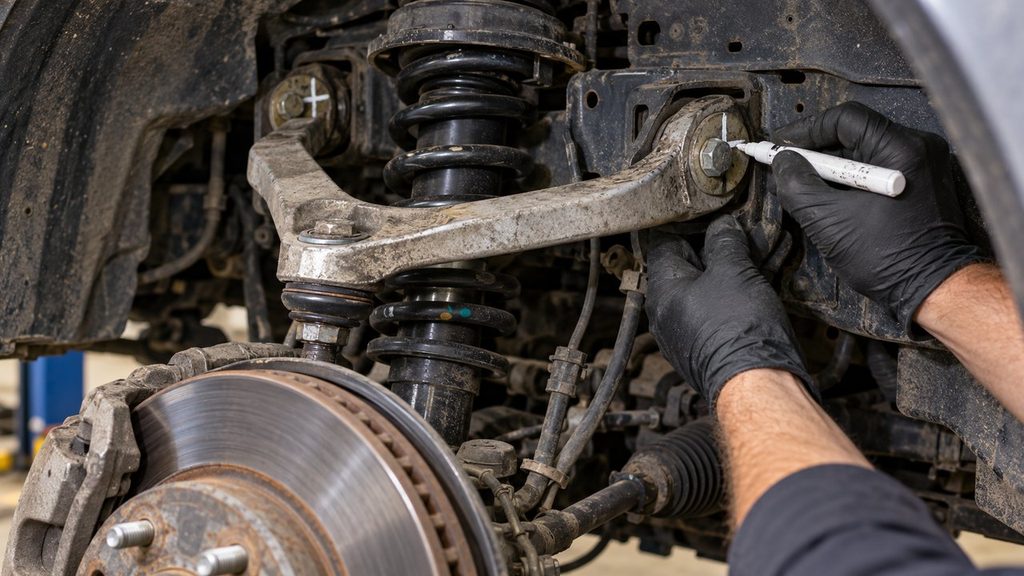
Keep track of which pieces belong at the front and rear mounting points. Mixing them up can make the initial reassembly position substantially different from the original.
Remember: Alignment marks are only a starting reference. They cannot guarantee that the new arm will reproduce the original wheel angles.
Next, inspect the control arm for attached ABS sensor wiring, brake hose brackets, ride-height sensor links, or other retainers. Release the appropriate fasteners and position the attached components safely out of the way.
Avoid pulling on electrical wiring or allowing a brake hose to support the weight of the steering knuckle. If the vehicle has an electronic ride-height sensor connected to the arm, record the link’s original orientation before disconnecting it.
Step 5: Support the Steering Knuckle and Disconnect the Upper Ball Joint
Before separating the upper ball joint, make sure the suspension and steering knuckle are supported according to the vehicle’s repair procedure.
The knuckle may move outward or tilt when its upper connection is released. On four-wheel-drive or front-wheel-drive vehicles, uncontrolled movement can strain the CV axle or its rubber boots. Brake hoses and ABS sensor wiring are also vulnerable.
Many conventional upper ball joints use a tapered stud passing through the steering knuckle. If yours has a castellated nut and cotter pin, remove the old cotter pin first, then loosen the retaining nut.
Other joints use a self-locking nut, and some suspension designs secure the joint with a pinch bolt or another arrangement instead of a conventional tapered stud. Identify the correct connection before attempting to separate it.
For a tapered joint, use a properly sized ball joint separator in the manner specified by the vehicle and tool manufacturers. Where instructed, leave the loosened nut partially threaded onto the stud while releasing the taper.
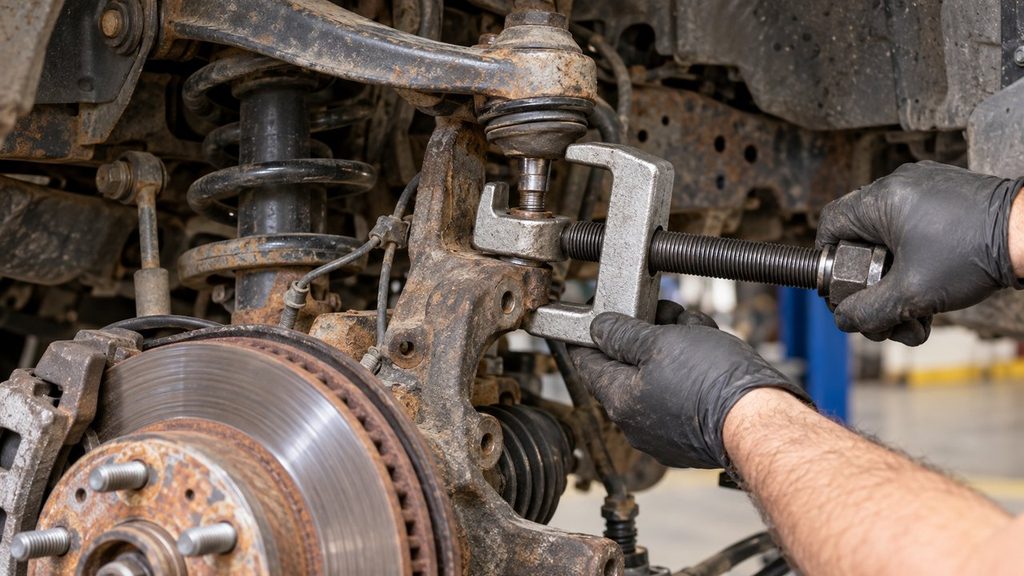
The joint may separate suddenly, sometimes with a loud pop. Keep hands clear of the loaded separator and any area where the knuckle could move.
A pickle fork may damage the dust boot on the old ball joint. That’s less important when the complete arm is being discarded, but a controlled screw-type separator is generally preferable when suitable for the application.
Once the connection is safely released, remove the remaining joint hardware and keep the knuckle supported. Don’t allow it to hang from the steering tie rod, brake hose, or CV axle.
Step 6: Remove the Inner Mounting Bolts and Old Upper Control Arm
With the outer connection free, locate the bolts or pivot shaft securing the upper arm to the frame.
Most conventional designs have two inner pivot points, but the hardware can differ considerably. Some use individual through-bolts, while others have a cross-shaft arrangement or eccentric alignment fasteners.
Loosen and remove the hardware following the specified sequence. Keep any shims, washers, or alignment components organized in their original positions.
Watch the clearance around each bolt as it comes out. A long bolt may contact the spring or coilover before it’s completely removed. On certain vehicles, approved suspension positioning can create the required clearance; others require removal of additional components.
Do not loosen a spring-retaining nut or dismantle a loaded coilover simply to get a pivot bolt out. If the service procedure requires suspension disassembly, follow it exactly.
Once the hardware is removed, guide the old arm out of the mounting brackets. Avoid forcing it against brake lines, wiring harnesses, or surrounding suspension components.
Inspect the frame brackets for distortion, corrosion, elongated bolt holes, or other damage. A new control arm cannot compensate for a mounting point that no longer holds it securely.
Step 7: Compare the Old and New Control Arms
Place both arms side by side before installing the replacement.
Compare the distance and orientation between the inner mounting points, the ball joint position, and the shape of the arm. Check the bushing widths, bolt holes, and any provisions for wiring or sensor brackets.
Small design differences aren’t always a problem, particularly with an approved replacement or upgraded arm, but the part must be intended for your specific application.
Inspect the replacement ball joint’s dust boot and retaining hardware. Make sure the bushings are properly seated and that no shipping damage is visible.
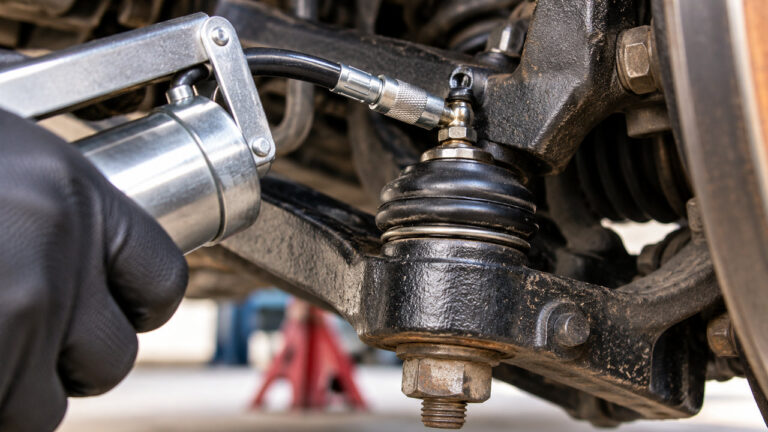
If the new arm has a grease fitting, check whether it arrives prelubricated or requires grease during installation. Many modern replacement joints are sealed and require no additional lubrication.
Don’t install an arm with mismatched mounting dimensions or use improvised washers and spacers to compensate for incorrect fitment.
Step 8: Install the New Upper Control Arm
Position the new upper control arm between its chassis mounting brackets and align the inner bushing sleeves with the bolt holes.
Insert the specified mounting bolts by hand, observing their correct direction and any required washers or alignment components. If the arm uses eccentric bolts or shims, place them according to the manufacturer’s initial installation settings.
For conventional bonded-rubber bushings, the inner fasteners are commonly left short of final torque until the suspension is placed at its specified tightening position. Follow the actual service instructions, as some vehicles require a particular arm angle, ride-height measurement, or special positioning tool.
Don’t force bolts through misaligned bushing sleeves or use their threads to pull the arm into position. If the replacement won’t align normally, check the part number, bracket condition, and suspension position.
Make sure the arm moves through the permitted range without contacting the spring, coilover, frame, or other suspension parts. On a lifted truck with an aftermarket arm, check the clearance requirements supplied by the arm manufacturer.
Step 9: Reconnect the Ball Joint and Tighten the Bushing Bolts Correctly
Bring the steering knuckle back into its specified position and align the new upper ball joint connection.
For a conventional tapered stud, guide the stud into the steering knuckle and install the correct retaining nut. Make sure the mating surfaces are clean and the taper seats correctly.
Tighten the joint using the manufacturer’s specified torque and procedure. Some applications require a torque-plus-angle tightening sequence or replacement locking hardware.
If the joint uses a castle nut and cotter pin, follow the specified method for aligning the nut slots with the stud hole. When the procedure requires additional tightening for alignment, do not loosen the nut below its required torque. Install a new cotter pin and secure it correctly.
For joints secured by a pinch bolt or another design, use the specific installation procedure instead of applying tapered-stud instructions to an incompatible connection.
Now comes an easily overlooked part of the job: final tightening of the inner control arm mounts.
Many factory bushings use rubber bonded between metal sleeves. When the inner sleeve is clamped in place, normal suspension movement twists the rubber. If the bolts are fully tightened while the arm is hanging at the wrong angle, the rubber can remain twisted when the vehicle returns to its normal ride height.
That unwanted preload can shorten bushing life and may affect suspension behavior. Follow the specified tightening position, commonly normal ride height or an equivalent manufacturer-defined arm angle.
Some service procedures use a ride-height gauge or specific measurements rather than placing the vehicle’s full weight on its wheels. Other bushing designs have different requirements. Don’t assume every upper control arm must be tightened in exactly the same way.
Once the suspension is correctly positioned, torque the inner mounting fasteners to their specified values. Recheck any eccentric adjusters, shims, or locking hardware according to the service procedure.
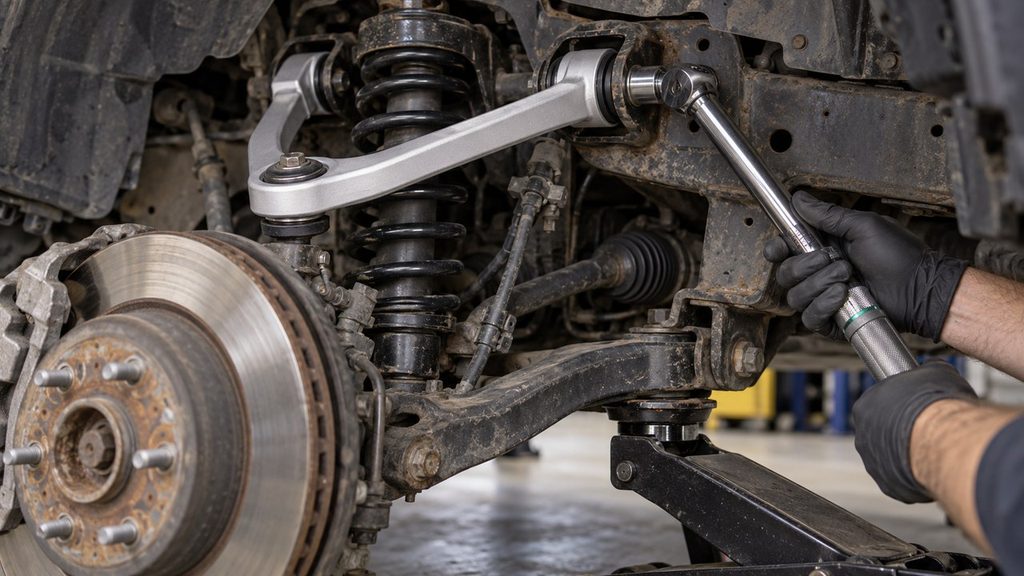
Never guess control arm torque specifications. Different vehicles use different bolts, joint designs, and tightening sequences. The correct value for a Silverado may be completely inappropriate for a Honda Accord or a Ram 1500.
Step 10: Reinstall the Wheel and Check the Repair
Reconnect any ABS wiring brackets, brake hose retainers, ride-height sensor links, or other components removed for access.
Make sure wiring and hoses follow their correct paths without being stretched, twisted, or positioned where suspension movement could damage them.
Inspect the upper ball joint, inner mounting bolts, bushings, and alignment hardware. Confirm that each connection is correctly secured and that the rubber boots are undamaged.
Reinstall the wheel, start the lug nuts by hand, and lower the vehicle using the approved procedure. Tighten the wheel nuts in the required pattern to the manufacturer’s specified torque.
With the vehicle in its normal position, check the suspension height and look for obvious differences between the repaired side and the opposite side. Inspect for interference or abnormal component positioning.
Do not treat the job as complete until the required suspension checks have been performed and wheel alignment has been addressed. If a joint appears loose, the wheel sits at an abnormal angle, or the steering binds, don’t drive the vehicle until the problem has been corrected.
What if the Upper Control Arm or Ball Joint Is Stuck?
Sometimes the replacement itself is the easy part. On an older truck that’s spent years on salted roads, removing the original hardware can take longer than the rest of the job.
The important thing is to identify exactly what’s stuck before reaching for a bigger hammer.
Upper Ball Joint Won’t Separate From the Knuckle
A tapered ball joint stud can remain tightly wedged into the steering knuckle even after the retaining nut is loosened. Corrosion can make the connection more difficult to release.
Check that you’re using the correct separator for the joint’s size and orientation. A screw-type puller should apply force to the intended contact points without damaging the knuckle or nearby components.
Keep the knuckle correctly supported because the connection may release suddenly. Never place your fingers where the suspension can close a gap unexpectedly.
On some vehicles, a pinch bolt or other retaining arrangement must be fully removed before the ball joint connection can separate. Don’t mistake a mechanically retained stud for a stubborn conventional taper.
If the specified tool and procedure cannot release the joint safely, professional extraction may be needed. Avoid uncontrolled impacts or heating that could damage an aluminum knuckle, rubber boot, brake hose, or surrounding components.
Inner Pivot Bolt Is Seized Inside the Bushing
Corrosion can bond a pivot bolt to the bushing’s inner metal sleeve. In that situation, removing the nut may accomplish very little: the bolt still refuses to slide out.
Clean the exposed threads, apply suitable penetrating oil where appropriate, and check whether the bolt is trapped by suspension load or misalignment.
Don’t apply unlimited leverage or strike the mounting bracket without considering what supports it. A bent chassis bracket or damaged mounting hole can be much more expensive to repair than the original control arm.
Severely seized hardware may require specialized extraction equipment, replacement bolts, or additional disassembly. If removing it risks damaging the frame or another structural component, stop and use an approved repair method.
Upper Control Arm Bolts Won’t Clear the Shock or Coilover
This problem appears on some suspensions where a long inner pivot bolt points toward a spring, shock absorber, or coilover assembly.
Before removing nearby components, check whether the factory procedure specifies a particular suspension position or requires access from another direction.
Other vehicles genuinely require additional parts to be moved or removed. The important distinction is that an accessible shock mounting bolt is not the same as a fastener retaining a compressed spring assembly.
Do not loosen the central nut of a loaded coilover or strut assembly to create clearance. Follow the manufacturer’s safe removal procedure if the complete shock or spring assembly must be moved.
Do You Need an Alignment After Replacing an Upper Control Arm?
Yes, a wheel alignment check is generally recommended after replacing an upper control arm, and many vehicles will need an adjustment afterward.
The upper arm helps locate the steering knuckle. Its dimensions and mounting position can influence camber and caster, while changes to those angles can also affect steering behavior and the resulting toe setting.
If your vehicle uses eccentric cam bolts, adjustable mounting points, or alignment shims, removing the arm directly disturbs components involved in wheel geometry.
Even when the new arm appears identical and you reinstall the adjusters at their original marks, replacement-part tolerances can change the final alignment.
Camber describes wheel tilt when viewed from the front, while caster describes the steering axis inclination when viewed from the side. Both can influence handling, steering return, and tire behavior. The final alignment needs to meet the specifications for the vehicle and its suspension configuration.
Our guide to wheel alignment after replacing suspension parts explains why control arms, tie rods, and certain other repairs can change wheel geometry.
Don’t rely on paint marks as proof that the alignment is correct. If the vehicle pulls, the steering wheel is noticeably off-center, or a wheel appears incorrectly positioned, have the issue evaluated before normal driving.
Upper vs. Lower Control Arm Replacement: What’s Different?
Although upper and lower control arms work together to locate the wheel, replacing them isn’t necessarily the same job.
On many double-wishbone suspensions, the lower arm carries a substantial portion of the spring load or provides the mounting point for the spring or coilover. The upper arm primarily controls the upper knuckle position, although the exact forces and arrangement depend on the suspension design.
Upper arms can sometimes be replaced with less disassembly, but that’s not a guarantee. Access to their inner mounting bolts may be difficult, and some vehicles require additional suspension components to be removed.
Our separate lower control arm replacement tutorial covers the lower-arm procedure, including its specific mounting and spring-loading considerations.
Replacing an upper arm also doesn’t automatically mean the lower arm needs replacing. Inspect each component independently and repair the joints or bushings that actually require attention.
How Hard Is It to Replace an Upper Control Arm Yourself?
For someone experienced with suspension repairs, a straightforward complete upper control arm replacement is often an intermediate DIY job. The difficulty increases considerably when mounting bolts are inaccessible, components are heavily corroded, or special procedures are needed to manage spring forces.
Think about the actual vehicle rather than the part name. Replacing a readily accessible upper arm on a pickup can be easier than changing the same component on a car where the inner bolts are partly hidden behind the suspension assembly.
You should be comfortable using jack stands, identifying structural suspension connections, operating a ball joint separator, and tightening fasteners to their correct specifications.
If you’ve never removed a suspension ball joint or aren’t certain which components are carrying the spring load, this isn’t a good repair to approach by trial and error.
A useful test before starting is whether you can identify every required fastener and access point from the service procedure. If you cannot, gather the correct information first.
How Long Does Upper Control Arm Replacement Take?
On a straightforward vehicle, an experienced mechanic may replace one complete upper control arm in roughly one to two hours. Some repairs are quicker, while difficult access or severe corrosion can push the job well beyond that range.
For a first-time DIY repair, allow substantially more time. Photographing the original arrangement, organizing adjustment hardware, checking component fitment, and carefully tightening the new parts are all worth doing properly.
Don’t forget the alignment appointment. The physical installation and the wheel alignment are separate parts of returning the suspension to the correct condition.
Is DIY Upper Control Arm Replacement Worth It?
If you already have the right tools and experience, replacing a complete upper control arm yourself can save labor costs. Buying an assembly with new bushings and a ball joint already installed can also eliminate the additional work of servicing those components separately.
But the calculation changes when the repair requires special suspension tools, extensive corrosion removal, or complicated access to the inner mounts.
You’ll also need to consider replacement fasteners and wheel alignment. Those expenses don’t disappear simply because you’re doing the mechanical installation yourself.
For a breakdown of parts, labor, and typical U.S. repair prices, see our upper control arm replacement cost guide.
If the repair involves uncontrolled spring loading, structural mounting damage, or equipment you don’t have, professional installation is a better choice than risking an incorrect suspension repair.
Frequently Asked Questions
Can you replace an upper control arm without removing the strut?
Yes, on many vehicles the upper control arm can be removed without taking out the shock or coilover. However, some designs position the inner mounting bolts behind suspension components, requiring additional access procedures. Check the factory instructions rather than assuming removal will be identical on every vehicle.
Do you need a spring compressor to replace an upper control arm?
Not necessarily. Many complete upper control arm replacements don’t require direct spring compression or disassembly, but the suspension’s spring load still must be controlled according to the vehicle-specific procedure. Never remove or loosen spring-retaining components without the correct equipment and training.
Should you replace both upper control arms at the same time?
Not automatically. If one upper control arm is damaged and the opposite arm remains serviceable, replacing only the failed side may be appropriate. Inspect both sides for worn bushings, loose ball joints, corrosion, and damage. Follow the vehicle or parts manufacturer’s recommendations when deciding whether paired replacement is worthwhile.
Can you replace an upper control arm without an alignment?
You can physically install the replacement before the alignment is performed, but that doesn’t mean the finished wheel geometry is correct. Upper control arm position can affect camber and caster, and some vehicles use adjustable mounting hardware. A professional alignment check is generally recommended after replacement.
Do upper control arm bolts need to be tightened at ride height?
Many upper control arms with bonded-rubber bushings require final tightening at normal ride height or another manufacturer-specified suspension position. This prevents the rubber from being excessively twisted at the vehicle’s normal resting height. Other bushing designs and service procedures may differ, so use the instructions for the exact application.
Do new upper control arms come with ball joints?
Many complete aftermarket upper control arm assemblies include the ball joint and inner bushings, but not all do. Check the product description and included hardware. Some applications have separately serviceable joints, while others are designed for replacement as a complete assembly.
Can you drive with a loose upper control arm?
Driving with a severely loose ball joint, damaged control arm, or insecure mounting connection can compromise wheel control and steering stability. If the vehicle has significant suspension movement, abnormal wheel positioning, or unpredictable steering, don’t continue driving. Arrange professional inspection or towing.
Final Checks Before Returning the Vehicle to the Road
Replacing an upper control arm is more than swapping one A-shaped metal part for another. The new arm needs to fit its mounting points correctly, the upper ball joint must be securely connected, and the bushings must be tightened at the suspension position specified by the manufacturer.
Before calling the repair finished, check every fastener you disturbed, confirm that wiring and hoses have been reattached correctly, and inspect the clearance around the replacement arm. Make sure any eccentric bolts or alignment hardware are secure and correctly positioned.
Finally, have the wheel alignment checked and address any abnormal steering behavior or suspension noise before normal driving. A carefully installed replacement should restore the intended mechanical connections without creating new problems elsewhere in the suspension.