How to Replace an Outer Tie Rod End: Steps & Alignment
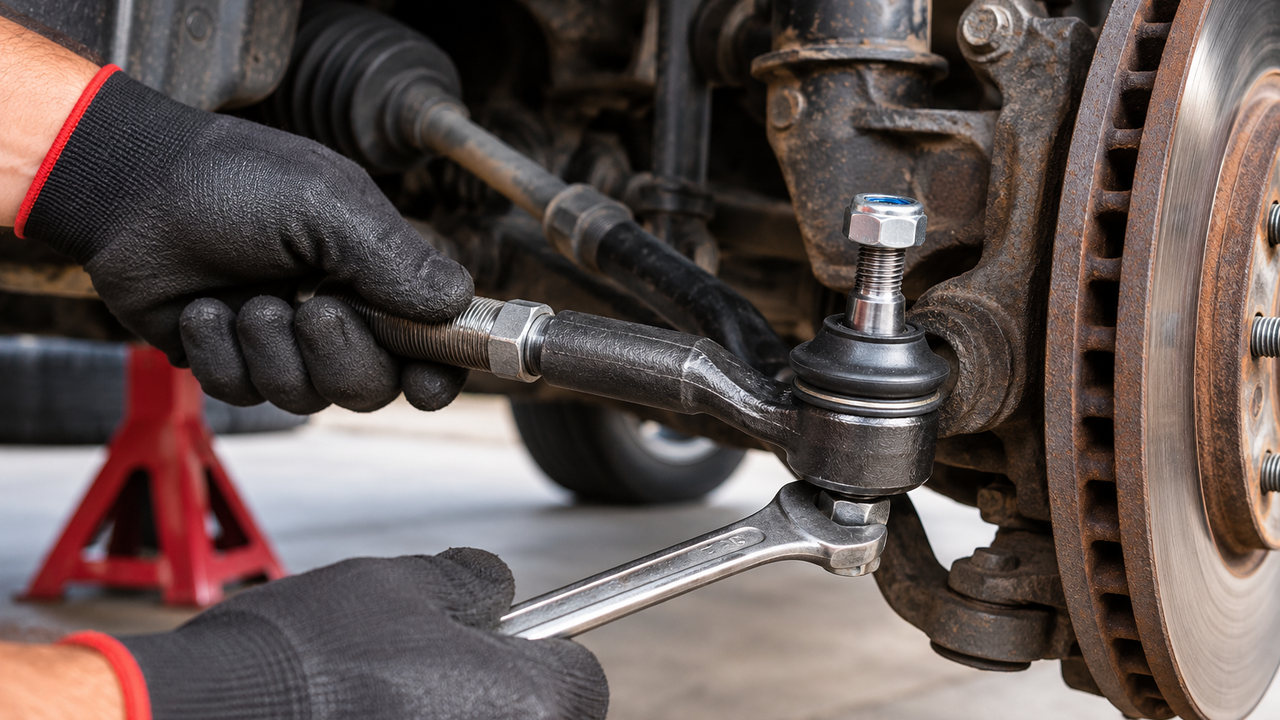
To replace an outer tie rod end, raise and safely support the vehicle, remove the front wheel, loosen the tie rod’s jam nut, and disconnect the tapered stud from the steering knuckle. Unscrew the old end while counting its turns, install the matching replacement at approximately the same position, and torque the new hardware to the manufacturer’s specifications. Finish with a wheel alignment.
On most rack-and-pinion steering systems, this is a manageable DIY repair if you’re comfortable working on steering components. The part is usually accessible once the wheel is off. The tricky bits are often a rusted adjustment nut, a stubborn tapered joint, and getting the new tie rod close enough to its original position without disturbing the alignment more than necessary.
We’ll concentrate on the outer tie rod end, the ball-joint connection at the steering knuckle. You won’t normally need to remove the steering rack boot or disconnect the inner tie rod from the rack. Those are different repairs.
Safety note: Tie rods are part of the vehicle’s steering linkage. A loose or incorrectly secured tie rod end can cause loss of steering control. Follow the service procedure for your exact vehicle, use the specified replacement hardware, and never work under a car supported only by a jack.
Tools and Parts Needed to Replace an Outer Tie Rod End
Most of the work can be done with ordinary hand tools, but a tie rod end puller makes separating the joint much easier. It’s worth having one before you begin rather than discovering that the tapered stud won’t release after the wheel is already off.
- Correct outer tie rod end: Check the vehicle application, left or right position, thread size, stud taper and supplied mounting hardware.
- Floor jack, jack stands and wheel chocks: For lifting and supporting the vehicle safely.
- Socket set and combination wrenches: For the wheel nuts, stud retaining nut and tie rod adjustment nut.
- Torque wrench: Required to tighten the steering connection and other fasteners to specification.
- Tie rod end puller: A screw-type separator is particularly useful for releasing a tapered stud without damaging nearby components.
- Penetrating oil and wire brush: Helpful for exposed threads affected by road salt and corrosion.
- Needle-nose pliers: For removing and installing cotter pins on vehicles that use castellated retaining nuts.
- Paint marker and tape measure or calipers: For recording the old tie rod’s installed position.
- New cotter pin or specified locking hardware: Use the retaining system required for your application.
- Chassis grease and grease gun, if applicable: Only for a replacement joint that requires lubrication through a grease fitting.
Have the factory torque specifications available as well. The stud nut and jam nut may have different tightening requirements, and some fasteners are designed for one-time use. Don’t rely on a generic torque figure from a different vehicle.
How to Replace an Outer Tie Rod End: Step by Step
The following procedure describes a typical passenger car or light truck with a rack-and-pinion steering system. Older steering-box layouts may use an adjusting sleeve and different thread directions, so identify your actual connection before attempting to loosen it.
Step 1: Confirm the Fault and Match the Replacement Part
Before dismantling anything, make sure the outer joint is the component that needs replacing.
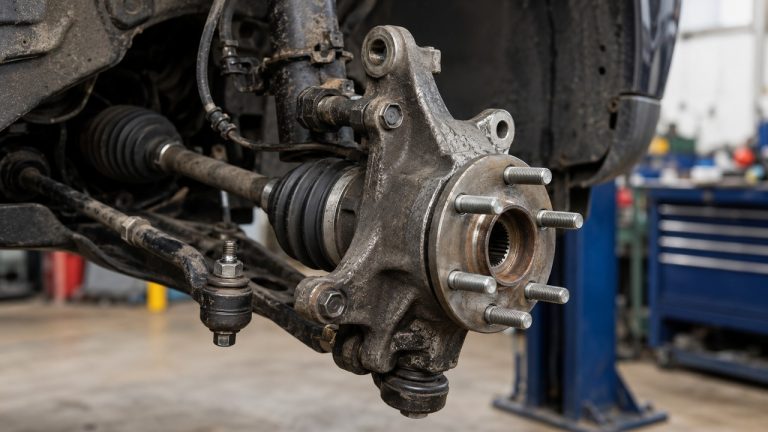
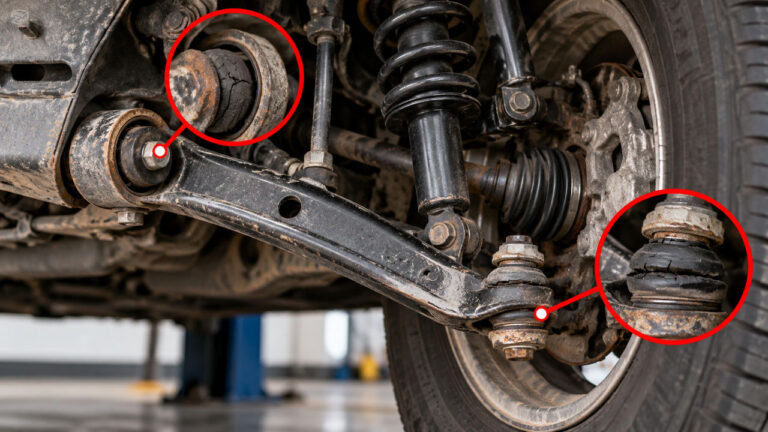
The outer tie rod end is attached to the steering knuckle near the wheel. Its ball-and-socket joint lets the steering linkage change angle as the suspension moves and the front wheels turn. The threaded end connects to the inner tie rod or, on some steering systems, an adjustment sleeve.
If the outer joint has confirmed excessive play, physical damage or a condition that requires replacement under the manufacturer’s inspection criteria, changing that component is appropriate. If the looseness originates farther inward, replacing the outer end won’t correct it.
Steering vibration, clunking and uneven tire wear can have several causes. Our guide to identifying a bad inner or outer tie rod explains how to distinguish joint play from other steering and suspension problems.
Compare the new part with the original while both are still accessible. Verify the correct side, thread direction, threaded length, ball-stud position and mounting style. Also check whether the replacement includes a new jam nut, castellated nut, cotter pin or self-locking nut.
An outer tie rod end that looks almost identical can still have the wrong thread pitch or stud taper. If those details don’t match, stop and verify the part number rather than attempting to make it fit.
Step 2: Raise the Vehicle and Remove the Wheel
Park on firm, level ground and position the steering wheel straight ahead. Apply the parking brake and secure the wheels that will remain on the ground with suitable chocks.
Loosen the front wheel nuts slightly while the tire is still touching the ground. Lift the vehicle at its approved jacking point and place appropriately rated jack stands beneath the specified support locations.
Once the vehicle is stable, remove the wheel. You should now be able to see the outer tie rod end where its tapered stud passes through the steering knuckle’s steering arm.
Look at how the joint is mounted before reaching for a wrench. Depending on the vehicle, the stud may point upward or downward through the steering arm, and the retaining hardware may be easier to access from one side than the other.
Inspect the exposed inner tie rod threads, adjustment nut, rubber dust boot and steering rack bellows. If you discover severe corrosion, a bent steering component or damage around the steering knuckle, the repair may need more attention than a simple outer-end replacement.
Step 3: Mark the Original Tie Rod Position Before Loosening It
Don’t skip this step. The threaded connection between the inner and outer tie rods is also part of the front wheel’s toe adjustment.
Measure and record the old assembly’s position before changing it. On a typical rack-and-pinion design, you can mark the position of the jam nut on the inner tie rod and measure from a fixed reference point to the center of the outer ball stud. Photograph the arrangement so you know which surfaces you used.
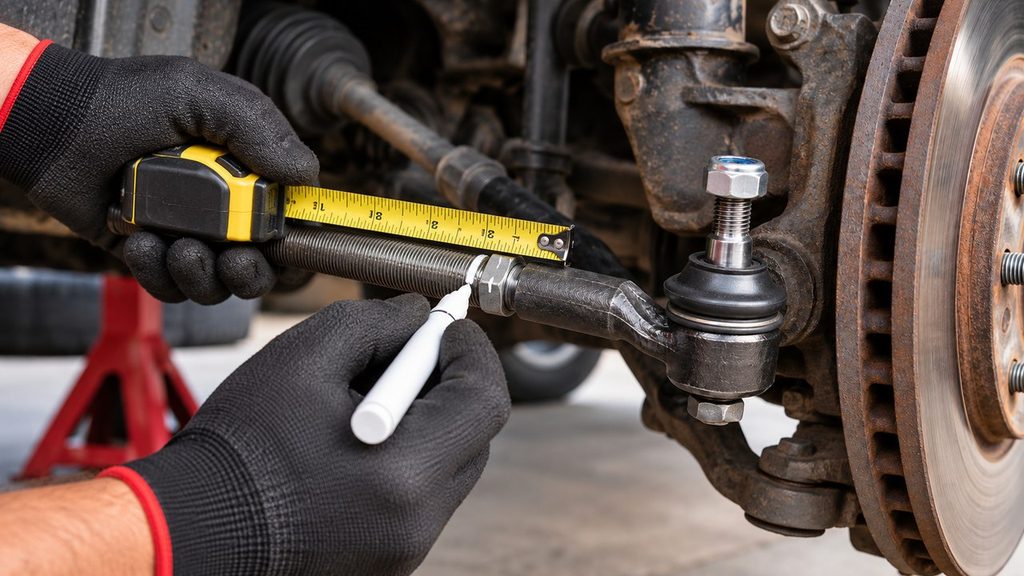
You’ll also count the turns needed to remove the old end later. Having both a measurement and a turn count provides a useful cross-check, especially if the replacement has a slightly different body length.
Before proceeding, inspect the threaded engagement. If the original end appears to have unusually little thread engagement or a damaged adjustment arrangement, don’t assume its position was correct. Use the manufacturer’s installation requirements instead.
Important: These measurements help establish a preliminary setting. They do not guarantee the original toe angle or replace a proper alignment after installation.
Step 4: Loosen the Jam Nut on the Inner Tie Rod
The jam nut, sometimes called the tie rod lock nut or alignment nut, secures the outer end against the threaded inner rod.
Clean the exposed threads with a wire brush and apply suitable penetrating oil if corrosion is present. Give the oil time to work instead of immediately applying maximum force to a stubborn nut.
On many vehicles, loosening the jam nut while the outer stud is still connected to the knuckle makes it easier to keep the assembly from moving. Use the correct holding point or backup wrench on the inner tie rod as specified, so the loosening force isn’t transferred unnecessarily into the steering rack.
Check the thread direction first. Most conventional applications use right-hand threads, but some adjustment sleeves and steering linkages use left-hand threads on one side. Forcing a left-hand-threaded nut in the wrong direction can damage the assembly.
Break the nut free only as far as necessary for removal, and preserve the reference mark you made earlier.
If it refuses to move, avoid using an open flame around rubber boots, grease, brake hoses or other nearby components. A damaged inner tie rod or steering rack is a much larger problem than a seized adjustment nut. Professional removal equipment may be the better option.
Step 5: Remove the Cotter Pin and Tie Rod Stud Nut
Now move to the fastener holding the outer tie rod’s ball stud in the steering knuckle.
If the vehicle uses a castellated nut, also known as a castle nut, you’ll usually see a cotter pin passing through the nut’s slots and a hole in the stud. Straighten the pin with needle-nose pliers and remove it. Discard the old pin.
Other designs use a self-locking or flanged nut without a cotter pin. Check which arrangement the manufacturer specifies before removing anything.
Loosen the stud nut with the appropriate socket or wrench. If the stud rotates inside its ball joint, look for a manufacturer-provided counter-hold feature, such as an internal hex or Torx recess. Avoid spinning the joint continuously with an impact wrench.
When using a puller, the procedure may call for leaving the loosened nut threaded onto the end of the stud temporarily. This can help contain the joint when the taper releases and may protect the exposed threads from the separator. Follow the tool and vehicle instructions for the correct setup.
Step 6: Separate the Outer Tie Rod End From the Steering Knuckle
The stud doesn’t simply slide out after the nut is loosened. Its tapered shape wedges into a matching tapered hole in the steering knuckle, creating a tight mechanical connection.
A screw-type tie rod separator is usually a controlled way to release that connection. Position the tool correctly around the joint and apply force according to its instructions until the tapered stud separates from the knuckle.

Sometimes the joint releases with a sudden pop. Keep your hands clear of the tool’s loaded contact points and make sure the surrounding brake hose, ABS wiring and rubber boots cannot be caught as it moves.
A pickle fork is another possible separation tool, but it often damages the rubber dust boot. That may be acceptable when the old end is being discarded, though a screw-type puller is generally preferable when you want to avoid unnecessary damage around the joint.
Don’t strike the threaded stud directly, use an uncontrolled amount of force against the steering knuckle, or improvise a puller that can slip under load. If corrosion has locked the taper in place, reassess the tool position and approved removal method.
Once the taper has released, remove the retaining nut completely and lift the outer tie rod stud clear of the steering knuckle.
Step 7: Unscrew the Old Outer Tie Rod End
With the outer end disconnected from the knuckle and the jam nut loosened, you can unthread the old part from the inner tie rod.
Rotate the outer tie rod end in the correct direction, counting every full turn until it comes off. Include any partial final turn in your notes. For example, if it takes 16 full turns and another quarter turn to release, record that rather than rounding to 16.
If the outer end and inner rod are heavily corroded, avoid twisting the entire inner tie rod or applying excessive force through the rack. Use the approved holding points and stop if the threads begin to bind or deform.
After removal, compare the original and replacement parts on a clean surface. Pay attention to the distance from the threaded opening to the center of the ball stud, not just the overall body length. Two parts can have similar appearances but different dimensions that affect their installed steering position.
Inspect the exposed inner threads. Minor surface contamination can often be cleaned, but damaged or severely corroded threads may require additional repairs. Don’t install a new end onto threads that cannot securely hold it.
Step 8: Thread the New Tie Rod End Into Position
Start the new outer tie rod end onto the inner rod by hand. The threads should engage smoothly. If the replacement immediately binds, stop and confirm the thread pitch and direction rather than forcing it with a wrench.
Use the recorded turn count to establish a starting position, then compare the installed distance with your original measurement. If the two tie rod ends have slightly different dimensions, the same number of turns may not reproduce the previous ball-stud location.
Position the jam nut against the new tie rod end as appropriate for the vehicle’s tightening procedure. Keep the required amount of thread engagement and make sure the rubber boot isn’t twisted or trapped.
There’s no advantage to making the new assembly look exactly like the old one if doing so leaves inadequate thread engagement or contradicts the part manufacturer’s requirements. Correct fitment and secure installation come first; the final toe setting will be established during alignment.
Step 9: Reconnect the New Tie Rod End to the Steering Knuckle
Clean the steering knuckle’s tapered mounting hole and inspect it for damage. The stud should seat against the matching taper without debris, burrs or contamination preventing proper contact.
Insert the new ball stud into the knuckle and start the specified retaining nut by hand. Confirm that the stud is correctly positioned and the nut isn’t cross-threaded.
Use a torque wrench to tighten the nut to the vehicle or approved replacement-part manufacturer’s specification. Do not substitute a convenient generic value. The required torque varies with the stud size, taper, nut design and vehicle application.
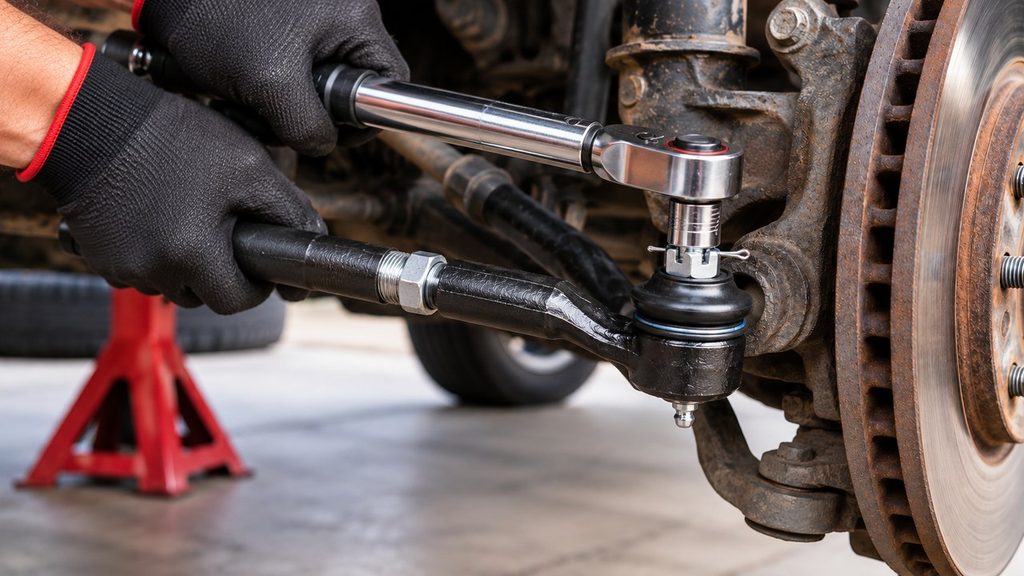
If your vehicle uses a castle nut and cotter pin, follow the specified tightening procedure. On designs that call for advancing the nut to align the slots with the stud hole, tighten farther only as instructed; don’t back off a properly torqued nut just to align the hole.
Insert a new cotter pin through the aligned hole and secure its legs as specified. Never reuse a bent or damaged cotter pin.
If the assembly uses a self-locking nut instead, use the correct new locking hardware required for that design. Don’t add a cotter pin to a stud that isn’t designed for one or substitute a different locking system without manufacturer approval.
Finish securing the jam nut to specification while keeping the appropriate parts from rotating. The exact order of final tightening can differ by application, so follow the service procedure. What matters is that the tapered joint is securely seated and the adjustment nut cannot allow the outer end to change position afterward.
Step 10: Grease the Joint if Required and Reinstall the Wheel
Check the replacement tie rod end’s lubrication requirements. Many modern outer ends are sealed and prelubricated, with no grease fitting or routine lubrication requirement.
Other replacement ends have a grease fitting, commonly called a Zerk fitting. If the part requires initial lubrication, use the specified grease and follow its manufacturer’s instructions. Some greaseable parts arrive prefilled, so don’t assume every new fitting needs additional grease immediately.
Don’t overfill the rubber boot. Excessive pressure can damage the seal or force grease out of a joint that was otherwise in good condition.
Before reinstalling the wheel, inspect the finished connection. Confirm the stud nut is secure, the correct locking device is installed, the jam nut is tightened, and the dust boot is seated without tearing or twisting.
Make sure there is sufficient clearance between the tie rod assembly and nearby brake hoses, wheel components and suspension parts through the steering movement specified for inspection.
Reinstall the wheel and start the lug nuts by hand. Lower the vehicle using the approved procedure, then tighten the wheel nuts in the specified sequence to the correct torque.
Do You Need an Alignment After Replacing an Outer Tie Rod End?
Yes, a professional wheel alignment check is strongly recommended after replacing an outer tie rod end. The replacement directly affects the steering linkage length, which determines part of the front wheel’s toe setting.
Counting the turns and measuring the original installed length can get the adjustment reasonably close, but neither method confirms the actual wheel alignment. Differences in the replacement joint’s dimensions, thread engagement or mounting position can leave the toe angle outside specification even when the steering wheel appears straight.
Toe describes whether the wheels point slightly inward or outward relative to the vehicle’s centerline. An incorrect setting can make the tires scrub across the road rather than roll cleanly. Our explanation of toe-in and toe-out covers how these small steering-angle differences affect tire wear and directional stability.
For the same reason, don’t treat a driveway tape-measure adjustment as proof that the repair is finished. It may be useful for an initial position check, but precise alignment requires suitable measuring equipment and the correct vehicle specifications.
Have the car aligned promptly before returning it to normal driving. If the wheels appear visibly misaligned, the steering binds, or the vehicle cannot be driven safely, arrange professional assistance or transport rather than attempting a road test.
For a broader explanation of why some repairs disturb wheel geometry while others do not, see our guide to alignment after replacing suspension parts.
What to Do if the Outer Tie Rod End Is Stuck
Removing an old tie rod end isn’t always difficult because of the steering design. Sometimes the biggest obstacle is simply years of corrosion on hardware exposed to water, grit and road salt.
There are two different places where the assembly can seize, and they need to be approached differently.
The Jam Nut Is Seized on the Inner Tie Rod
If the adjustment nut won’t move, clean the visible threads first. Penetrating oil may help, especially if it can reach the area between the nut and the threaded rod.
Use a properly fitting wrench and counterhold the inner tie rod at the approved location. Excessive twisting force applied through the steering rack can create damage beyond the original repair.
Verify that the thread isn’t left-handed before increasing force. This is particularly important on older steering linkages and adjustable sleeves.
If corrosion has effectively bonded the nut and rod together, professional extraction methods or replacement of additional steering hardware may be necessary. Cutting or heating parts near the steering rack, rubber bellows and brake components without the correct procedure can create substantial safety risks.
The Tapered Stud Won’t Release From the Knuckle
A tapered stud can remain firmly seated even with its retaining nut removed. This doesn’t necessarily mean you’ve missed another bolt.
Check that the separator is the correct size and is contacting the intended surfaces. A screw-type puller needs to apply its force in the proper direction without crushing the dust boot or bearing against a fragile part of the knuckle.
Don’t keep striking the stud or nearby components if the connection refuses to release. A damaged stud, cracked knuckle or distorted steering arm can turn a relatively small repair into a much more serious problem.
If the available tool cannot separate the joint safely, stop and use a suitable professional removal method.
The New Tie Rod End Doesn’t Screw on Smoothly
A replacement that binds after only part of a turn may have the wrong thread pitch, the wrong thread direction or damaged threads. Another possibility is a small burr left on the inner tie rod from the old jam nut.
Don’t use a wrench to force the new part into place. Remove it and compare the threads, dimensions and part number. If the inner rod is damaged, it needs to be repaired or replaced according to the manufacturer’s specifications before the vehicle is driven.
Common Mistakes That Can Ruin an Outer Tie Rod Replacement
Most mistakes in this repair aren’t obvious once the wheel has been reinstalled. The joint may look secure while a critical detail has been missed.
- Forgetting to record the original position: Makes the preliminary toe setting harder to reproduce and can leave the wheels visibly misaligned.
- Using an incorrect replacement: A different thread pitch, stud taper or joint length can prevent safe installation.
- Reusing discarded locking hardware: Old cotter pins or one-time-use nuts may no longer provide the intended security.
- Guessing the torque: Steering fasteners need their specified tightening procedure, not an estimate based on wrench feel.
- Damaging the rubber dust boot: A torn new boot can allow contaminants into the ball-and-socket joint.
- Leaving the jam nut loose: Allows the adjustment to shift, potentially changing toe and steering response.
- Skipping the alignment check: A matching turn count is not a measurement of the finished wheel geometry.
One particularly easy error is focusing so much on removing the rusty old part that the final inspection gets rushed. After installation, take the time to verify the fastening arrangement and make sure the joint moves as intended without contacting anything around it.
How Long Does It Take to Replace an Outer Tie Rod End?
On a straightforward vehicle, replacing one outer tie rod end may take an experienced mechanic around 30 to 60 minutes when the hardware comes apart normally. A careful DIY repair can take longer, especially if it’s your first time using a tie rod separator or working with steering linkage adjustments.
A seized jam nut or corroded tapered stud can add considerable time. Part compatibility problems and damaged inner threads may turn the job into something more involved than originally planned.
Remember to account for the wheel alignment separately. Completing the physical replacement doesn’t mean the vehicle’s steering geometry has been measured and corrected.
Is Replacing an Outer Tie Rod End Yourself Worth It?
If you already have suitable lifting equipment, a torque wrench and experience working on suspension or steering components, an outer tie rod end can be a reasonable DIY repair. You usually don’t need to remove the complete steering rack, and a compatible replacement can be installed without dismantling the inner joint.
However, the labor saving becomes less attractive when the threads are badly corroded, the steering linkage is damaged or the job requires equipment you don’t have. A specialist may be able to release seized hardware without damaging the expensive components around it.
You’ll also need to budget for an alignment even if you perform the mechanical work yourself. For a comparison of parts, labor, inner versus outer replacement and alignment charges, see our tie rod replacement cost guide.
If you’re uncertain about safely supporting the vehicle, identifying the correct joint or tightening steering fasteners, professional installation is the better choice. Steering hardware isn’t an area where an almost-correct repair is good enough.
Frequently Asked Questions
Can you replace an outer tie rod end without an alignment?
You can install the replacement while preserving an approximate toe setting, but that doesn’t confirm the alignment is correct. Counting turns or matching the original installed length helps with initial positioning only. A professional alignment check is strongly recommended after the repair.
Can you replace just one outer tie rod end?
Yes. If one outer tie rod end is worn and the opposite side is in good condition, replacing only the failed component is generally acceptable unless the vehicle manufacturer specifies otherwise. Inspect both sides, but don’t automatically replace a healthy joint solely because the other one failed.
Do you need a special tool to remove an outer tie rod end?
A tie rod end separator or puller is usually the most useful specialty tool. It releases the tapered stud from the steering knuckle. A pickle fork can also work on suitable applications, but it may damage the old joint’s dust boot. The correct removal method depends on the vehicle and the tool being used.
How do you keep the steering alignment close when replacing a tie rod end?
Before removal, record the existing installed length and jam nut position. Count the turns required to unscrew the old outer end, then use those measurements to position the replacement. Because replacement parts may have different dimensions, this is only a preliminary adjustment. Final toe must be checked with alignment equipment.
Do you have to replace the inner tie rod at the same time?
No. A serviceable inner tie rod does not automatically need replacing when the outer end is worn. The inner joint should still be inspected for excessive play, damage and thread condition. If it needs replacement, that’s a separate procedure that may involve removing the steering rack boot and using an inner tie rod tool.
Do new outer tie rod ends need grease?
It depends on the replacement. Some outer tie rod ends are factory-sealed and permanently lubricated. Others have grease fittings and require the specified chassis grease at installation or during maintenance. Follow the manufacturer’s instructions and avoid overfilling the joint’s rubber boot.
Can you drive with a loose outer tie rod end?
A tie rod end with significant looseness, damaged retaining hardware or a risk of separation should not be driven. It can compromise the mechanical connection used to steer the wheel. If the steering feels unpredictable or a joint appears close to failing, arrange professional assistance or towing instead of continuing to drive.
Final Checks Before Driving
Replacing an outer tie rod end is often simpler than replacing the inner tie rod or the complete steering rack. The old joint is usually accessible from the wheel well, and the new one can be fitted with a small selection of tools and a suitable separator.
The real measure of a successful repair is what happens afterward. The new stud must seat correctly in the steering knuckle, the specified nut and locking hardware must be secured, and the adjustment nut must hold the tie rod in position.
Check the installation carefully, confirm that nothing binds or interferes during the required steering inspection, and arrange the post-repair wheel alignment. If you encounter damaged threads, questionable mounting hardware or unexpected steering movement, correct the issue before putting the vehicle back into normal use.