How to Replace Struts on a Car: Tools, Steps & Safety
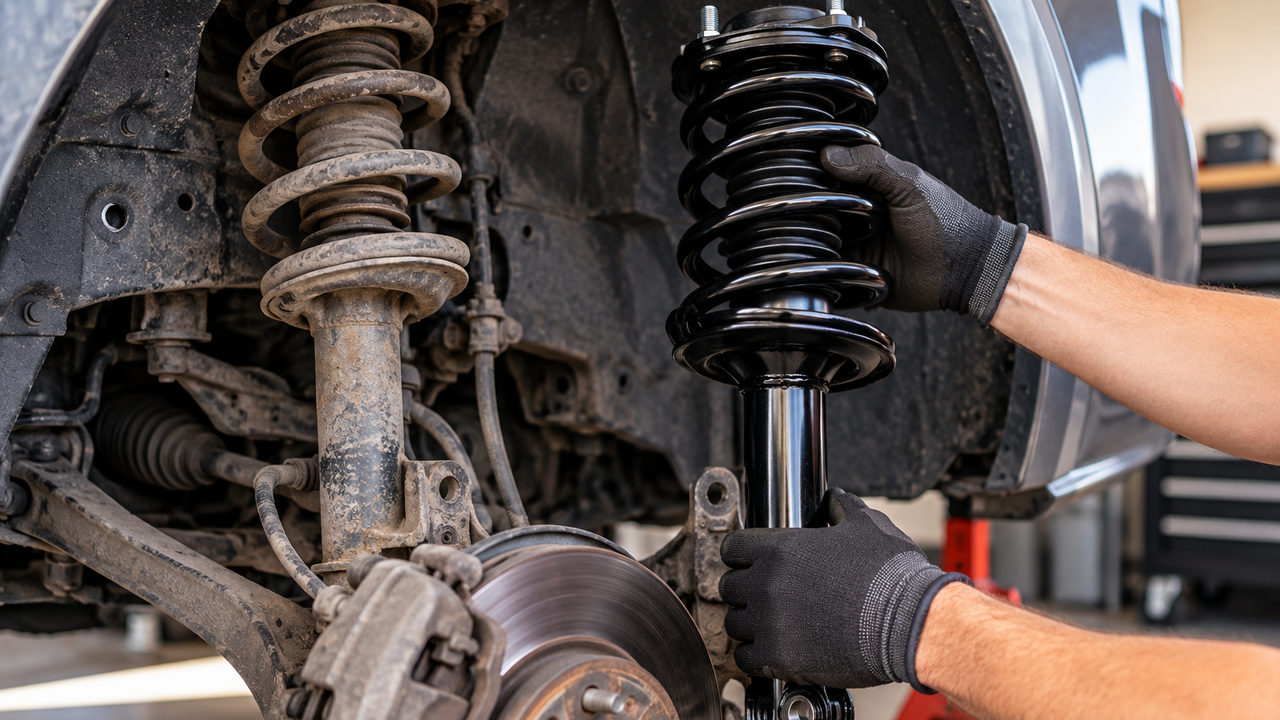
To replace struts on a car, you generally remove the front wheel, disconnect the components attached to the strut, support the steering knuckle, and release the strut’s lower and upper mounting fasteners. A new complete strut assembly can then be positioned, secured to the vehicle, and tightened to the manufacturer’s specifications before the wheel is reinstalled and the alignment checked.
That sounds fairly straightforward, and on some cars it is. The difficulty comes from seized suspension bolts, awkward access, and the fact that a front strut is part of the structure holding the wheel in position. There is also a major difference between replacing a complete, preassembled strut and transferring an old coil spring onto a new damper.
This guide covers replacing complete front MacPherson strut assemblies, the more practical approach for an experienced home mechanic. We’ll go through the tools, removal and installation steps, common complications, and the checks that matter before the car goes back on the road.
Important: Never loosen the large center nut on a spring-loaded strut assembly without the spring being safely controlled using the correct professional equipment and procedure. The smaller nuts attaching the upper mount to the vehicle body are different fasteners. Confusing the two can cause serious injury.
Before You Start: Make Sure You’re Replacing the Right Strut
First, check that your vehicle actually uses structural struts at the axle you’re repairing. A conventional shock absorber and a MacPherson strut are not interchangeable, even though both control suspension movement. Our comparison of struts and shocks explains how their mounting arrangements differ.
For this job, the most important decision is whether to buy a complete assembly or a bare replacement strut. Both may appear in parts catalogs for the same vehicle, but they require very different amounts of work.
| What to Compare | Complete Loaded Strut | Bare Strut |
|---|---|---|
| What comes in the box | Preassembled damper, spring and usually the upper mount | Damper without the complete spring assembly |
| Original coil spring | Normally stays assembled on the old unit | Usually must be transferred |
| Spring compressor | Not normally needed for a compatible complete assembly | Required for conventional spring transfer |
| DIY complexity | Intermediate to advanced, depending on vehicle | Specialized spring-handling work |
| Main advantage | Less assembly work and no spring transfer | May reduce parts cost when other components are reusable |
A complete unit is often sold as a loaded strut or quick strut. Check exactly what the manufacturer includes, since the bearing, bump stop, dust boot and other details can vary.
Match the new assembly to the vehicle’s year, make, model, drivetrain and suspension package. Left and right units may have different brackets or mounting orientations. Also check for electronic or adaptive damping, which may require different replacement parts and service procedures.
Do not assume you need new struts just because the car has high mileage. Significant leakage, physical damage, poor damping and abnormal ride control deserve investigation, but tire problems, control arm bushings and upper mounts can produce similar symptoms. If a clunk or steering pop is your main complaint, check the signs of a failing upper strut mount before ordering the complete assembly.
Tools Needed to Replace Front Struts
You don’t need a professional workshop for every complete-strut replacement, but this isn’t a job to start with a basic wrench and an uncertain lifting setup. Check the factory repair instructions for special tools before removing the wheel.
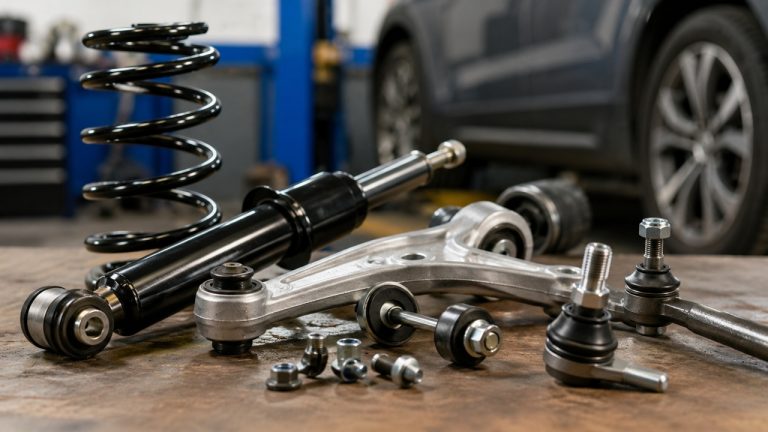
- Correct complete strut assemblies: Confirm fitment, side, mounting design and included components.
- Floor jack and rated jack stands: Support the vehicle at approved lifting and support points.
- Wheel chocks: Secure the wheels remaining on the ground.
- Socket and wrench sets: Include appropriate sizes for wheel nuts, strut bolts and sway bar links.
- Breaker bar: Helpful for releasing tight lower mounting fasteners.
- Torque wrench: Essential for tightening suspension and wheel fasteners to specification.
- Penetrating oil and wire brush: Useful when exposed hardware is corroded.
- Suitable knuckle support: Prevents the hub and knuckle from dropping when their strut connection is released.
- Marker and phone camera: Record bracket orientation, wiring routes and adjustable bolt positions.
- Replacement fasteners: Have the specified new nuts or bolts ready if the manufacturer prohibits reuse.
- Safety glasses and gloves: Particularly useful around corroded hardware and tight wheel wells.
A few vehicles require additional equipment. For example, a strut that slides into a clamped steering knuckle may need a dedicated knuckle-spreading tool. Others have suspension components that must be moved for clearance. Find out which design you have before committing to the repair.
How to Replace Front Struts: Step-by-Step Instructions
The sequence below applies to many conventional front MacPherson suspensions using complete, preassembled replacement struts. Some vehicles have different fasteners, additional suspension connections or special tightening requirements. Where the factory procedure differs, follow the instructions for your exact vehicle.
Step 1: Prepare the Vehicle and Check the Replacement Parts
Start on a flat, solid surface with enough room to work around the front wheel. Set the parking brake and chock the wheels that will remain on the ground.
Before lifting anything, place the new strut beside its box and inspect it. Check the upper mounting studs, lower bracket, brake hose mounting tab and sway bar link attachment. If the replacement doesn’t match the vehicle’s suspension configuration, stop before disassembling the car.
Review the required tightening specifications and confirm whether the manufacturer calls for new strut-to-knuckle bolts, prevailing-torque nuts or other single-use hardware. A replacement that arrives without necessary fasteners can leave your vehicle immobilized halfway through the job.
Step 2: Raise the Car and Remove the Front Wheel
With the wheel still on the ground, slightly loosen its lug nuts. Raise the vehicle using the designated jacking point and secure it on appropriately rated jack stands at the approved support locations.
Some suspension arrangements make sway bar link removal easier when both front wheels are unloaded equally. Consult the vehicle’s procedure and support the front end accordingly. Never assume that a jack placed under one corner is enough to stabilize the car while suspension components are disconnected.
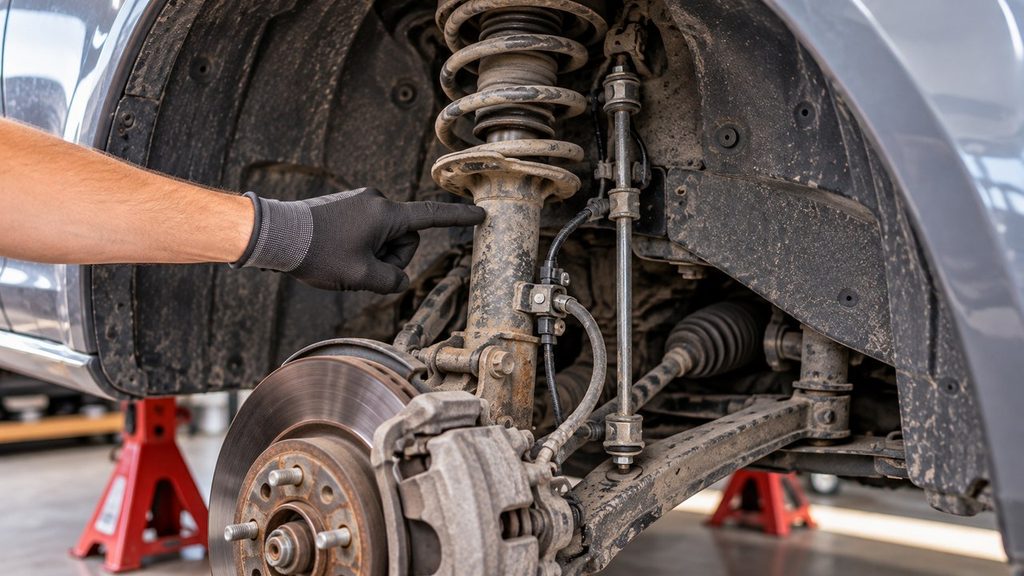
Remove the wheel and look at the assembly before touching any fasteners. The strut typically runs from the wheel well or strut tower down to the steering knuckle. A coil spring surrounds much of the strut body on conventional MacPherson designs.
Identify the lower attachment, upper mount, brake hose bracket, ABS sensor wire and any sway bar link connected to the strut. This first look often reveals whether the job will be straightforward or whether corrosion and restricted access are likely to cause delays.
Step 3: Disconnect Attached Hoses, Wiring and the Sway Bar Link
Look for any brackets or clips fastened to the old strut housing. On many cars, a flexible brake hose passes through a bracket on the strut. There may also be clips for the ABS wheel-speed sensor wiring.
Photograph their positions, release the appropriate retainers and carefully move the hose or wiring clear of the work area. The goal is to free the attachments, not to disconnect the hydraulic brake line itself. Opening the brake system unnecessarily creates additional work and may require bleeding.
If the sway bar end link attaches to the strut, disconnect it according to the service procedure. A common complication is a link stud that spins with the retaining nut. Some have an internal hex or Torx fitting so the stud can be held while the nut turns.
Don’t automatically replace a good link just because it has been disconnected. If it is worn or seized, our sway bar link replacement instructions cover the removal process and ways to deal with a stubborn retaining nut.
Step 4: Support the Steering Knuckle Before Separating the Strut
This is a step that can be easy to underestimate.
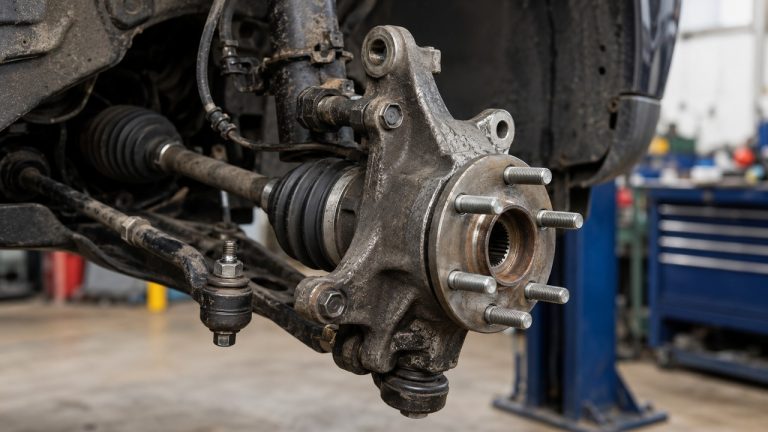
The steering knuckle connects the wheel hub to the suspension and steering system. On a MacPherson design, the strut is one of the parts controlling its position. Once the lower strut connection is removed, the knuckle can tilt or move farther than expected.
Use the support method specified by the manufacturer to keep the knuckle and hub under control. This may involve a secondary support or an appropriate retaining arrangement, depending on the suspension layout. The car itself must remain safely supported by the jack stands.
Pay particular attention to the outer CV joint and axle boot on front-wheel-drive or all-wheel-drive vehicles. Allowing the hub to swing outward can overextend the axle or strain the flexible brake hose. A few minutes spent arranging proper support can prevent a much more expensive problem.
Step 5: Remove the Lower Strut-to-Knuckle Fasteners
With the upper mount still holding the strut in place and the steering knuckle supported, work on the lower connection.
Many cars use two large horizontal bolts through a bracket at the bottom of the strut. Others clamp the cylindrical strut housing inside the steering knuckle with a pinch bolt. You need to identify which type you have because the removal methods aren’t the same.
- Two-bolt bracket: Remove the specified nuts and bolts while controlling the knuckle’s position. If a bolt is eccentric or adjustable for camber, record its original orientation where the service procedure permits.
- Pinch-clamp mount: Remove the retaining hardware and use the approved release or spreading method. Some designs require specific positioning or tools to slide the strut housing out without damaging the knuckle.
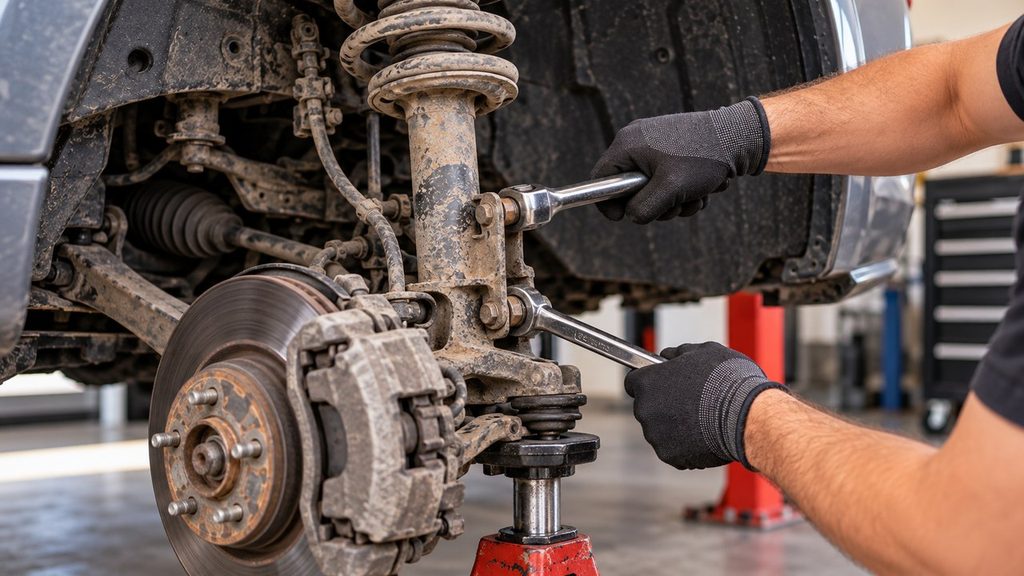
Corrosion can make these fasteners particularly stubborn. A wire brush and appropriate penetrating oil may help, but don’t keep increasing leverage if a bolt begins to deform, a captive nut moves, or the mounting bracket shows damage.
Take care around aluminum knuckles. Using an improvised wedge in a clamp slot or striking the casting indiscriminately can create damage that isn’t immediately visible.
Once the connection is free, keep the knuckle supported and confirm that no wiring, hose or axle component is being pulled tight.
Step 6: Remove the Upper Mounting Nuts and Lift Out the Old Strut
Open the hood and find the upper strut mounting point. On many cars, you’ll see two or three smaller nuts arranged around a central nut. Some models hide the mount behind plastic covers or other access panels.
Support the strut assembly from below and remove its body-mounting fasteners in the sequence specified for your vehicle. Keep hold of the assembly as the last fastener comes free. A complete strut is heavier and more awkward to handle than it may look.
Do not loosen the large central piston-rod nut. It secures components of the spring-loaded assembly and is not one of the ordinary body-mounting nuts.
Carefully guide the old strut out through the wheel well. Watch the brake rotor, CV axle boot, fender opening and any nearby wiring. If the assembly won’t clear, check the factory procedure for additional components that must be released rather than forcing it through a gap.
Once removed, put the old and new units side by side. This is your final chance to spot a mismatched bracket, a different spring seat or an upper mount that points in the wrong direction before installation.
Step 7: Position the New Complete Strut Assembly
Leave the new assembly intact. Do not loosen its center nut, remove spring retainers or attempt to reposition the spring without the manufacturer’s approved procedure.
Guide the strut into the wheel well, orient the upper mount correctly and align its mounting studs or holes with the strut tower. Start the upper mounting fasteners by hand so the assembly is supported, but do not automatically apply final torque until you’ve checked the specified tightening sequence.
Some upper mounts have a particular orientation relative to the vehicle. A strut that physically fits into the tower may still be incorrectly positioned if its mount or spring seat is rotated. Look for manufacturer identification marks, alignment arrows or other installation instructions supplied with the part.
Before moving to the lower connection, confirm the strut can sit in its intended position without twisting the brake hose bracket, forcing the sway bar link mounting tab against another component or contacting the surrounding bodywork.
Step 8: Reconnect the Strut to the Steering Knuckle
With the assembly supported at the top, carefully bring the lower strut attachment into alignment with the steering knuckle.
On a two-bolt design, position the bracket and insert the specified bolts in their correct orientation. You may need to adjust the supported knuckle slightly to line up the holes. Avoid forcing a bolt through at an angle or using the threads to pull misaligned structural components together.
On a clamped design, the strut housing must sit at the correct insertion depth and orientation before the clamp fastener is secured. Follow the vehicle’s instructions, including any locating tabs, stops or alignment marks.
Install new nuts or bolts wherever the service information specifies one-time-use hardware. If the connection includes adjustable camber bolts, position them using the approved preliminary setting. Marks from the old assembly can provide a reference, but they cannot replace an alignment measurement.
Keep the knuckle properly supported until the structural connection has been secured according to the manufacturer’s procedure.
Step 9: Reattach Everything and Torque the Fasteners
Reconnect the sway bar link if it was removed. Refit the brake hose bracket, ABS wire retainers and any other clips attached to the old strut. Compare the finished routing with the photos taken before disassembly.
Now work through the required torque specifications, including the lower strut connection, upper mount and any disturbed suspension fasteners. Some vehicles specify new locking nuts or torque-plus-angle tightening. Others require particular suspension positions during final tightening.
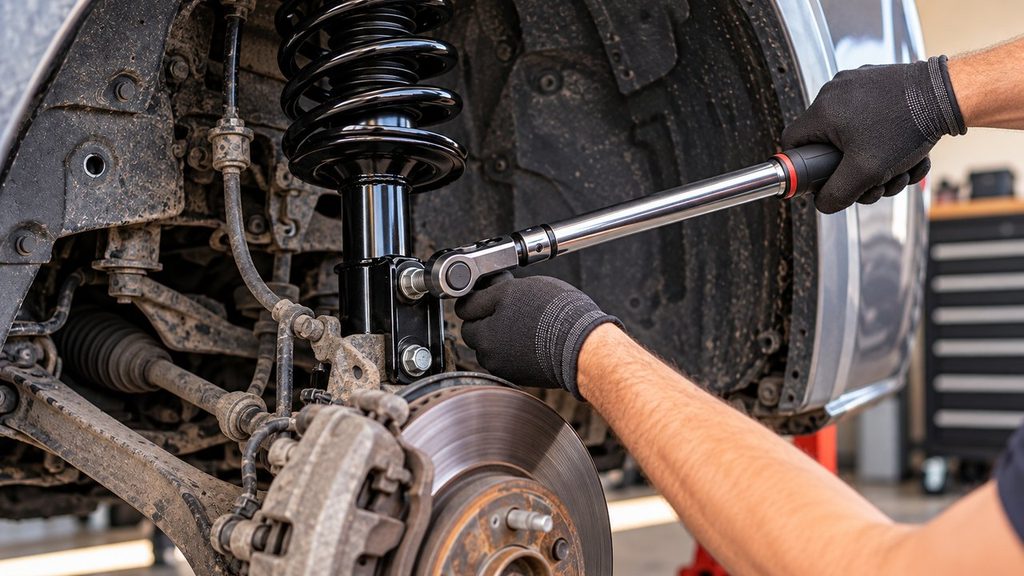
There isn’t a universal strut bolt torque that can safely be applied to every car. A bolt on a compact sedan may have a completely different specification from a similar-looking bolt on an SUV. Use the correct service information and a suitable torque wrench.
Do not assume every fastener should be tightened with the suspension hanging, or that every one must wait until normal ride height. The correct position depends on the joint and the manufacturer’s procedure. Suspension bushings that require tightening at ride height are not necessarily treated the same as a strut-to-knuckle clamp.
Before reinstalling the wheel, inspect the area again. The brake hose must not be stretched or trapped, the ABS wiring must clear moving parts, and the coil spring must appear correctly seated. If something looks different from the original arrangement, investigate it now.
Step 10: Reinstall the Wheel and Complete the Final Checks
Reinstall the wheel and start the lug nuts by hand. Lower the car using the approved procedure, then torque the wheel nuts to specification in the correct tightening pattern.
Repeat the appropriate replacement process on the opposite side if both front struts are being replaced. Struts are commonly replaced in axle pairs to maintain balanced damping, although the final repair decision should follow the vehicle and parts manufacturers’ guidance.
Once both sides are complete, compare the ride height and look for obvious differences in spring or mount position. Check that the steering operates smoothly and that no newly installed component contacts a brake hose, wheel or nearby suspension part.
Do not assume the vehicle is ready for normal driving solely because the bolts are back in place. Complete the required inspections, verify the steering and suspension are functioning correctly, and arrange the appropriate wheel alignment. If you find abnormal wheel position, binding, loose hardware or unexpected noises, correct the problem before driving.
What If You Bought a Bare Strut Instead of a Complete Assembly?
A bare strut changes the job considerably. The original coil spring and other compatible parts normally have to be removed from the old assembly and transferred onto the replacement damper.
This requires controlling the substantial force stored in the compressed spring. The upper mount and central piston-rod nut cannot safely be disassembled simply by placing the assembly on a bench or supporting it with a floor jack.
Spring transfer requires correctly rated equipment, training, an inspection of the spring and related parts, and the manufacturer’s specific assembly procedure. A cracked spring, damaged seat, unsuitable compressor or incorrect mounting arrangement can make the operation especially hazardous.
For someone who is comfortable removing a complete strut from a car but has no spring-compression experience, having a qualified shop handle the spring transfer is a reasonable compromise. It is also worth comparing the total cost with a compatible preassembled unit before committing to reusing the old spring.
Common Problems During Strut Replacement
The clean, rust-free suspension shown in a parts diagram rarely tells the whole story of a repair on an older car. These are the situations most likely to turn an ordinary afternoon job into a much longer one.
The Lower Strut Bolts Won’t Come Out
A bolt can be completely free of its nut and still refuse to slide out of the mounting bracket. Corrosion may have bonded the bolt to its sleeve or the surrounding metal, while suspension load can also make removal difficult.
Check that the knuckle is correctly supported and that the bolt isn’t being trapped by misalignment. Use approved corrosion-removal and extraction methods. If the bolt starts deforming or the knuckle itself may be damaged, stop rather than turning an already difficult job into a structural repair.
The Sway Bar Link Stud Keeps Spinning
Many sway bar links use a ball-joint stud that rotates when you try to loosen the nut. Inspect the end of the stud for the correct counter-hold fitting. Using that fitting with the appropriate wrench often solves the problem without removing additional suspension parts.
If the stud or its fitting is severely corroded, the link may need replacement. Don’t leave it partially connected or reuse damaged retaining hardware simply to finish the job.
The New Strut Doesn’t Line Up With the Knuckle
First, recheck the part number, mounting orientation and whether the unit belongs on the left or right side. A wrong strut can look surprisingly close to the original while having a differently positioned bracket or upper mount.
If the part is correct, inspect the knuckle’s supported position and follow the manufacturer’s alignment method. Don’t drill larger holes, bend the new strut bracket or grind away locating tabs to make the assembly fit.
A Clunk or Popping Sound Appears After Installation
New suspension noises are worth investigating immediately. Possible causes include loose upper mounting hardware, an incorrectly seated spring, a damaged upper bearing, a disconnected sway bar link or interference between parts.
A springy pop while turning the steering wheel deserves particular attention around the upper mount and bearing. A heavy clunk over bumps may point toward mounting hardware or another suspension joint. Neither sound should be dismissed as a normal characteristic of a new strut.
Do You Need an Alignment After Replacing Struts?
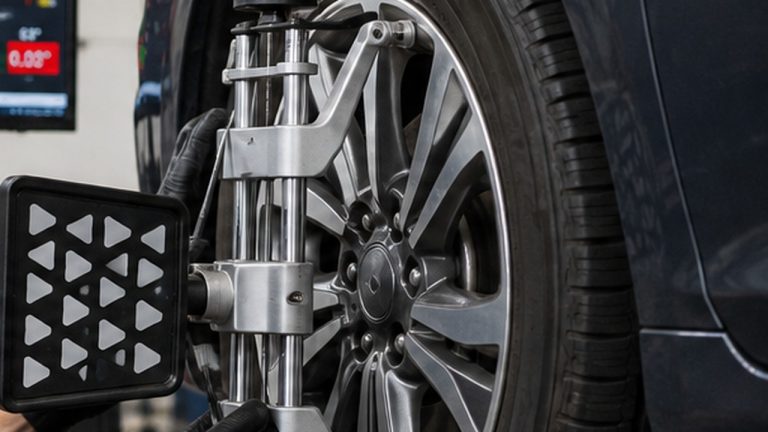
For most conventional front MacPherson strut replacements, checking the wheel alignment afterward is the sensible approach. Removing the lower strut connection can affect the relationship between the steering knuckle and the strut, particularly on designs with adjustable camber bolts or mounting tolerances.
Even if you carefully mark the original fastener positions, a new component may not sit in exactly the same location as the old one. Small changes in camber can contribute to steering pull or uneven tire wear.
Some suspension arrangements have different alignment requirements, particularly where the repair doesn’t disturb an alignment-sensitive connection. The correct decision depends on the vehicle, not a universal rule that every strut replacement is identical.
For a fuller explanation of which suspension jobs disturb wheel geometry, see when alignment is needed after replacing suspension components.
Don’t skip the inspection simply because the steering wheel looks straight. If the car pulls, the wheel sits visibly out of position, or the steering feels unusual after replacement, have the problem evaluated before normal driving.
How Hard Is It to Replace Struts Yourself?
Replacing complete front strut assemblies is generally an intermediate suspension repair, but difficulty varies substantially by vehicle. A car with easily accessible fasteners and minimal corrosion may be manageable for someone experienced with brakes and suspension work. A vehicle with seized mounting bolts, complicated access or electronic suspension may be a very different prospect.
The job requires more than the ability to remove large nuts and bolts. You need to lift the vehicle safely, control movement of the steering knuckle, recognize damaged hardware and understand when a connection has not been assembled correctly.
If you have never used jack stands or a torque wrench, this is not the ideal first project. And if the only available replacement requires transferring a compressed coil spring, professional assistance becomes much more important.
How Long Does It Take to Replace Struts?
A straightforward pair of front loaded struts may take an experienced home mechanic a few hours to replace. A first-time DIY mechanic should allow considerably more time for reading the repair instructions, working carefully around the knuckle and checking every connection during reassembly.
Rust, damaged hardware, hidden upper mounting nuts and special removal procedures can extend the job. A wheel alignment also needs to be accounted for separately, since it requires appropriate measuring equipment.
Don’t plan the repair around an optimistic video demonstration. If this is your only vehicle, consider what happens if a critical mounting bolt breaks or the replacement part turns out to be incorrect.
Is DIY Strut Replacement Worth the Savings?
Replacing complete struts yourself can save a substantial amount of labor, especially when you already own suitable tools and have experience with suspension work. It may also be more convenient than arranging a shop visit for a straightforward vehicle.
But the cheapest replacement strut isn’t necessarily the cheapest repair. A bare unit may require additional spring-transfer work, while a loaded assembly costs more upfront but arrives with several components already assembled. Special tools, replacement hardware and an alignment also affect the total expense.
For a detailed comparison of parts, labor and alignment expenses, see our strut replacement cost breakdown. That makes it easier to judge whether buying the tools and doing the work yourself offers a meaningful saving for your particular vehicle.
Frequently Asked Questions
Can you replace struts yourself without a spring compressor?
Yes, on many vehicles you can replace a correctly matched, complete preassembled strut without using a spring compressor. You remove and install the complete spring-loaded unit without disassembling it. Replacing only a bare strut and transferring the old spring is a different, more hazardous procedure that requires specialist equipment and training.
Should you replace both front struts at the same time?
Replacing both struts on the same axle is generally recommended to keep damping performance balanced from side to side. However, the right decision depends on their condition, the vehicle manufacturer’s instructions and the replacement components. There is no automatic requirement to replace healthy rear shocks just because the front struts need attention.
Can you replace struts without getting an alignment?
Whether an alignment adjustment is required depends on the suspension design and what was disturbed. An alignment check is generally advisable after front MacPherson strut replacement, especially when the strut-to-knuckle connection has been separated. Reinstalling the bolts in their original positions doesn’t guarantee the alignment remains correct.
Is replacing rear struts the same as replacing front struts?
Not necessarily. Some vehicles have structural struts at the rear, while others use separate shocks and springs. Rear mounting points may be accessed through the trunk or interior trim, and the suspension geometry may be different. Use the rear suspension procedure specific to your vehicle rather than assuming the front steps apply unchanged.
Can a new strut make noise after installation?
Yes. New noises may result from an incorrectly seated spring, upper mount or bearing problems, loose hardware, or interference with nearby components. A properly installed new strut shouldn’t produce persistent clunking, binding or sharp popping sounds. Investigate those symptoms before continuing to drive.
Do you have to replace the strut mounts too?
Not always. The mounts should be inspected and replaced if damaged or worn. A complete loaded strut often includes a new upper mount, whereas a bare strut may require the existing mount to be reused or replaced separately. Check the contents of the replacement assembly and the manufacturer’s recommendations before ordering parts.
Before You Call the Strut Replacement Finished
The actual removal of a strut is only part of the repair. What matters just as much is whether the replacement fits correctly, the steering knuckle is securely connected, every hose and wire is routed safely, and all disturbed fasteners have been tightened according to the vehicle’s specifications.
For an experienced DIY mechanic, a complete preassembled strut can make the job much more manageable by avoiding spring transfer. That convenience doesn’t remove the need for careful suspension work or an appropriate alignment check afterward.
If a mounting connection is damaged, a spring-loaded assembly needs to be dismantled, or the finished suspension doesn’t look or behave correctly, don’t improvise a fix just to get the wheel back on. Have the problem corrected before returning the car to regular use.