How to Replace Inner Tie Rod Ends: Tools, Removal & Installation
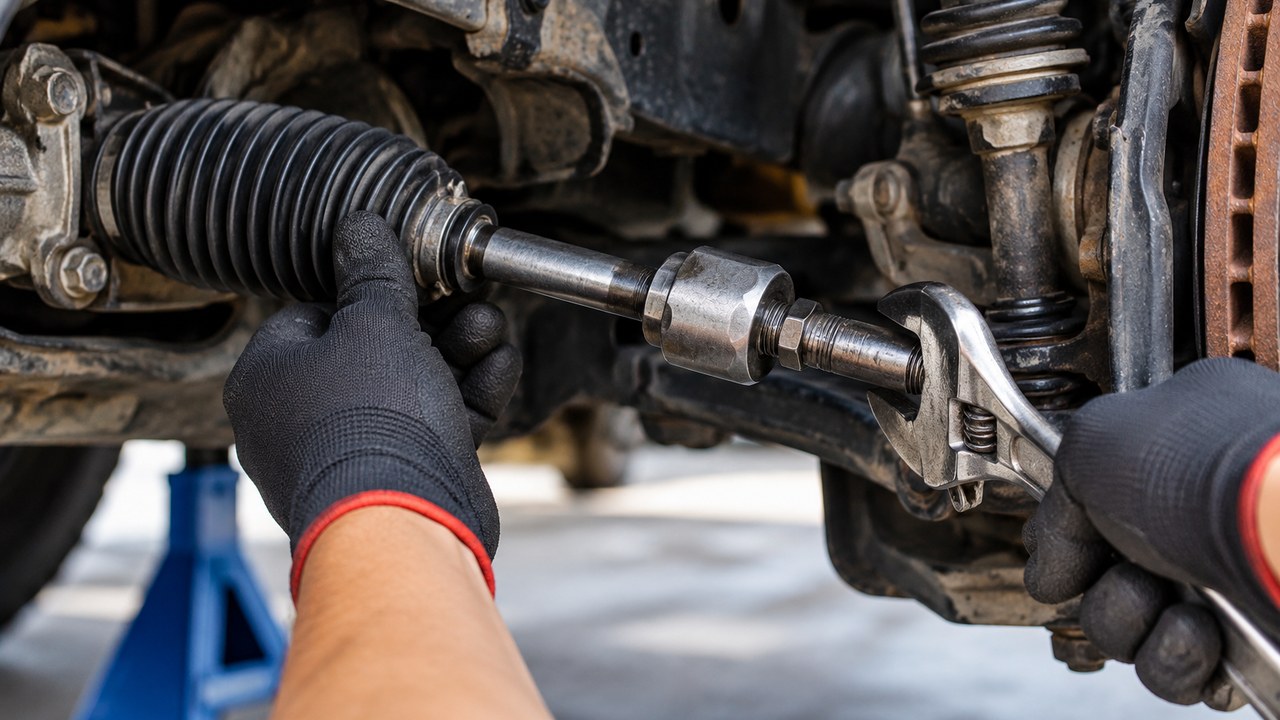
To replace an inner tie rod, remove the front wheel and outer tie rod end, take off the steering rack boot, and use an inner tie rod removal tool to unscrew the worn joint from the rack. Install the correct replacement with its specified locking hardware, refit the protective boot, reconnect the outer end, and torque the steering fasteners to the manufacturer’s specifications. A wheel alignment is needed afterward.
The inner tie rod sits farther inboard than the outer end, usually hidden beneath the rubber bellows on a rack-and-pinion steering system. That makes it a little less convenient to reach. You may have to work around a subframe, remove a stubborn boot clamp, or use a long tubular tool to reach the joint’s mounting flats.
The job is possible for an experienced DIY mechanic, but there’s an important catch: the inner joint threads directly onto the steering rack. Applying removal or tightening force incorrectly can damage the rack itself. This guide explains how to replace inner tie rod ends on a typical passenger car or light truck, including the tools, locking methods, and boot installation details that are easy to miss.
Safety first: Steering linkage is safety-critical. Follow the factory service procedure for your exact vehicle, including any electric power steering or airbag-related precautions. Support the vehicle on appropriately rated jack stands, use the specified fastening hardware, and never assume a steering connection is secure simply because the parts fit together.
Tools Needed to Replace an Inner Tie Rod
Most of the hand tools will look familiar if you’ve worked on brakes or suspension. The unusual one is the inner tie rod tool. Before renting or buying it, check the shape of the joint housing on your vehicle. Not every inner tie rod uses the same flats, diameter, or removal arrangement.
- Correct replacement inner tie rod: Match the vehicle application, rack connection, thread pitch, overall length, and included locking components.
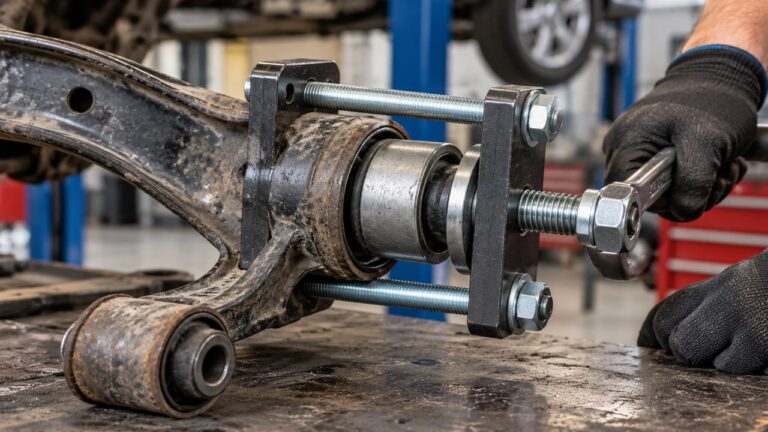
- Inner tie rod removal tool: Usually a long tubular tool with interchangeable adapters or a compatible universal gripping head.
- Outer tie rod separator: Used to disconnect the outer joint from the steering knuckle when required.
- Floor jack, jack stands, and wheel chocks: For safe vehicle lifting and support.
- Socket and wrench sets: Include sizes for the wheel nuts, outer tie rod hardware, and jam nut.
- Breaker bar and torque wrench: For loosening and correctly tightening steering fasteners.
- Approved rack counter-hold tool: Required on applications where the steering rack must be restrained during inner joint removal or installation.
- Boot clamp pliers: Suitable for the rack bellows clamp design being used.
- Needle-nose pliers and a suitable pick: For cotter pins, retainers, and carefully releasing boot clamps.
- Penetrating oil and wire brush: Helpful for corroded outer adjustment threads.
- Paint marker and measuring tool: For recording the original steering linkage position.
- Replacement rack boot clamps and locking hardware: Use the items specified for the steering rack and replacement joint.
- Specified threadlocker or lubricant, if required: Use only what the manufacturer calls for.
If the existing rack boot is split, hardened, or contaminated, have a correctly matched replacement ready. You may also need a new outer tie rod cotter pin or self-locking nut, depending on the design.
One detail worth checking ahead of time: a crowfoot-style adapter can change the effective length of a torque wrench. If your setup changes that length, apply the appropriate torque correction rather than assuming the wrench’s displayed setting always equals the torque at the joint.
How to Replace Inner Tie Rod Ends: Step-by-Step Guide
The procedure below describes a common rack-and-pinion steering system. Hydraulic and electric power steering racks may have different access requirements, retaining hardware, and service precautions. Certain vehicles require procedures that aren’t covered by a universal walkthrough, so check the repair manual before starting.
Step 1: Confirm the Inner Joint Is Worn and Check the Replacement
Don’t replace an inner tie rod based on a clunk or loose steering feel alone.
The inner tie rod connects to the steering rack and contains a joint that accommodates suspension and steering movement. Excessive play at that joint can create imprecise steering, knocking, or abnormal tire wear, but worn outer tie rods, wheel bearings, ball joints, and even rack problems can produce similar complaints.
Confirm the source of movement using the vehicle manufacturer’s inspection criteria. The goal is to establish that the inner joint itself is loose, not simply that there’s movement somewhere in the steering linkage. If you’re still diagnosing the problem, our inner and outer tie rod symptoms guide explains the differences and the checks that help identify the worn component.
Before taking the car apart, verify that the replacement inner tie rod is correct for the steering rack. Parts catalogs sometimes list different joints for trim levels, steering systems, or production dates that otherwise appear identical.
Check whether the new part includes a lock washer, retaining plate, securing pin, or pre-applied thread-locking compound. Some use a mechanical locking system; others have different retention requirements. You’ll need to know which applies before the old joint comes off.
Step 2: Safely Lift the Vehicle and Record the Steering Position
Park on solid, level ground, apply the parking brake, and chock the wheels that will remain on the ground. Follow the specified steering-wheel and ignition precautions for your vehicle, especially if it has electric power steering.
Loosen the wheel nuts slightly before lifting. Raise the vehicle at its approved jacking point, install appropriately rated jack stands at the designated support locations, and confirm the vehicle is stable before removing the wheel.
With the wheel off, locate the outer tie rod end, its adjusting jam nut, and the threaded inner rod leading into the rubber steering rack boot.
Before loosening the adjustment, take a measurement that you can reproduce during installation. Record the approximate overall steering linkage length between consistent reference points, such as the outer ball-stud center and an identifiable point near the rack-side joint, where the design allows a reliable measurement.
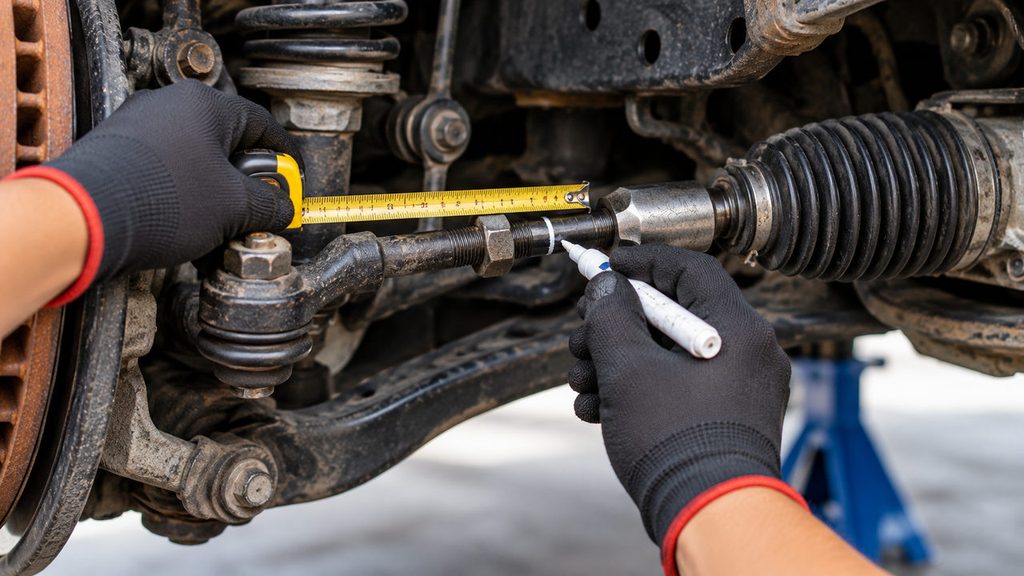
Photograph the jam nut position and exposed threads. These references are more useful than simply trying to remember where everything sat.
Also inspect the rack boot for splits, missing clamps, or evidence of fluid around the assembly. A damaged boot may have allowed water and grit into the protected area, so it deserves attention even if the original repair was only for joint play.
Step 3: Disconnect and Remove the Outer Tie Rod End
On many vehicles, the outer tie rod end must come off so the jam nut and rack bellows can slide over the inner rod.
Start by cleaning the exposed adjustment threads. If the jam nut is corroded, apply appropriate penetrating oil and allow it time to work. Loosen it using the correct wrench and approved holding point rather than transmitting unnecessary twisting force through the steering rack.
If the outer ball stud uses a castle nut and cotter pin, remove the old pin first. Other designs use a self-locking nut. Disconnect the retaining hardware according to the service manual and separate the tapered joint from the steering knuckle with a suitable puller.
Some tapered joints release with a sharp pop. Keep your hands clear of the separator’s loaded contact points and protect nearby brake hoses, ABS wiring, and rubber boots.
Once the stud is free, unscrew the outer end from the inner rod. Count and record the complete and partial turns required for removal. Then remove the jam nut if necessary to slide the rack boot off later.
The turn count is useful, but because you’re replacing the inner rod itself, don’t assume the new part has identical threaded dimensions. Compare the final assembled length as well.
For detailed help with seized outer studs, castle nuts, and adjustment threads, see our separate outer tie rod end removal and replacement guide. Here, removing the outer joint is only the access stage of the inner tie rod repair.
Step 4: Remove the Steering Rack Boot and Its Clamps
With the outer end and any obstructing jam nut removed, you can access the protective rubber bellows, also called the rack boot or inner tie rod boot.
Most boots have a small clamp near the outer end of the inner tie rod and a larger clamp where the boot meets the steering rack housing. The larger clamp is often hidden behind other components, so inspect how it’s secured before trying to remove it.
Release the small clamp first. Then access the larger rack-side clamp using the proper tool. Some factory crimp clamps are intended for one-time use and must be replaced after removal.
Work carefully around the rubber. A sharp screwdriver or pick can puncture an otherwise reusable boot, leaving an opening for road water and dirt to enter.
Before pulling the boot away, check for a small breather or equalization tube. Some steering racks connect the left and right bellows through a vent passage so air can move as the rack travels. Photograph the connection and disconnect it only as the service procedure requires.
Gently work the boot away from the rack housing and slide it along the rod. If the boot is stiff or stuck, release it without tearing its sealing lips or damaging the rack surface underneath.
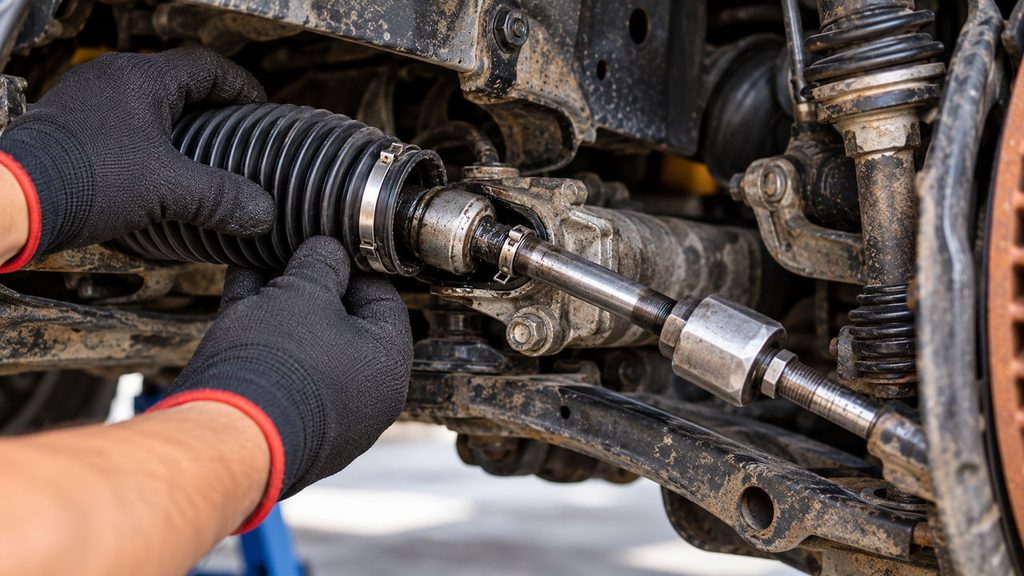
With the boot removed, the inner tie rod housing should be visible at the end of the steering rack.
Check for fluid inside the boot. On a hydraulic power steering rack, an appreciable accumulation of power steering fluid may indicate a leaking internal rack seal rather than an ordinary tie rod problem. Replacing the inner joint won’t repair that leak. Identify the fluid and its source before continuing.
Step 5: Release the Inner Tie Rod Lock and Remove the Old Joint
This is the part of the job that makes inner tie rod replacement different from changing an outer end.
The inner joint screws directly onto the steering rack. Depending on the application, it may be secured with a staked lock washer, retaining plate, mechanical pin, or another manufacturer-specified locking arrangement.
Inspect the joint before attempting to turn it. If a lock washer has tabs folded over the joint housing, release them using the approved procedure. If a retaining pin or another locking device is present, remove or disengage it as specified.
Don’t simply force the housing to rotate against an engaged mechanical lock. Doing so can damage the rack threads or retaining surfaces.
Choose the correct adapter for the inner tie rod removal tool. A common tool consists of a long tube that slides over the rod, with a crowfoot-like adapter gripping flats on the joint housing near the rack.

Other joints have rounded housings without conventional wrench flats and may require a compatible universal gripping tool or a vehicle-specific remover.
Before applying force, follow the service manual’s instructions for supporting or counterholding the steering rack. Some applications require holding the rack shaft at a designated location to prevent the removal torque from being transmitted through the internal gear mechanism.
Do not clamp polished rack surfaces or grip steering rack teeth with an improvised tool. Use only the approved counter-hold locations and equipment for your application. Damage to these surfaces or the rack’s internal components can create a far more expensive repair.
Fit the removal tool securely over the inner joint housing and loosen it in the specified direction. Once the threaded connection is free, carefully unthread the old joint from the rack.
Keep dirt and loose metal particles out of the exposed steering rack connection. If the joint won’t release with the correct tool and procedure, stop to check for overlooked retaining hardware rather than adding uncontrolled force.
Step 6: Compare the Parts and Install the New Inner Tie Rod
With the old joint removed, compare it directly with the replacement.
Check the rack-side thread diameter and pitch, the length of the threaded outer rod, the joint housing dimensions, and any grooves or surfaces used by the locking system.
Don’t assume an inner tie rod is correct because it threads partway into the rack. Incorrect thread engagement or a mismatched retaining system can make the steering connection unsafe.
Inspect the exposed rack connection for damaged threads or signs of mechanical wear. Where the manufacturer permits, carefully remove old thread-locking residue and contamination without scratching the rack or allowing debris inside its housing.
Now identify the correct installation method for the replacement:
- Staked lock washer: Install the specified new washer in the correct orientation. Its locating features must engage the matching rack features where required. Stake the washer only after the joint has been tightened as instructed.
- Thread-locking compound: Apply the specified type and amount to the designated threads if required. Follow any cleaning and curing requirements.
- Retaining pin or special locking device: Fit the exact replacement locking hardware using the manufacturer’s procedure.
These are examples of different systems, not interchangeable methods. Don’t add threadlocker, grease, or a locking washer simply because another vehicle uses one.
Start the new inner tie rod by hand to avoid cross-threading. It should engage smoothly without forcing the threads together.
With the joint correctly positioned, use the approved holding method and inner tie rod tool to tighten it to the manufacturer’s specified torque. Make any required correction for the torque-wrench adapter setup.
Install or engage the locking hardware exactly as specified. A correctly torqued joint with a missing locking plate or improperly secured tab is not a finished steering repair.
Some replacement joints require a specified amount or type of lubricant. Others arrive permanently lubricated and sealed. Follow the part manufacturer’s instructions rather than packing grease into every joint or rack cavity.
Step 7: Refit the Rack Boot and Reconnect the Outer Tie Rod
Before reinstalling the bellows, inspect the rubber for cracks, punctures, damaged sealing lips, or deterioration around the clamp grooves.
A boot that’s already torn isn’t worth putting back on. It protects the steering rack and inner joint from water, dust, and road grit, and replacement is much easier while the assembly is apart.
Make sure the correct clamps are positioned where they’ll be needed, then slide the boot onto the new inner rod and fit its larger end onto the steering rack housing.
Seat the boot fully in the rack housing groove or designated sealing location. Reconnect any breather tube and make sure the vent passage isn’t blocked or pinched.
Secure the large inner clamp with the specified tool and replacement hardware. Then position the smaller end of the boot correctly on the inner tie rod and install its clamp.
Some replacement kits specify a particular strap or tie-style fastener, while others require a metal clamp. Don’t substitute an ordinary cable tie for a specified clamp without manufacturer approval.
The boot should remain seated through its normal movement without twisting, stretching excessively, or folding into nearby components.
Next, reinstall the jam nut and outer tie rod end. Use the turn count and measurements recorded during removal to establish an approximate starting position, while checking that the new assembly has the required thread engagement.
Because the new inner rod may not be dimensionally identical to the original, match the appropriate overall linkage length rather than relying only on the number of turns.
Reconnect the outer ball stud to the steering knuckle using the specified retaining hardware. Torque the connection as required and install a new cotter pin if the design uses one. Secure the jam nut following the prescribed adjustment and tightening procedure.
Step 8: Inspect the Steering Linkage and Complete the Repair
Before reinstalling the wheel, check the parts you’ve disturbed.
Confirm that the rack boot is seated correctly at both ends, the clamps are secure, and any ventilation tube is reconnected. Make sure the new inner joint has its specified retention system installed and that the outer connection uses the correct fasteners.
Check the steering linkage through the movement specified in the service procedure. Watch for a twisted bellows, trapped hose, interference with the subframe, or a joint that binds instead of articulating normally.
If the outer tie rod was disconnected, verify that its tapered stud is fully seated and correctly secured. Check the jam nut and the required thread engagement again.
Reinstall the wheel and start the lug nuts by hand. Lower the vehicle using the approved procedure and tighten the wheel nuts in the manufacturer’s specified pattern and torque.
Don’t consider the repair complete until the installation has passed its required checks and the wheel alignment has been addressed. If the steering binds, the wheels appear visibly misaligned, or the vehicle has unexpected movement or noises, correct the fault before driving.
How to Remove an Inner Tie Rod End Without the Special Tool
One of the most common questions is whether you can remove an inner tie rod without the long removal-tool kit.
Sometimes you can, but it depends on the joint housing and how much room surrounds the steering rack.
If the inner housing has accessible wrench flats, certain vehicles allow a correctly sized wrench to engage them directly. Some service procedures also permit other dedicated wrench arrangements when there’s enough clearance.
But there are two reasons not to improvise:
- Limited access: The joint may sit too close to the rack housing, subframe, or other components for an ordinary wrench to turn safely.
- Risk to the steering rack: Uncontrolled removal force can twist the rack, damage its connection, or place excessive load on the internal steering mechanism.
Locking pliers or a pipe wrench may appear convenient, but they’re not appropriate for every rack or joint design. Their jaws can slip or damage surfaces, and they don’t replace the specified method of counterholding the rack.
If the approved procedure calls for a dedicated inner tie rod tool, renting one is usually more sensible than risking damage to the steering rack to save the cost of a tool.
Common Problems During Inner Tie Rod Replacement
Inner tie rod replacement usually goes more smoothly when the outer threads aren’t corroded, the bellows come off cleanly, and the rack-side joint uses a standard tool adapter. Older vehicles don’t always cooperate.
The Inner Tie Rod Housing Won’t Unscrew
First, check for a retaining plate, staked washer, locking pin, or other mechanical lock that hasn’t been released.
Make sure the removal tool is fully engaged with the housing. A partly seated adapter can round the flats or slip when pressure is applied.
Verify the thread direction and any manufacturer-specific removal requirements. If a thread-locking compound was used during the original installation, follow the approved procedure for releasing it.
Avoid applying heat near steering rack seals, electrical components, rubber bellows, and hydraulic lines unless the vehicle manufacturer’s instructions specifically permit and control that operation.
If the housing remains immovable, professional assistance is preferable to damaging the rack shaft or internal gear mechanism.
The Steering Rack Boot Is Torn or Won’t Stay in Place
A boot that slips off repeatedly may have the wrong diameter, a damaged sealing lip, an incorrectly seated clamp, or a seating groove that hasn’t been engaged properly.
Check that the replacement boot matches the rack and that no retaining feature or ventilation connection was overlooked.
Don’t stretch a visibly damaged boot back into position and hope the clamp holds it. A compromised seal can allow dirt and moisture into an area that normally stays protected.
There’s Power Steering Fluid Inside the Bellows
On a hydraulic rack, the rubber bellows is primarily a protective cover, not the hydraulic pressure seal that retains power steering fluid.
If an appreciable amount of hydraulic fluid collects inside the boot, a leaking internal rack seal is a possibility. Changing the inner tie rod alone will not repair the hydraulic leak.
Identify the fluid and confirm its source before reinstalling everything. Electric power steering racks don’t all contain hydraulic fluid, so the correct diagnosis depends on the steering system used.
The Steering Feels Different After Replacement
If the steering wheel is off-center, the tires appear to point in different directions, or the vehicle pulls after the work, the toe setting may have changed.
However, significant binding, clunking, or unusual free play could also indicate a problem with the installed joint, retaining hardware, or another steering component.
Don’t assume all steering changes are harmless alignment issues. Inspect the mechanical installation first, and do not drive if the steering isn’t operating safely.
Do You Need an Alignment After Replacing an Inner Tie Rod?
Yes. A professional wheel alignment is strongly recommended after inner tie rod replacement because the repair changes or disturbs components used to set the front wheel’s toe angle.
The total effective length of the inner and outer steering linkage influences how far each front wheel points inward or outward. Even a small difference in the installed position can change the toe setting.
Recording measurements and counting turns can help return the replacement assembly to an approximate starting position. But they don’t measure the wheel’s actual angle relative to the vehicle.
Replacement parts may also have slightly different joint lengths, thread engagement dimensions, or manufacturing tolerances. Matching the old turn count doesn’t eliminate those differences.
Incorrect toe can cause tire scrubbing, uneven wear, steering-wheel misalignment, and unstable directional behavior. If you want to understand the geometry behind those effects, our toe-in vs. toe-out explanation covers how the two settings influence handling and tire wear.
Arrange the alignment promptly. If the toe is visibly incorrect or the vehicle cannot be moved safely, have it professionally transported rather than attempting a normal road test.
For more detail about which other suspension repairs require an alignment, see our guide to alignment after replacing suspension parts.
How Hard Is It to Replace Inner Tie Rod Ends?
For an experienced DIY mechanic, replacing an inner tie rod is generally an intermediate to advanced steering repair. The physical process is not unusually complicated, but access and correct installation are critical.
Compared with an outer tie rod, the inner joint is harder to reach, requires the rack boot to be removed, and may have locking hardware that’s easy to overlook.
The difficulty can rise substantially when the vehicle has limited subframe clearance, severe corrosion, electronic steering components, or a steering rack that needs a specific counter-hold procedure.
If you’ve never worked on steering linkage or aren’t confident identifying the correct locking system and tightening procedure, it’s worth having the work performed by a qualified technician. A damaged rack or improperly retained inner joint is not a minor installation mistake.
How Long Does Inner Tie Rod Replacement Take?
On a vehicle with straightforward access and hardware that releases normally, an experienced mechanic may replace one inner tie rod in roughly one to two hours. That is a general planning estimate rather than a fixed labor time.
A first-time DIY mechanic should allow considerably longer, particularly if the correct inner tie rod tool or boot-clamp equipment isn’t already available.
A seized outer adjustment nut, difficult rack-side retaining washer, restricted subframe access, or damaged boot can extend the repair substantially. Wheel alignment is a separate operation that also needs to be scheduled.
Is Replacing an Inner Tie Rod Yourself Worth It?
If you already own safe lifting equipment and suitable steering tools, DIY replacement can save labor on a vehicle with good access and manageable corrosion.
But the special tool, new locking hardware, boot clamps, and professional wheel alignment all contribute to the final cost. Savings can disappear quickly if a damaged rack boot or incorrect removal method creates additional repairs.
For a breakdown of typical U.S. parts and labor prices, see our tie rod replacement cost guide, which separates inner and outer repairs and explains how alignment affects the total bill.
Before starting, make sure the replacement part and required tools are available, and that the vehicle can remain safely out of service if a seized joint or unexpected repair issue delays the job.
Frequently Asked Questions
Can you replace an inner tie rod without removing the steering rack?
Yes, on many rack-and-pinion vehicles the inner tie rod can be removed and replaced with the steering rack still installed. A long inner tie rod removal tool allows access to the joint housing from the wheel-well area. Some steering systems require additional disassembly or have limited access that makes the job more difficult.
Do you have to remove the outer tie rod to replace the inner one?
On many vehicles, yes. Removing the outer end allows the adjustment nut and protective rack boot to slide off the inner rod. Some manufacturer-specific procedures use a different disassembly sequence, so follow the instructions for your vehicle rather than assuming every design is identical.
Can you replace just one inner tie rod end?
Yes. If only one inner joint is worn and the opposite side remains serviceable, replacing the faulty component alone is generally appropriate unless the manufacturer specifies otherwise. Both sides should still be inspected for joint play, boot damage, and other steering problems.
Can you reuse the steering rack boot?
Usually, if it’s undamaged, compatible, and the manufacturer permits reuse. Inspect the bellows for splits, hardened rubber, stretched sealing surfaces, and damage caused during removal. Replace single-use clamps as required and make sure any breather tube is correctly reconnected.
Do inner tie rods need threadlocker?
Some applications require a specified thread-locking compound, while others use staked lock washers, retaining pins, or different locking methods. Follow the vehicle and replacement-part instructions. Don’t apply an arbitrary threadlocker or substitute it for required mechanical locking hardware.
Can you drive immediately after replacing an inner tie rod?
Only if the steering assembly has been correctly installed and inspected, all required fasteners and locking devices are secure, and the vehicle is safe to move. A wheel alignment should be arranged promptly. If the steering binds, feels loose, or the wheels appear significantly misaligned, do not drive until the issue is corrected.
Before You Call the Inner Tie Rod Replacement Finished
Replacing an inner tie rod is more involved than changing the outer end, mainly because the inner joint attaches directly to the steering rack and sits behind a protective bellows. Getting the old part off is only half the job.
The replacement must match the rack connection, be tightened with the correct counter-hold and torque procedure, and use the specified locking system. The rack boot also needs to seal properly, with its clamps and ventilation connections correctly positioned.
Take time to inspect the finished steering linkage before reinstalling the wheel. Then arrange the post-repair alignment rather than trusting a paint mark or turn count as proof that the steering geometry is correct. If the rack threads, retaining components, or steering behavior don’t seem right, resolve the problem before putting the car back on the road.