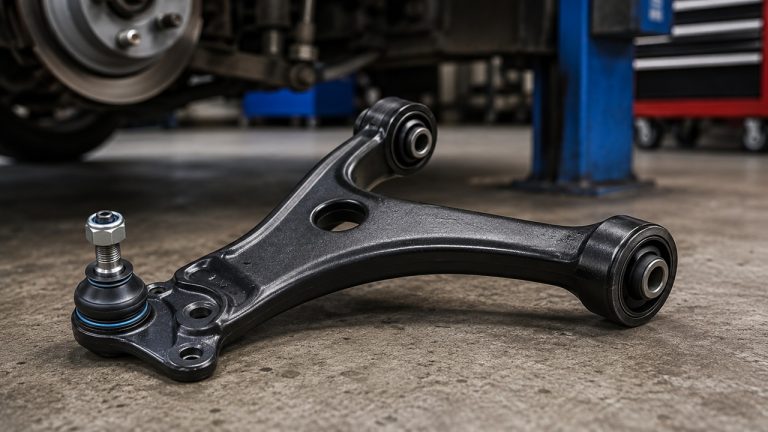
How to Grease Ball Joints: Safe Step-by-Step Guide
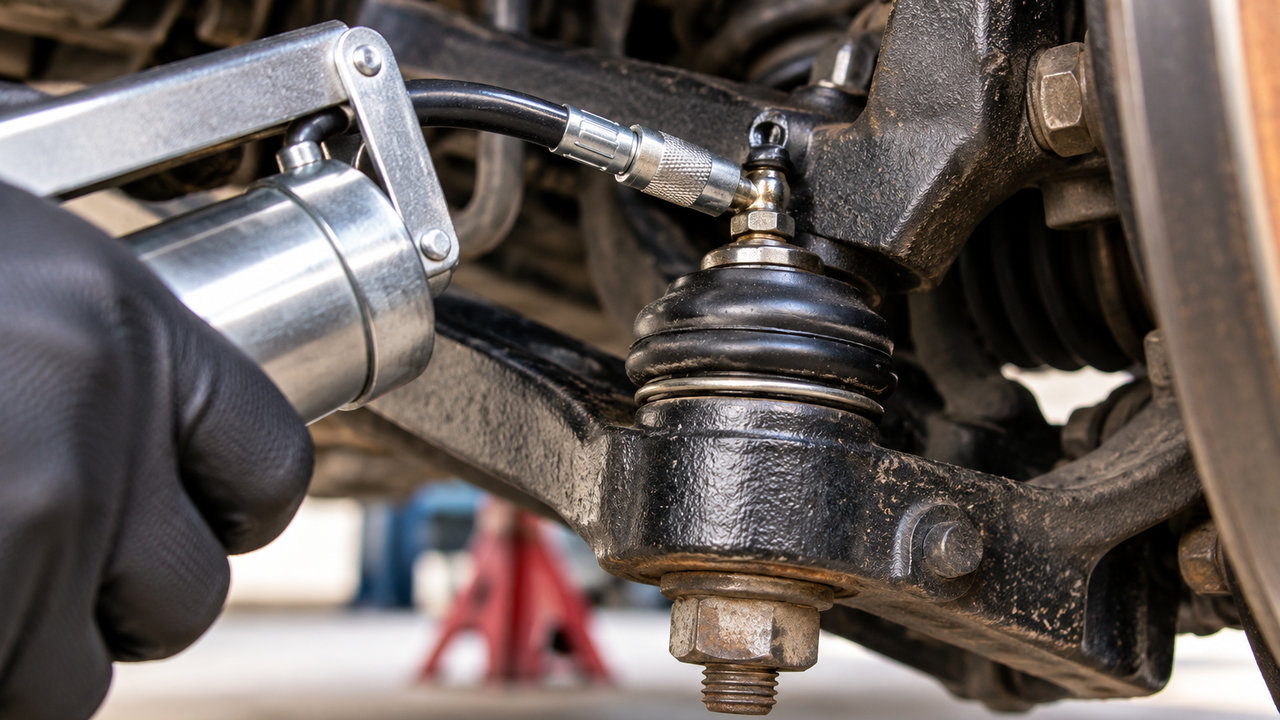
To grease a ball joint, first make sure it has a serviceable grease fitting, also called a Zerk fitting. Clean the fitting, connect a hand-operated grease gun, and pump slowly while watching the rubber dust boot. Stop when the joint reaches the fill point specified by its manufacturer—often when old grease appears at a designated relief valve or the boot just begins to expand. Disconnect the gun and wipe away the excess.
That’s the basic job. The part that deserves more attention is knowing when to stop. Too much pressure can damage the boot, and a torn boot gives water and road grit a way into the joint.
This guide covers greaseable upper and lower ball joints, the tools you’ll need, what to do when grease won’t flow, and why a sealed ball joint without a service port needs a different approach.
Before You Start: Is Your Ball Joint Greaseable?
Take a look at the actual part before getting the grease gun out. Many factory-installed ball joints are sealed and aren’t designed for routine lubrication. Aftermarket replacements from manufacturers such as MOOG and Mevotech may have service fittings even when the original joints didn’t.
On a conventional greaseable ball joint, look for a small metal nipple on the joint housing. It may point straight out, sit at an angle, or be tucked into a difficult-to-reach area. This is the Zerk fitting, which contains a small check valve that opens when grease is pumped into it.
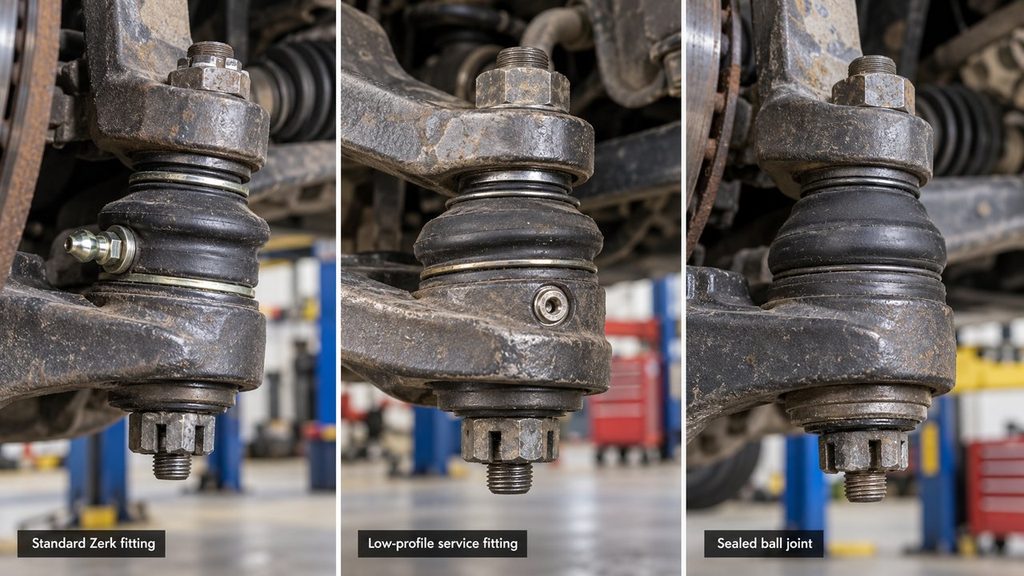
| What you find | What it means |
|---|---|
| Standard Zerk fitting | The ball joint is designed for lubrication through a compatible grease gun coupler. |
| Approved low-profile service fitting | A special adapter or needle-tip coupler may be required. Follow the part manufacturer’s instructions. |
| No service fitting or approved port | Usually a sealed, maintenance-free joint. Do not assume it can be greased. |
| Torn boot, significant play, or damaged housing | The joint needs inspection or repair, not simply additional grease. |
If you don’t recognize the fitting, check the part number. A replacement ball joint may be different from the one shown in your vehicle’s original service manual. Some designs also use removable or temporary service fittings, so identification matters.
Tools and Supplies You’ll Need
This isn’t a complicated tool collection. For a routine lubrication service, a few basic items are enough:
- Hand-operated grease gun: A pistol-grip or lever-action model gives you control over how much grease enters the joint.
- Correct chassis grease: Use the formulation specified by the ball joint manufacturer.
- Flexible grease gun hose: Helpful when the fitting is behind a control arm or close to the steering knuckle.
- Compatible grease gun coupler: An adjustable or locking coupler can make difficult fittings easier to reach.
- Clean shop towels and gloves: For removing grit, old grease, and residue.
- Flashlight: Useful for spotting small fittings, tears in the boot, and grease relief points.
- Jack and properly rated jack stands: Only if additional access is necessary and the vehicle manufacturer’s lifting procedure permits it.
For many serviceable automotive ball joints, premium NLGI #2 chassis grease is appropriate, but some aftermarket joints have additional requirements. If you’re unsure about lithium, synthetic, or moly formulations, our ball joint grease guide explains the differences and how to choose the right product.
Make sure the grease gun is loaded and primed before connecting it to the vehicle. Squeeze a little grease from the coupler into a disposable towel to confirm that the gun is delivering lubricant rather than air.
Safety: Work on firm, level ground with the vehicle secured against movement. If you need to raise it, follow the specified lifting and support points, and never work beneath a vehicle held up only by a hydraulic jack. Suspension springs and control arms can remain heavily loaded even when a wheel is off the ground; this maintenance procedure does not require loosening suspension fasteners or separating the ball joint.
How to Grease Ball Joints With a Zerk Fitting: Step by Step
The following procedure applies to a healthy ball joint designed for routine grease-gun servicing. Check the part-specific instructions before starting, especially on newly installed aftermarket components.
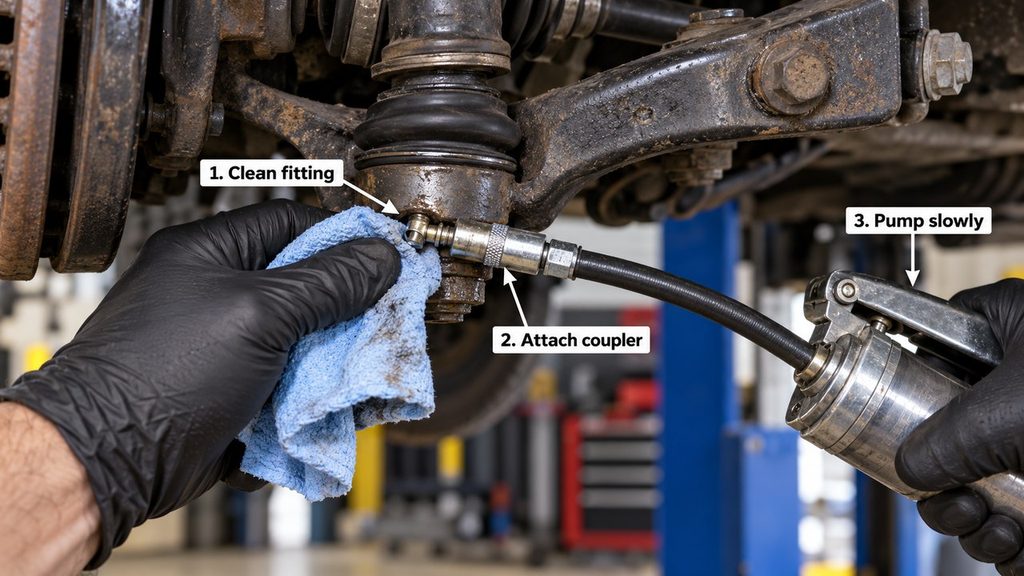
Step 1: Locate the fitting and inspect the boot
Find the grease fitting on the ball joint housing. Depending on the suspension design, it may be visible from beneath the vehicle or through an opening near the wheel assembly.
Before connecting anything, examine the rubber dust boot. Look for splits around the folds, loose retaining rings, grease leaking through a tear, and places where the boot has pulled away from its mating surfaces.
A little old grease near an intentional relief opening isn’t necessarily a problem. Grease escaping through damaged rubber is another story. If the boot is already torn, don’t assume pumping fresh lubricant into it will make the joint serviceable again.
Step 2: Clean the Zerk fitting thoroughly
Road dirt tends to collect around the base of a grease fitting, particularly on trucks that see muddy roads or winter salt. Wipe away old grease and grime until the metal nipple and surrounding area are clean.
Pay attention to the small ball in the center of the fitting. That’s part of its check-valve mechanism. Dirt pushed through that opening can reach the bearing surfaces you’re trying to protect.
If the fitting is badly rusted, loose, or damaged, address that before pumping grease. Don’t scrape debris into the opening or try to force lubricant past a visibly defective valve.
Step 3: Attach the grease gun coupler
Press the coupler onto the Zerk fitting as squarely as access allows. It should grip the nipple securely rather than rest loosely against the end.
Some couplers have an adjustable sleeve; others use a locking mechanism. Follow the coupler’s instructions and make sure the connection is secure before operating the gun.
If the hose runs at an awkward angle, reposition it instead of pulling sideways on the fitting. A flexible hose usually makes this easier than a rigid extension.
One simple check: if grease immediately escapes between the gun coupler and the Zerk fitting, the connection may not be seated properly. Stop and correct it before proceeding.
Step 4: Pump grease slowly into the joint
Operate the grease gun gently, allowing time for lubricant to move through the fitting and into the joint. Keep your attention on the dust boot and any manufacturer-designed grease relief point.
On many MOOG greaseable chassis components, the servicing instructions call for adding grease until old lubricant is displaced through the relief valve near the boot and stud. When there is no visible purge, MOOG instructs technicians to stop when the boot begins to swell rather than overfill it.
Other designs may use different fill limits. Some need only a small replenishment amount. Follow the instructions for the installed joint, not a fixed number of strokes copied from a different vehicle.
Stop immediately if pressure rises unusually, the boot balloons, or grease escapes from an unintended location. A grease gun can produce substantial pressure even when operated by hand. More grease is not automatically better.
Step 5: Release the coupler without damaging the fitting
Once the correct fill point is reached, stop pumping and release the coupler using its intended mechanism. A locking coupler may need to be unlocked first. Some conventional couplers release with a slight controlled movement after pressure is relieved.
Don’t yank the hose or use the grease fitting as a lever. A snapped Zerk fitting turns a straightforward maintenance job into an unnecessary repair.
If the coupler seems stuck, check whether its jaws are still gripping the fitting and follow the tool manufacturer’s release procedure. Forcing it sideways can damage the nipple or threads.
Step 6: Wipe everything clean and check the result
Remove excess grease from the fitting, joint housing, and surrounding surfaces. Old grease mixed with dirt makes future inspections harder and can hide a small leak.
Check that the boot remains seated, its retaining hardware is intact, and there is no fresh split or unexpected leakage. If the component uses a removable service fitting or protective plug, restore it exactly as its instructions require and verify that it won’t interfere with nearby moving parts.
Repeat the process on any other serviceable ball joints that are due for maintenance. Once the vehicle is safely reassembled and lowered, a short drive followed by another visual inspection can help reveal a boot that has started leaking.
How Much Grease Should You Put in a Ball Joint?
There is no universal pump count. A small pistol-grip grease gun and a large lever-action gun may deliver different amounts with each stroke. The internal capacity of the joint and the way its boot manages excess lubricant also vary.
Mevotech says that 2–3 pumps from a typical grease gun are usually adequate when servicing its components, and that visible dust-boot movement is a useful stopping cue. MOOG describes a procedure based on controlled purging through the boot’s relief valve, or the first sign of boot expansion when grease doesn’t exit.
Those are manufacturer-specific guidelines, not instructions to pump every ball joint until its boot is visibly swollen.
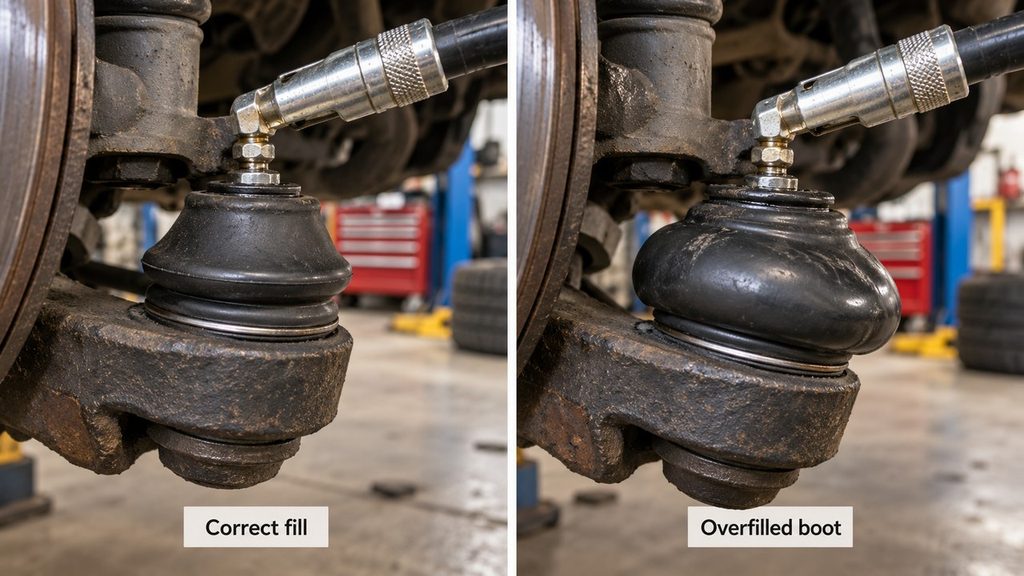
| What happens while greasing | What to do |
|---|---|
| Old grease exits through the intended relief valve | Stop at the manufacturer-specified purge point. |
| Boot just begins to change shape, with no intended purge visible | Stop if that is the specified fill indication for the component. |
| Boot becomes round, tight, or noticeably ballooned | Stop immediately. Do not add more grease. |
| Grease leaks around the gun coupler | Check the connection; lubricant may not be entering the joint. |
| Gun becomes unusually difficult to operate | Stop and investigate a blocked fitting, hose, or incorrect connection. |
A dust boot is a protective seal, not a balloon that should be inflated until it feels hard. The aim is to lubricate the bearing and maintain its seal—not fill every available space with excessive pressure.
How to Grease Ball Joints Without a Zerk Fitting
If a ball joint has no visible Zerk fitting, first determine whether it is truly sealed or uses a less obvious approved service port. These are two different situations.
A sealed, non-greasable ball joint
Most factory-sealed ball joints are assembled with lubricant and protected by a dust boot intended to keep that lubricant in place throughout the component’s service life. There is no routine maintenance step that involves adding grease through the rubber.
You may come across advice to insert a grease needle through the dust boot and pump lubricant into the space underneath. Although some DIY guides describe this method, we don’t recommend piercing an otherwise intact factory seal as routine maintenance.
The puncture can create a contamination path, and there is no guarantee that added grease reaches the loaded bearing surfaces rather than simply collecting inside the boot. Patching the hole afterward doesn’t restore the original engineered sealing arrangement.
If a sealed joint is noisy, leaking, or loose, inspect it using the manufacturer’s service procedure. Replacement may be necessary, particularly when the boot or internal bearing is damaged.
A serviceable joint with a low-profile fitting
Some aftermarket suspension components use a recessed or low-profile service fitting instead of a conventional raised Zerk nipple. MOOG, for example, specifies a needle-tip adapter for certain low-clearance applications.
In this case, the needle-style tool is used with the designated grease fitting, not to puncture the rubber boot. Confirm the correct adapter and service procedure for the installed part.
This distinction is particularly useful when searching for ways to grease a ball joint without a nipple: the absence of a standard nipple does not always mean the absence of an approved lubrication port.
How to Grease Upper and Lower Ball Joints
The actual lubrication method is generally similar for serviceable upper and lower ball joints. What changes is their location, access, and sometimes the design of the fitting.
On a traditional double-wishbone front suspension, there may be an upper ball joint at the outer end of the upper control arm and a lower ball joint near the lower control arm. Some trucks have grease fittings on both; others have a mixture of sealed and serviceable components.
A MacPherson-strut suspension often has a lower ball joint but no equivalent upper ball joint, because the strut mount serves as the upper steering pivot. Don’t search for four grease points on a vehicle that only has two ball joints.
Lower fittings can be obstructed by a steering knuckle, axle shaft, brake components, or nearby suspension hardware. Some replacement joints therefore use angled or side-mounted fittings. Mevotech has documented certain solid-axle applications where locating the fitting on the side of the ball joint housing improves clearance around the axle U-joint.
Use the fitting’s intended access point. If access requires removing a wheel or raising the suspension, follow the vehicle’s support instructions. Never loosen a loaded ball joint or control-arm connection just to reach a grease fitting.
Why Won’t My Ball Joint Take Grease?
Sometimes the hardest part of greasing a ball joint is getting the grease to enter it. Before assuming the joint is blocked internally, check the simple things.
| Problem | Possible cause | What to check |
|---|---|---|
| Grease leaks at the coupler | Loose, misaligned, or incompatible coupler | Reseat the coupler and check its adjustment. |
| Gun handle moves but nothing enters the joint | Air in the gun or an empty cartridge | Prime the gun and verify grease flow away from the vehicle. |
| Fitting won’t accept grease | Clogged or damaged Zerk check valve | Inspect the fitting and replace it if the manufacturer permits. |
| Pressure increases quickly | Blocked passage, incorrect connection, or a joint that cannot accept more grease | Stop pumping and investigate before proceeding. |
| Grease emerges from an unexpected location | Loose fitting or damaged boot | Inspect the seal and joint instead of adding more grease. |
Start by testing the grease gun away from the vehicle. If it won’t deliver grease freely, the problem may be in the gun, cartridge, or hose rather than in the suspension.
If the gun works, inspect the fitting. The tiny spring-loaded valve can become clogged with hardened grease or corrosion. On a compatible serviceable joint, a damaged removable Zerk fitting may be replaced with the correct approved type. Avoid forcing grease into a blocked passage with increasing pressure.
Also resist the temptation to heat a clogged fitting with an open flame. Rubber boots, grease, brake hoses, and other nearby components can be damaged. If the joint still refuses grease after the fitting and equipment have been checked, seek the manufacturer’s service guidance.
Do New Ball Joints Need to Be Greased?
Sometimes, yes—even if the packaging says the part is pre-greased.
There’s a difference between the grease added during factory assembly and the lubrication procedure required after installation. Some serviceable aftermarket joints arrive with enough lubricant for handling and assembly but need an additional amount to fill the boot or complete the installation process.
MOOG recommends greasing its serviceable components at installation, including filling the boot and lubricating the interface between the boot and mating part. Mevotech says its parts are pre-greased but generally recommends adding a pump or two at the end of installation.
These recommendations should not be transferred automatically to every brand. Some factory-sealed replacements are ready to install without any additional lubricant. Others have specific requirements for the supplied grease, fitting orientation, or service adapter.
If you’ve just fitted a new control arm with an integrated ball joint, check the instructions for the complete assembly as well. Don’t assume that every ball joint supplied inside an aftermarket control arm has the same lubrication requirement.
How Often Should You Grease Ball Joints?
There isn’t one service interval that applies to every vehicle. The schedule depends on the installed joint, operating conditions, and manufacturer recommendations.
MOOG recommends servicing its greaseable chassis parts at each oil change on heavy-duty vehicles, and at each tire rotation (approximately annually) on standard-duty vehicles. Mevotech recommends coordinating lubrication with engine oil service.
Those schedules are useful references, but the instructions for your actual part take priority. Frequent exposure to mud, road salt, water, or off-road conditions may also justify more frequent inspection and maintenance.
A long oil-change interval doesn’t automatically mean every suspension joint should wait that long between inspections. Likewise, a vehicle with sealed original-equipment ball joints does not suddenly need grease-gun servicing simply because its engine oil is being changed.
If you prefer having this maintenance performed professionally, the suspension lubrication cost guide covers the broader service and what a shop may include.
When Greasing a Ball Joint Won’t Solve the Problem
A ball joint can be properly lubricated and still be worn out. Grease reduces friction; it cannot rebuild an enlarged bearing socket, restore a damaged ball stud, or remove excessive clearance.
Pay attention to warning signs such as:
- Noticeable looseness or movement beyond the manufacturer’s allowable specification.
- A persistent clunk when changing direction or going over bumps.
- Steering that feels vague, unstable, or unusually inconsistent.
- A badly torn dust boot, visible contamination, or significant grease loss.
- Abnormal tire wear associated with suspension or steering looseness.
These symptoms don’t prove that a particular ball joint is faulty. Tie rod ends, control-arm bushings, sway bar links, and other suspension components can create similar noises. Our guide to suspension clunks and rattles explains how the possible causes differ.
Proper ball joint inspection may require raising or supporting the suspension in a specific way, depending on whether the joint carries the vehicle’s load. A casual wheel-wiggle test doesn’t replace the specified inspection procedure or wear measurement.
If a joint is confirmed worn beyond specification, it needs repair or replacement rather than another shot of grease. Our ball joint replacement cost guide explains the factors that affect parts and labor prices.
Common Ball Joint Greasing Questions
Can you grease a ball joint with a needle?
A needle-style adapter is appropriate when it connects to a manufacturer-approved low-profile service fitting. That is different from puncturing a sealed dust boot. We don’t recommend injecting grease through an intact, non-serviceable boot because the puncture can compromise the seal and the lubricant may not reach the bearing surfaces.
How do you know when a ball joint has enough grease?
Use the stopping point specified for that joint. Depending on the design, this may be the appearance of old grease at a relief valve or the first slight movement of the dust boot. Never keep pumping until the boot balloons or the gun becomes unusually hard to operate.
Will greasing a squeaky ball joint help?
It can help when a healthy, serviceable joint is due for lubrication. It won’t correct mechanical wear or a damaged seal. If the squeak continues, or the suspension has looseness or clunking, identify the actual cause before driving further.
Should the wheel be on or off the ground when greasing?
It depends on the access requirements and service procedure for the vehicle and ball joint. Some fittings can be reached safely with the vehicle on the ground, while others require lifting and supporting it. Don’t assume the suspension must always be loaded or always hanging at full droop. Follow the manufacturer’s instructions and support the vehicle correctly whenever it is raised.
Can you use a powered grease gun on ball joints?
A hand-operated gun is generally the safer, easier-to-control choice for routine ball joint lubrication. Powered guns can deliver grease rapidly and generate high pressure. If a manufacturer permits one, its specified pressure and delivery precautions must be followed. Stop immediately if the boot or fitting shows signs of excessive pressure.
Do you need to remove old grease first?
Not necessarily. Some serviceable joints are designed to purge old grease through an intended relief path as fresh grease enters. But not all joints can or should be flushed this way. If the existing grease is unknown or potentially incompatible with the replacement lubricant, follow the part manufacturer’s guidance rather than attempting to force all the old grease out.
A Few Minutes of Care Can Prevent a Bigger Repair
Greasing a serviceable ball joint is a fairly small job: identify the fitting, clean it, connect the gun, add the specified amount slowly, and check that the boot remains intact.
The important part isn’t how many pumps you can get into the joint. It’s knowing what you’re servicing and recognizing when enough is enough. A clean fitting, the correct lubricant, and a properly sealed boot will do more for the joint than overfilling it ever could.
And if the ball joint is sealed, damaged, or already loose, don’t turn routine maintenance into an improvised repair. Inspect it properly and address the underlying problem.