Shock Mount Brackets: Weld-On vs Bolt-On & Fitment
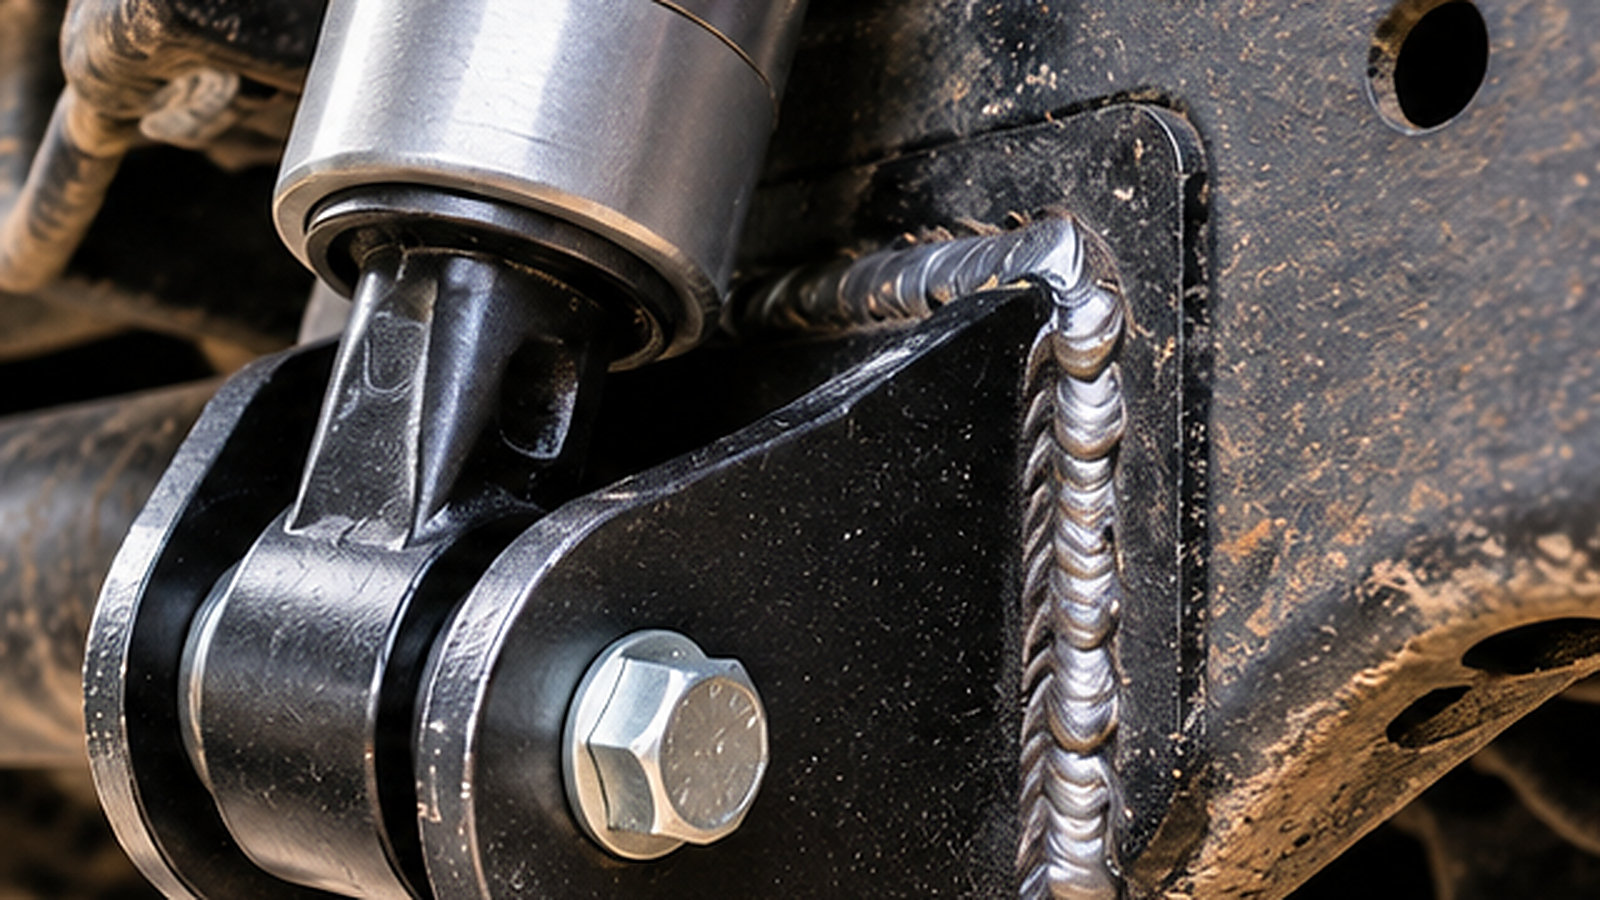
Shock mount brackets are the metal attachments that hold a shock absorber to the chassis, axle, or suspension arm. If you are shopping for them, the quickest way to narrow the options is to identify where the bracket mounts, how the shock attaches, and whether welding is required. A universal weld-on tab is not a direct replacement for a rusted factory upper mount, and a bolt-on relocation kit is not automatically suitable for every truck with a 1/2-inch shock bolt.
For a damaged original bracket on a daily-driven pickup, start with an exact-fit repair part or an application-specific kit. For a custom axle, solid-axle swap, or off-road build, look at weld-on tabs and axle-tube brackets only after measuring the shock eye and the available mounting space. Coilover brackets deserve an additional check: some must carry the vehicle’s spring load, not just damper forces. That difference can rule out an otherwise tempting universal tab.
Shock Mount Brackets: Match the Type to the Job
Retail catalogs tend to put everything from a tiny weld-on tab to a complete shock tower under the same heading. The part that works depends less on the product name than on the surface it attaches to and the load it is designed to handle.
| Mount style | Usually chosen for | Check before ordering |
|---|---|---|
| Vehicle-specific bolt-on bracket | Replacing a damaged mount or fitting a tested relocation kit | Exact year, chassis, location, mounting holes, included hardware |
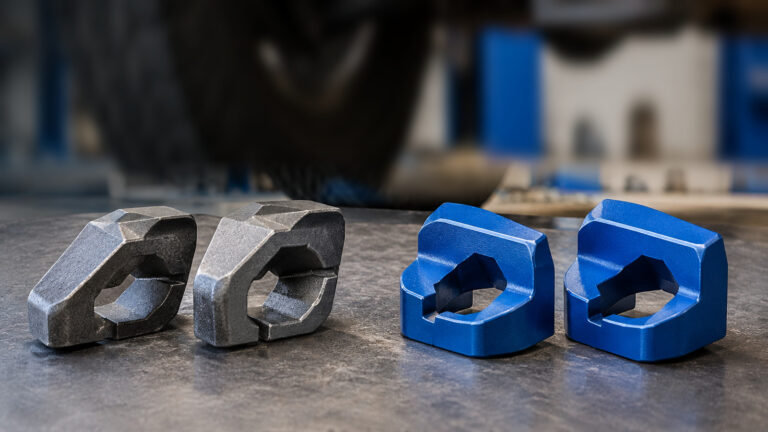
| Weld-on shock tab or clevis | Custom tube chassis, axle housing, or fabricated suspension | Parent material, weld surface, bolt direction, shock-eye width |
| Axle-tube saddle bracket | Lower shock mounting on a solid axle | Actual tube outside diameter, radius, clocking, weld access |
| Shock tower, hoop, or upper frame mount | Upper attachment for long shocks or a custom shock layout | Load path, body clearance, reinforcement, frame attachment |
| Shock relocation or extension bracket | Correcting a specific mount position or application clearance | Supported shock style and full bump/droop travel |
| Coilover mounting kit | Coilover conversion or an engineered performance suspension | Whether the bracket and structure are rated for spring loads |
The table is a starting filter, not a fitment chart. Two brackets with the same bolt hole may have different offsets, tab spacing, steel thickness, and requirements for what they attach to. Those differences often matter more than the bracket’s advertised “universal” label.
What Counts as a Shock Mount Bracket?
The basic job is to transfer damper forces into a stronger vehicle structure while allowing the shock end to move through its intended angular range. A mount that fits at ride height but binds when the axle articulates is not doing that job correctly.
Eyelet Tabs, Clevises and Shock Studs Are Not Interchangeable
An eyelet shock commonly passes a bolt through a bushing sleeve or a spherical bearing between two supporting tabs. A single-sided eyelet bracket or stud mount uses a different load path. A stem-mount shock passes its threaded shaft through a panel or engineered fitting, usually with shaped rubber grommets. A bar-pin mount has its own bolt pattern and hardware.
You can sometimes change an attachment with a manufacturer-approved conversion kit, but the attachment name is not merely packaging language. It identifies where the hardware bears load and how the joint is allowed to rotate. If the shock end in your hand looks nothing like the bracket photograph, pause before ordering.
A Shock Tower Is More Than a Tall Tab
Upper towers and hoops move the shock attachment higher or farther outward to make room for a longer damper. They may be part of a linked rear suspension, a bed-cage layout, or a purpose-built off-road system. Unlike a simple replacement tab, a tower must transfer forces through frame attachment points and any reinforcement specified by its manufacturer.
A tall bracket can also interfere with a tire, bed floor, exhaust, fuel line or spring. The fact that a shock fits between its two holes on a bench does not establish that the tower clears the vehicle through full travel.
A Shock Mount Is Not a Rubber Bushing
A bracket is the structural metal attachment; the bushing or bearing is the joint at the shock end. A metallic clunk can come from either one. If the steel tabs are intact but the eyelet has shifted around a worn sleeve, buying weld-on brackets will not fix the cause. Our shock absorber bushings guide covers those joints and the hardware differences in more detail.
Weld-On vs. Bolt-On Shock Mount Brackets
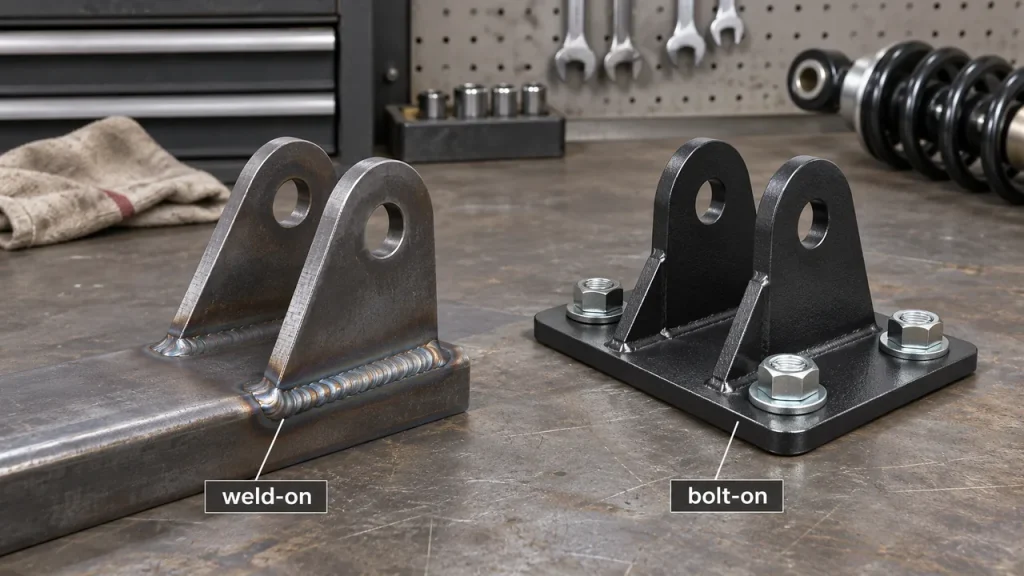
This is the decision most buyers actually face. Welding offers placement freedom on a properly engineered custom build. Bolting makes the most sense when a bracket has been designed for the vehicle’s existing structure, hole pattern and loads. Neither method is automatically better in every situation.
Weld-On: Flexible Placement, Less Room for Guesswork
Weld-on shock brackets are popular when the axle housing or frame has been changed enough that a stock mount will no longer work. A fabricator can position a tab pair to clear the shock body, choose the needed mounting width, and place the bolt in a useful orientation. Many are sold unfinished, ready for final fitting and welding.
That flexibility comes with real responsibilities. The weld area must be suitable, surrounding parts protected, and the bracket positioned with travel and load direction in mind. Axle tubes, cast centers, suspension arms, and vehicle frames are not interchangeable welding surfaces. Welding near brake components, seals, fuel systems or electronic wiring also brings additional hazards. Use a qualified suspension fabricator and the vehicle and component manufacturers’ instructions rather than treating every bare steel tab as an invitation to weld anywhere.
Bolt-On: Look for an Engineered Hole Pattern
A good bolt-on bracket has a defined application, designed fastener locations and a way to carry its forces into suitable metal. It might replace a failed original mount or relocate the lower eyelet on a specific chassis. It does not need welding merely because it is used off road.
The catch is that “bolt-on” describes the attachment method, not universal compatibility or necessarily a drill-free job. Some kits require holes to be drilled or existing mounting points to be modified. Do not assume a general flat plate with two holes becomes a safe shock mount just because it can be bolted to thin sheet metal. Follow the kit’s reinforcement, fastener and surface requirements.
What About Clamp-On Axle Mounts?
Clamp-on shock mounts appear in racing and custom chassis catalogs. They can be useful where a manufacturer has engineered the clamp for a specific tube size and application. But a generic clamp that happens to wrap around an axle tube should not be assumed to withstand shock loads, impacts or movement without slipping. Check the maker’s approved use and whether any welding, locating feature or secondary retention is required.
For an original-equipment truck with a rusty bracket, the choice normally begins with a vehicle-specific repair design—not a universal clamp chosen to avoid a welding bill.
Upper, Lower, Front and Rear: Location Changes the Design
A bracket’s position tells you what structure it has to fit. “Rear shock mount” alone may still describe four very different parts on the same truck: left upper, right upper, left lower and right lower.
Lower Axle Shock Mount Brackets
On solid-axle trucks, a lower mount may weld to an axle tube, attach to a spring plate, or use an OEM bracket. Catalog terms such as axle shock mount, lower shock tab, and axle-tube saddle often point here. Look for the correct tube contour or mounting base first, then check bolt orientation, clearance and where the shock will sit relative to the axle housing.
If the kit specifies a 3.00-inch axle tube and yours is 3.25 inches, the welded saddle is not a confirmed match. QA1, for example, offers separate heavy-duty bracket kits for those two nominal tube diameters. The dimensions are product applications, not universal measurements for all pickup axles.
Upper Frame Mounts and Shock Towers
An upper mount commonly attaches at the chassis or body-side structure. On a stock vehicle it may be a welded or bolted factory bracket; on a custom build it could be an upper hoop or crossmember. An upper bracket that sticks farther out can help with access or packaging, but may also introduce leverage and clearance issues that the original mounting point did not have.
Be particularly cautious about bolting a new tab to an arbitrary frame flange. A manufacturer-designed kit may distribute load across several points or use reinforcements. A single narrow tab attached to an unsupported section of sheet metal is a different proposition.
Some Shock Brackets Are Side-Specific
A left and right bracket may be mirror images, angled differently, or offset to clear a tire, exhaust or brake hose. It is worth comparing both sides of the vehicle before taking anything apart. A listing marked “pair” is not proof that the two pieces can be installed in either position; equally, two identical generic tabs may be correct for a symmetrical custom setup.
The Measurements That Make or Break Fitment
This is where catalog shopping usually slows down. Start with the shock end and its hardware, then measure the surface that will carry the bracket. A tape measure is useful for rough planning; the supplier’s dimensional drawing and an accurate caliper are better for final hole and width checks.
Shock Eye Width and Inside Tab Spacing
Measure the assembled width of the eyelet bushing sleeve or the bearing with its specified spacers—the portion intended to sit between the mounting faces. Then compare that with the bracket’s clear inside width. Too narrow and the assembly will not seat. Too wide and the bolt may pull unsupported tabs inward instead of clamping the intended sleeve or spacers.
As a real product example, GenRight describes formed mounting tabs with 1.50-inch spacing and parallel 1/2-inch holes for certain off-road shock applications. That is a specification for that tab design, not a standard shared by every shock eye or bracket. See the manufacturer’s shock-mounting tab specification to see why the mounting width and hole size must be read together.
Bolt Diameter, Sleeve Bore and Threaded Hardware
The bracket hole, bushing sleeve or bearing bore, and specified fastener must agree. A nominal 1/2-inch bolt is not automatically interchangeable with a metric bolt that looks close in a blurry listing photo. Also check whether the hardware is through-bolted with a nut, threaded into a captive fitting, or part of a stud-style mount.
A slightly loose bolt may let the eyelet move and damage the mounting holes. Overtightening hardware against the wrong sleeve or bushing can cause problems of its own. Follow the component’s fastener grade, washer arrangement, locking method and torque instructions; there is no single shock-bracket torque specification.
Axle Tube Diameter and Mounting Radius
A lower weld-on mount shaped to sit on a round axle housing needs a contact radius compatible with the actual tube. A flat tab intended for square or flat structural surfaces is not automatically suitable for round tubing, and the axle housing may not have the same diameter along its full width.
Note where the suspension links, U-bolts, brake lines, differential housing, and spring plates sit. A saddle whose radius is correct but which leaves no safe weld access or no space for the shock is still the wrong part. Do not grind away a structural bracket to force an off-the-shelf saddle into place.
Mounting Height, Offset and Bolt Direction
The center of the mounting hole fixes where the shock starts its travel. If a replacement tab shifts that center, even by a modest amount, the compressed and extended shock distances change. Offset and bolt direction also determine whether the eyelet can pivot without hitting the bracket or shock body.
Manufacturers sometimes sell parallel and perpendicular axle-tube bracket versions. Those terms describe the intended relationship of mounting hardware or tabs to the axle and must be read with product drawings, not guessed from the word “universal.” Choose the orientation needed by the actual damper end and its movement through suspension travel.
Single-Shear vs. Double-Shear Mounting
These descriptions are common in off-road product listings. They matter, but they are not substitutes for correct fitment or an engineered installation.
Why Two Supporting Tabs Are Often Preferred
In a typical double-shear eyelet arrangement, a bolt passes through one tab, the eyelet sleeve or bearing, and a second tab. The joint is supported on both sides. A single-shear layout supports the bolt at one side only, so its bending and load demands are different. That is one reason many fabricated shock and coilover brackets use two-tab clevis arrangements.
Do not turn that into a rule that every single-sided factory mount is unsafe. Manufacturers engineer many valid stud, pin and single-shear arrangements for particular vehicles. A poorly positioned, badly welded double-tab bracket can fail, while a correctly designed OEM single-sided mount can last for years.
Coilover Loads Are Not Ordinary Damper Loads
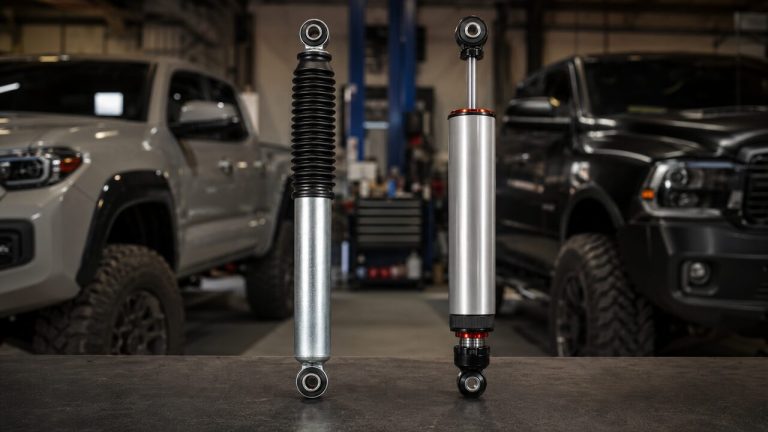
A conventional shock primarily resists suspension motion. A true spring-over-shock coilover assembly also transmits substantial spring force through its mounts. Replacing a non-load-bearing shock bracket with a coilover without engineering the supporting structure can overload the bracket or chassis.
For a coilover conversion, use a mount and vehicle structure specifically designed for the intended spring and damper loads. QA1’s heavy-duty coilover bracket kits, for instance, are described as double-shear weld-in assemblies intended for specific axle-tube diameters. That is a different product category from an inexpensive tab for an ordinary damper.
Bracket Position Must Work at Full Bump and Droop
Even a perfectly sized metal bracket can be wrong when installed in the wrong place. Before selecting a new mounting position, cycle the suspension or follow the engineering measurements supplied with a complete kit. Clearance at parked ride height only tells part of the story.
At Full Bump, the Shock Must Have Compression Reserve
When the axle or wheel reaches its designed compression limit, the shock must not bottom internally ahead of the suspension’s intended stop. Relocating an upper bracket downward or a lower bracket upward can reduce the compressed mount-to-mount distance. It may also bring the shock body into contact with the frame, tire or other hardware.
Our bump stops guide explains why the intended compression stop needs to protect the damper. The mounting tab should not create a new hard stop by trapping the shock eye against its own steel edges.
At Full Droop, Watch Extension and Joint Articulation
The other end of travel can be just as troublesome. A relocated mount may ask the shock to extend farther than its designed length, or force an eyelet bushing or spherical bearing beyond its allowed angular movement. If the shock, rather than an approved suspension limit, stops droop abruptly, the new bracket and damper can take loads they were not intended to absorb.
For measured extended, compressed and ride-height distances, use the shock length calculator. This article focuses on bracket selection; the calculator handles the dimensional shock-travel comparison. Both checks are needed on a modified mount layout.
A Straighter Shock Is Not Automatically a Better Mount
Relocation kits sometimes move an inboard shock outward or change its angle to improve packaging, access or control. Changing shock angle also changes the relationship between wheel movement and damper movement. That can alter effective damping and stroke usage even if the shock itself stays the same.
If you are building a genuine long-travel suspension, the bracket location is part of the broader geometry—not a stand-alone accessory. Our long-travel suspension guide covers the supporting steering, axle and travel considerations separately.
Choosing Brackets for a Stock Truck, Jeep or Custom Build
The part numbers and terminology change with the vehicle, but the buying process becomes easier once you know which problem you are solving.
Replacing a Rusted Original Shock Mount
For a daily-driven truck with a corroded upper or lower shock bracket, start with the exact chassis and location. Look for an original-equipment replacement, a reputable repair bracket with explicit model-year coverage, or a complete structural repair procedure from the vehicle manufacturer. Verify whether the surrounding frame or axle surface is still sound.
A universal tab may look inexpensive, yet making it fit can require cutting, fixture work, structural welding and corrosion protection. On a heavily rusted truck, that can be less practical—and less safe—than a repair kit designed around the remaining sound structure. Never assume a bracket alone fixes metal lost from the frame.
Jeep Axle Swaps and Weld-On Lower Tabs
Solid-axle swaps and off-road Jeep builds are common reasons to shop for weld-on shock tabs. Builders may need different axle-tube radii, a new lower position, or clearance for a larger shock body. A formed, two-tab mount can make packaging simpler than assembling two loose tabs, provided its width, hole size and weld surfaces match the design.
If the axle is rotated for pinion or suspension geometry, the tabs must still clear at bump and droop. They cannot simply be placed at the angle that makes the parked vehicle look tidy. The bracket also needs enough access for fastener installation and later service.
Lifted Pickups and Shock Relocation Kits
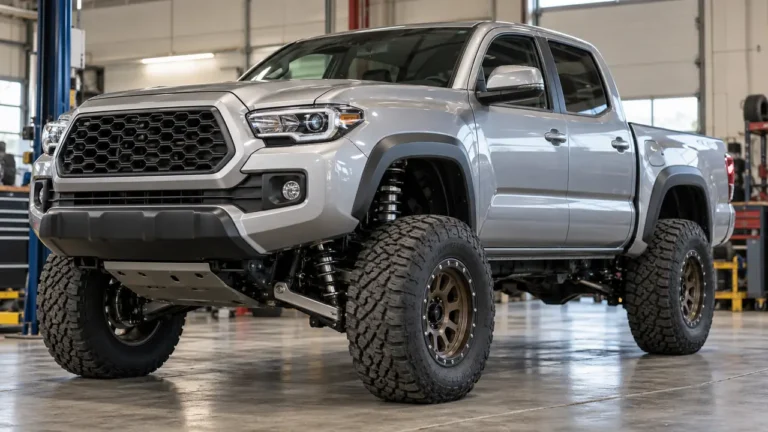
Some trucks with a suspension lift or revised axle arrangement need an application-specific shock relocation bracket. Others only need a different shock length, while the original mounts remain appropriate. Do not buy relocation hardware merely because the truck is taller than stock.
If your actual shopping problem is choosing dampers for a lift rather than choosing the metal attachment, use our lifted-truck shock guide. The bracket decision starts only when the existing mounting points are incompatible, damaged or intentionally being redesigned.
What Good Shock Mount Brackets Include—and What They Leave Out
A good listing should show more than a coated piece of steel. You need enough information to understand how it attaches and whether it supplies the complete joint. Unclear product photos are especially troublesome when a pair of tabs is shown assembled with hardware that is not included.
Steel Thickness Is Only Part of Strength
You will see plates advertised in 3/16-inch or 1/4-inch steel, and some lighter designs use different gauges. Thickness is relevant but does not determine strength by itself. Geometry, bend radius, weld design, material, bolt spacing, and the structure beneath the bracket all matter. A thin, properly engineered bracket can be appropriate for its application, while thick steel attached to the wrong surface can still fail.
Powder coating, paint and plating help with corrosion exposure when applied and maintained correctly. Bare weld-on tabs commonly need cleaning and a suitable protective finish after fabrication. If a kit is already powder coated, the instructions should explain what preparation is necessary at any intended welding surfaces.
Check Whether “Pair” Means Two Tabs or Two Complete Mounts
A “pair” might mean two individual tabs that together make one double-shear mounting location. It might also mean two complete welded brackets, one for each side of the vehicle. Some kits include bolts and locknuts, others supply only steel. Read the bill of materials and count the shock mounting locations you need.
Also check whether any misalignment spacers, eyelet sleeves, threaded studs, backing plates or reinforcing plates are sold separately. Buying a complete bracket kit often costs less in time than sourcing one missing piece after the truck is already on stands.
When a Dimensioned Drawing Is Worth More Than a Review
A review saying a bracket is “heavy duty” does not tell you its inside tab width or center-hole offset. A drawing can. If the product is sold as universal but provides no inside width, hole diameter, base radius or intended application, ask the manufacturer for that information before purchasing.
The extra detail pays off with uncommon shocks, changed axle housings, or a kit assembled from multiple brands. Otherwise, the first time you discover the mismatch may be when the eyelet will not seat between the tabs.
Bent, Torn or Rusted Brackets: Repair or Replace?
A broken shock mount deserves inspection beyond the visible tab. The crack or tear may be the result of repeated bottoming, incorrect travel, a loose fastener, an old weld defect, or rusted supporting metal. Replacing only the most obvious piece can leave the cause untouched.
Signs the Bracket Itself Needs Attention
Look for cracked steel around a weld or bolt hole, elongated holes, a bracket twisted out of alignment, rust perforation, a missing tab, or a mounting bolt that will no longer clamp the joint securely. Fresh polished wear marks can also show where a shock eye or sleeve has been moving against the wrong surface.
Do not confuse those signs with a worn rubber bushing or a leaking damper. A healthy bracket can make noise when the bushing has failed, while a damaged bracket can remain unsafe even after a new shock eliminates the rattle.
Why Welding a Crack Is Not Always the Repair
A small crack at a mount can extend into the frame, spring plate or axle housing. Covering it with weld or adding a generic plate without identifying the cause may hide damage while transferring stress somewhere else. Structural inspection, compatible repair procedures and a qualified fabricator are warranted where load-bearing metal is affected.
If the original mounting point failed because the shock had become the suspension’s travel stop, the new bracket will be exposed to the same problem unless bump and droop limits are corrected. The correct repair therefore sometimes includes changes outside the bracket itself.
A Practical Pre-Order Check for Shock Mount Brackets
Before you order a bracket or hand the job to a fabricator, collect the details below. They are the information an experienced supplier can use to rule out parts that merely look similar.
- Identify the job: exact factory bracket replacement, planned relocation, new lower axle mount, or coilover conversion.
- Record the vehicle and mounting position: year, make, model, chassis, left/right, front/rear and upper/lower, plus any axle or lift modifications.
- Identify the shock end: eyelet with bushing sleeve, spherical bearing, stem, bar pin, stud or another design; note assembled width and bolt bore.
- Measure the mounting surface: axle-tube outside diameter or frame/plate geometry, available space and any existing bolt pattern.
- Check the load and travel: damper-only versus spring-supporting coilover, full bump/droop clearances and the permitted angular movement at the eye.
- Confirm the complete kit: number of mounting locations supplied, fasteners, spacers, tabs, coatings and manufacturer instructions.
If even one of those answers is uncertain, ask for a dimensional drawing or a vehicle-specific part number. Buying the least expensive universal tab and hoping it lines up is not a substitute for knowing the actual fit.
Shock Mount Bracket Questions Buyers Ask
The same terms are used for replacement pieces, fabrication parts and relocation kits. These answers address the common points of confusion before a bracket is ordered or welded into place.
Can I bolt on a universal shock mount bracket instead of welding it?
Only if that particular bracket and the structure beneath it are designed for a bolted installation. A bare weld-on tab does not become an approved bolt-on bracket just because someone drills holes in it. Use a vehicle-specific bolt-on kit or an engineered mounting design with suitable hardware and reinforcement.
Are shock mount brackets universal?
Some are universal fabrication parts, meaning they can be incorporated into many custom builds with appropriate design and fitting. They are not universal direct-fit replacement parts. Hole size, mounting width, axle radius, orientation, load and clearances still determine whether a bracket is appropriate.
What size bolt does a shock mounting bracket use?
There is no single size. Many aftermarket tabs use a 1/2-inch mounting hole, while other shocks and factory installations use different metric or imperial hardware. Match the complete joint—bracket hole, sleeve or bearing bore, fastener and the manufacturer’s specified hardware—rather than choosing a bolt from the bracket photo.
Can a rear shock mount be welded to an axle tube?
Some purpose-designed lower brackets are intended for welded attachment to a suitable axle tube. That does not mean every axle or every location can be welded safely. Tube material, nearby components, housing design and the vehicle manufacturer’s requirements need to be considered by a qualified fabricator.
Are double-shear shock brackets always better?
Two-tab support can reduce bolt bending in an appropriately designed joint, and it is common in off-road and coilover assemblies. But strength depends on the entire mount and attachment. A correctly engineered single-shear or stud-type OEM mount is not inherently defective simply because it has one support side.
Do shock bracket extenders give a truck more suspension travel?
Not by themselves. Moving a mount changes where the shock operates, but wheel travel still depends on suspension geometry and safe bump/droop limits. An extender can improve fitment in a specific engineered kit or create a bottoming or topping-out problem when used without the right shock and travel checks.
Can a broken shock bracket cause clunking?
Yes. Cracked tabs, loose bolts and elongated holes can let the shock move against metal and make noise over bumps. But worn shock bushings and other suspension joints can make similar sounds. Inspect the mounting point and the shock end instead of replacing parts by noise alone.
Can I use ordinary shock tabs for coilovers?
Not unless the manufacturer and the supporting structure explicitly accommodate the coilover’s spring and damper loads. Many inexpensive shock tabs are designed for conventional dampers, not to support vehicle weight. A structural coilover conversion needs application-specific engineering.
The simplest useful shopping rule is this: buy the bracket for the mounting surface, shock end and actual load—not for a brand name or a familiar-looking photograph. Once those match, verify the position against full suspension travel. That combination is what makes the difference between a mount that simply bolts up and one that works correctly on the road or trail.