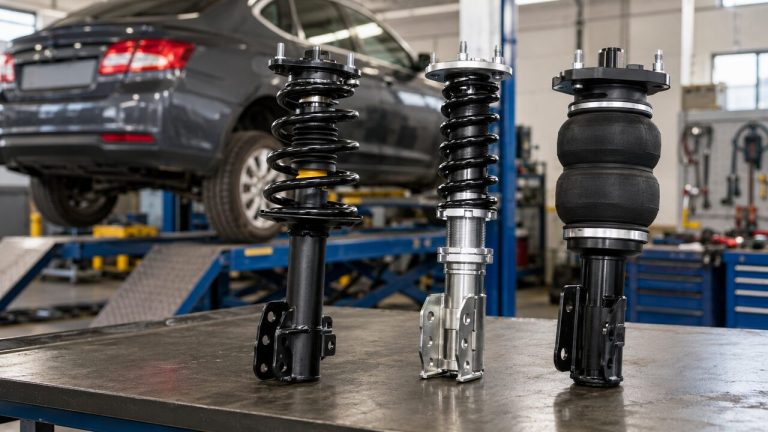
How to Set Coilover Preload: Step-by-Step Adjustment Guide
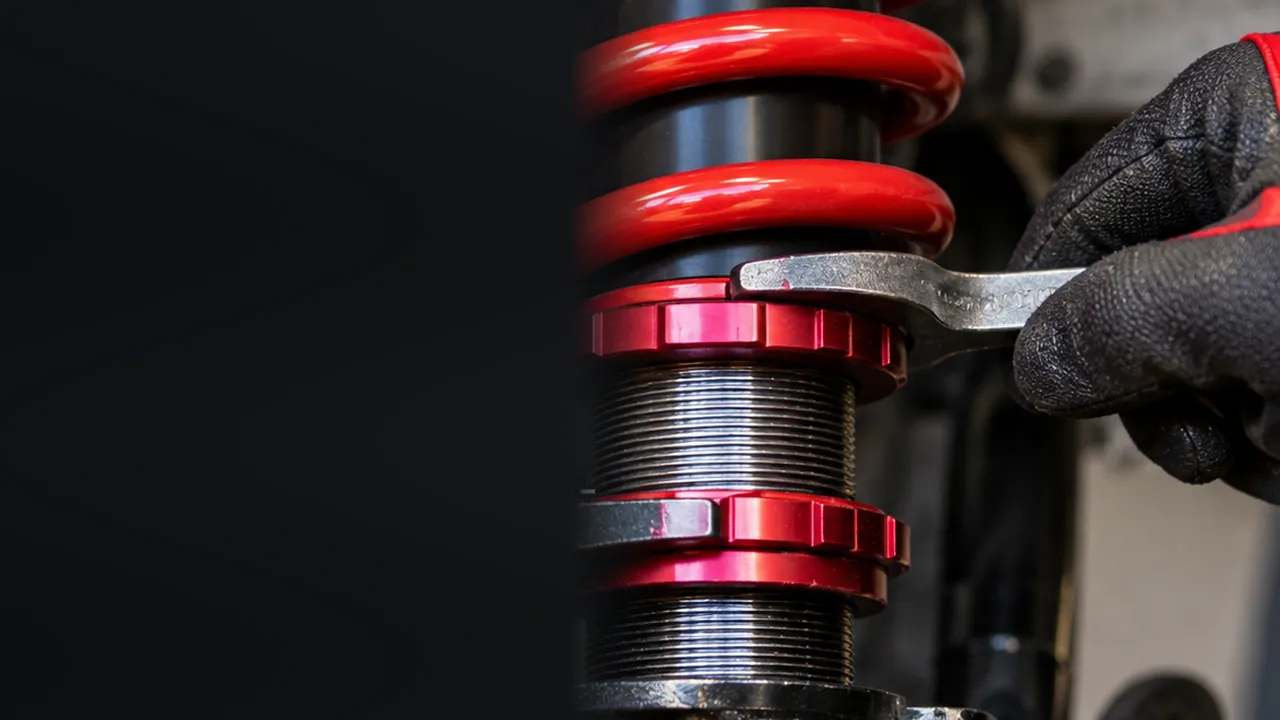
To set coilover preload, first find the manufacturer’s target, unload the suspension safely, bring the spring seat to the zero-preload position, then compress the spring by the specified amount and lock the collars. Measure the spring itself rather than guessing by how many turns you made. On a coilover with a separate lower height-adjustment bracket, leave the spring preload alone when setting ride height at that bracket.
There is no single 3 mm, 5 mm or “two turns” rule for every kit. Some coilovers need a particular spring compression; others are supplied at zero preload and should stay that way. The steps below explain both cases, how to measure the result, and when the adjustment is better left to a suspension shop.
How to Set Coilover Preload in Six Steps
This is the basic workflow for a conventional coilover with a threaded spring perch and locking collar. It is not permission to alter a factory-set assembly: check the instructions for your part number before touching the perch, especially on a strut with a heavily loaded spring.
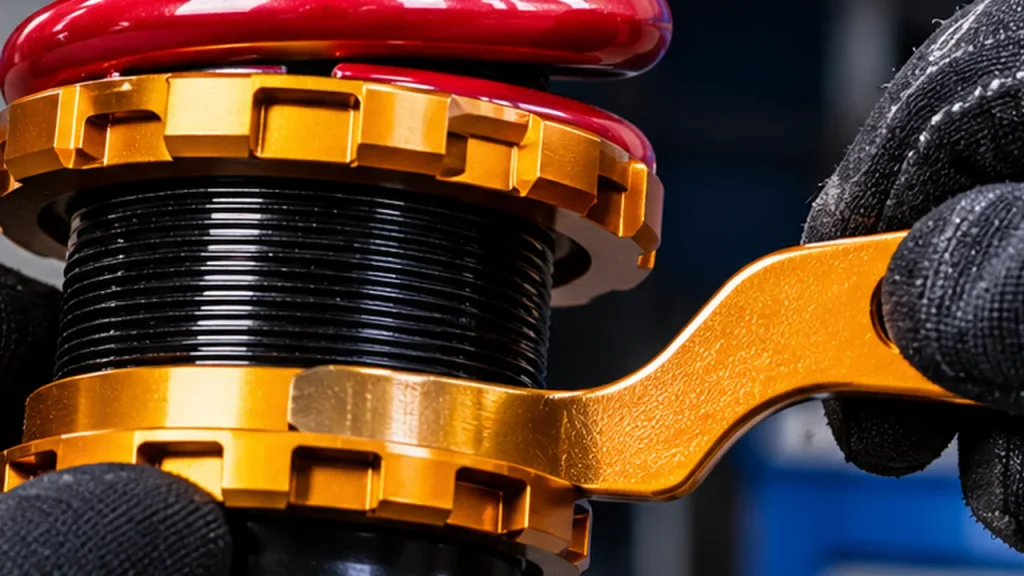
- Identify the coilover design and specified preload. Find the exact brand, model and vehicle-specific sheet. Make sure the ring you intend to move is the spring seat, not the lower mounting bracket or a damping adjuster. If the manufacturer says the preload is factory-set and not user-adjustable, stop here.
- Support the vehicle correctly and remove the load. Work on level ground with suitable lifting equipment and rated stands at approved support points. Keep the suspension secure and follow the kit’s procedure for measuring at full extension; an assembled spring can still store substantial energy even with the wheel hanging.
- Record the existing setup. Photograph the spring and collars, measure the free spring length from a reliable specification or an uncompressed spring, and record the installed spring length in the manufacturer-defined unloaded condition. Never loosen the top shaft-retaining nut as a preload-adjustment shortcut.
- Find zero preload if the kit calls for it. Following the manufacturer’s procedure, bring the seat into contact so the main spring has no axial play without deliberate extra compression. With some systems this can be checked by hand; with others, the assembly must be removed or measured differently. A helper spring changes the reference.
- Set the specified compression and lock the hardware. Adjust the spring perch the measured distance stated in the kit instructions. Re-measure between the spring ends or the specified seat reference points, then tighten the locking collar or locking fastener to the manufacturer’s procedure. Do not assume one spanner turn always equals 1 mm.
- Check the finished installation. Verify both sides, spring seating, collar security, clearance and the suspension’s intended bump/droop limits. If you also changed ride height, settle the vehicle and check alignment and corner balance as appropriate before road use.
The order matters. Twisting the preload collar to get the stance you want can hide a spring that is too short, a lower bracket in the wrong position, or a shock running near the end of its travel. Those are different problems, even though the car may look level in the driveway.
Coilover Preload Calculator: Measure the Spring, Not the Guesswork
If you know the spring’s free length and its length when the coilover is unloaded, the calculation is simply free length − installed length = spring compression (preload). Enter a manufacturer-approved target to see the spring length you would need; you can optionally enter measured thread travel per turn for a rough collar-turn estimate. The calculator cannot choose the correct target for your vehicle.
Free length, unloaded installed length and optional target · No vehicle recommendation
Measured spring compression
For example, a 200 mm spring measuring 198 mm while the damper is fully extended has 2 mm of measured compression. If the correct kit manual specifies 4 mm, its target installed length would be 196 mm. The sample button illustrates that arithmetic; 4 mm is not a universal setting. Thread travel is optional because the safest final check is the measured spring length, not a count of turns.
Identify the Spring Perch, Lock Ring and Height Adjuster First
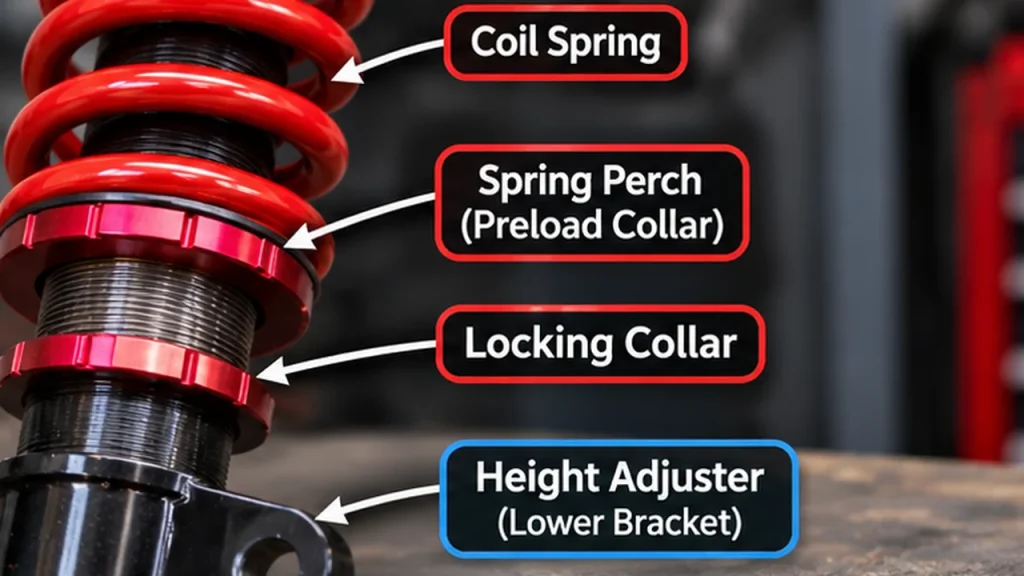
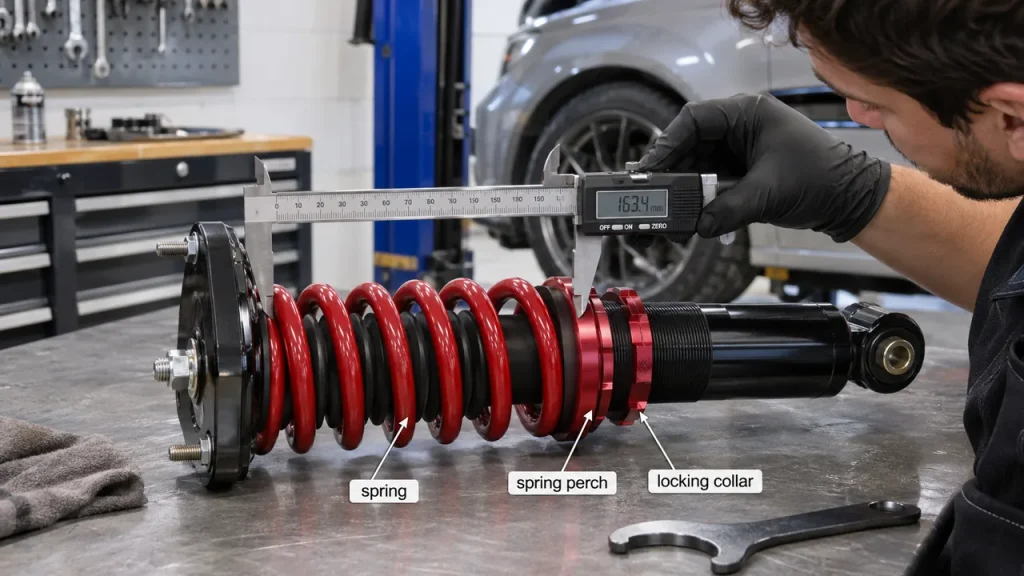
A coilover can have several threaded pieces in one short section of body. The ring carrying the coil spring is the spring perch or spring seat; a neighboring ring or clamp secures its position. The lower bracket may look similar but changes a different dimension. Before turning anything, trace what each component is attached to.
Full-Length Coilovers With an Independent Lower Mount
On many street-performance kits, the damper body screws into a separate lower mounting bracket. The spring seat sets the installed spring condition; the lower bracket adjusts assembly length and ride height within the limits specified by the maker. That separation is useful, but it is not an invitation to wind the bracket out until only a few threads remain. Check the stated thread-engagement and clearance limits.
If your kit uses this layout, do not compensate for incorrect ride height by adding spring compression. Finish the spring setting according to the manual, then use the designated height adjustment. If ride height changes enough to affect geometry, check alignment and available travel before driving normally.
Spring-Perch-Only Coilovers and Fixed Lower Mounts
Some dampers have no independently threaded lower bracket. Moving the spring perch may then change static ride height and where the damper works within its available stroke. On these systems, “set preload” and “set height” are not completely separate tasks. A height change can alter how much droop remains, and a softer spring may need more installed compression to support the same vehicle.
That is also why you cannot copy a collar position from another car. Tire-to-fender measurements tell you where the body sits; they do not tell you whether the spring remains captured at extension or whether the damper still has compression travel.
Separate Rear Springs, Helper Springs and Dual-Rate Coilovers
A rear multi-link car may have a spring sitting on its own adjustable perch while the shock mounts beside it. In that layout, the shock length and rear spring seat interact. There is no universal shortcut that translates the front coilover method directly to the rear. ISC publishes a specific procedure for separate rear-spring preload and damper setup, which illustrates why the installation sequence matters.
A helper spring or tender spring also changes what you measure. A fully compressed helper spring can keep the main spring located without acting as the main working spring at ride height. Dual-rate off-road coilovers add sliders, crossover rings and multiple springs; those parts have their own setup rules. The simple calculator above assumes you are measuring the specified main spring under the reference condition given by the manufacturer.
How to Find Zero Preload and Measure Spring Compression
For a single linear spring, the simplest reference is its free length: the distance from end to end when it is not being compressed. Compare that with the distance between its ends when installed in the manufacturer-defined unloaded condition. Keep the tape or caliper square to the spring and repeat the measurement at the same points.
Zero Preload Means Seated, Not Crushed
At the zero-preload reference, the spring is retained between its seats but has no deliberate added compression. Depending on the design, you may still be able to rotate the spring by hand while it cannot move up and down. Finger-feel alone is imperfect: thrust bearings, dirty threads, helpers and seat shape change the resistance. If you have a reliable free-length specification, use the actual dimension to confirm the result.
This zero point is particularly important when a guide says to add a stated number of millimeters. That number is measured from zero, not from the arbitrary collar position the previous owner left behind. If the spring is captive only because a helper is compressed, do not apply the main-spring formula without checking the assembly instructions.
A 200 mm Spring With 3 mm of Preload
Suppose a main spring has a genuine 200 mm free length. When installed and unloaded, it measures 197 mm between its ends. The measured compression is 200 − 197 = 3 mm. If you switch to inches, that is approximately 0.118 in. No motion ratio, corner weight or damping click count is required to calculate the measurement.
Now suppose the seat moves another 2 mm in the direction that compresses that same spring. If nothing else in the assembly changes, its installed length should become 195 mm and its measured compression 5 mm. This is a measurement example, not a recommendation to apply 5 mm to your car.
Why the Number of Spanner Turns Can Mislead You
A full rotation of a threaded seat advances it by its axial lead, not by an amount you can safely assume from a photo. Thread pitch, multiple thread starts, dirt and a collar that slips relative to its seat can all upset the estimate. Mark the starting point and measure the spring before and after. If you know the actual axial movement per rotation, the calculator can estimate turns, but re-measurement is still the authority.
How Much Coilover Preload Should You Use? Check the Brand
The range of published advice is a good reason not to copy the first 5 mm figure you see online. Manufacturers work with different spring lengths, damper designs and mounting geometry. Even within one brand, a different series or vehicle can require different treatment.
These examples are brand-specific reference points, not interchangeable settings. Follow the instructions supplied with your exact coilover and application; do not transfer a number from one row to another.
| Manufacturer / example | Published guidance | What it means for your setup |
|---|---|---|
| KSport | Factory setting; KSport states its systems should not have the preload changed and separately describes a zero-preload reference. | Do not adjust the spring perch to copy another brand’s preload value. |
| ISC Suspension N1 | ISC describes 5 mm of preload, measured as compression of the main spring from its free length. | Applicable to the ISC systems covered by its guidance, not every coilover. |
| Fortune Auto | Its guidance describes 1/4 in for MacPherson applications and 1/8 in for double-wishbone applications. | Even the same brand may specify different baselines by suspension arrangement. |
For primary instructions, compare KSport’s adjustment guidance with Fortune Auto’s preload instructions. If the printout supplied with your exact kit differs from a general web article, confirm the correct specification with the manufacturer before changing anything.
A coilover arriving with an unexpected amount of preload is not automatically faulty. Some ship pre-set; others intentionally arrive without their final spring setting. Confirm packaging and installation instructions before deciding whether to correct the spring collar.
What More Preload Changes—and What It Cannot Fix
Spring compression before the vehicle’s weight is applied is only one part of suspension setup. It can change the force present at full extension and, depending on the layout, the ride position and travel available around it. It cannot turn an unsuitable spring into the right one.
Preload Does Not Increase the Rate of a Linear Spring
A linear spring with a rate of 400 lb/in still has a rate of approximately 400 lb/in after you add preload. You have changed its initial force, not the extra force needed for each additional inch of compression. This distinction gets muddled whenever a driver reports that the car “feels stiffer” after moving the perch: the damper may now be sitting in a different part of its stroke or contacting a stop sooner.
If the car needs a different stiffness rather than a different installed position, use our suspension spring rate calculator to estimate a starting spring rate from corner load, motion ratio and desired ride frequency. It answers a different question from the preload measurement tool on this page.
Ride Height, Droop and Bump Travel May Change
Picture a wheel dropping into a shallow dip while the body remains roughly level. The suspension needs droop travel to keep the tire in contact with the road. Excessive preload on certain configurations can place the damper nearer its full-extension position at normal ride height, leaving less droop. With a different height-adjustment design, the relationship is not identical. That is why a change in collar position should be followed by actual ride-height and travel checks.
For a modified suspension, our shock length calculator compares full-bump and full-droop mount distances with a candidate shock’s extended and collapsed dimensions. It does not calculate spring preload, but it can expose a travel conflict that a perch adjustment cannot solve.
Too Little Preload Can Make a Spring Loose at Droop
A loose main spring may rattle, shift or fail to seat correctly as the suspension moves back up. The right remedy might be the manufacturer’s specified preload, the correct spring length, a helper spring or repair of a damaged seat. Adding arbitrary compression until the noise stops can create another problem. Clunks also come from loose locks, top mounts and links, so verify the source of the noise before changing the spring setup.
At the other extreme, excessive compression can leave the shock poorly positioned in its available stroke, worsen top-out behavior or reduce usable travel. It does not cure incorrect spring rate or damping. A symptom that appears only after a collar adjustment is a reason to compare with the documented baseline, not to keep adding turns.
Common Preload Adjustment Mistakes to Avoid
Most incorrect setups start with a reasonable-looking shortcut. These checks help distinguish a measurement error from a real suspension problem before another adjustment is made.
- Measuring with the car sitting on its tires: the vehicle load adds spring compression. That dimension is not the unloaded preload measurement.
- Confusing the lower bracket with the spring seat: a height-adjustment collar and a preload collar may be only inches apart but control different things.
- Copying a generic 5 mm target: manufacturer requirements differ, and some kits should remain factory-set.
- Counting turns without knowing thread lead: collar rotation is not a substitute for measuring the installed spring length.
- Ignoring helper or tender springs: the main spring may have no direct compression even though the assembly is captive.
- Loosening a top shaft nut to release tension: an assembled coilover spring can carry dangerous stored energy.
- Leaving the lock collar loose: a correct measurement can drift if the seat is not locked as specified.
- Chasing corner balance or ride comfort with preload alone: ride height, spring rate, damping, corner weights and alignment need their own checks.
The common thread is that preload is a measured assembly condition, not an all-purpose tuning knob. Keep an adjustment log with the before-and-after spring length, ride height and the reason for each change. It makes it much easier to undo a poor result.
Coilover Preload Questions That Come Up During Setup
A few issues tend to arise only once the car is on stands and the spring collars are visible. The answers depend on the coilover’s actual layout, not on whether the car is used on the street or at a track day.
Does Adding Preload Raise or Lower the Car?
It depends on the design. With a perch-only spring-supported layout, moving the seat can raise the car and change the damper’s resting position. With an independently adjustable lower bracket, ride height is usually set separately without changing the specified spring preload. Some off-road threaded-body coilovers intentionally use spring-seat position to adjust lift. Never assume one direction works the same on every kit.
Can I Set Coilover Preload Without Removing the Coilover?
Some manufacturers allow an in-place adjustment with the suspension safely unloaded and the correct tools; others require the assembly to be removed to access or torque hardware properly. The accessible collar is not proof that it is safe to turn under residual spring load. If you cannot verify how your kit unloads, or cannot support the car and moving suspension safely, have a qualified technician perform the work.
Is Zero Preload the Same as a Loose Spring?
No. Properly described zero preload means the spring is seated and has no intentional additional compression, not that it can fall away from its seats. If a spring has axial play at full droop, confirm the correct free length, seats, helpers and manufacturer arrangement before making a change.
Should Front and Rear Coilovers Have the Same Preload?
Not necessarily. Different spring rates, suspension motion ratios, damper lengths and separate rear-spring layouts may require different values or measurement methods. Follow each axle’s instructions. Even left and right should be checked against the intended baseline, not blindly matched by exposed thread count.
Does Preload Fix a Bouncy or Harsh Ride?
Usually not on its own. Harshness can be caused by excessive damping, a poor spring choice, worn mounts, insufficient bump travel or hitting the bump stops. Our suspension adjustment guide separates spring preload from compression/rebound damping and other setup variables. A persistent bounce after installation deserves a systematic inspection.
Should I Get an Alignment After Adjusting Preload?
If the adjustment changes ride height or the suspension geometry, check the alignment against the manufacturer’s requirements. On many independent suspensions, changing height can shift camber and toe. If only the spring’s measured setting was restored without any height or geometry change, the need for alignment depends on the vehicle and the work performed. A full coilover installation normally includes height checks and alignment, as discussed in our coilover installation cost breakdown.
Before the First Drive: Confirm Spring Seating and Full Travel
Do not finish the job when the spring measures the target length. The spring needs to remain properly located throughout the suspension’s intended movement, the damper needs adequate travel at both ends, and every collar or fastener needs to be secured to the manufacturer’s instructions. An apparently quiet test in the garage is not enough to prove those conditions.
Have the installer inspect the spring at full permitted droop and check for coil bind, bump-stop engagement, tire and brake-hose clearance, and safe lower-mount thread engagement. Then lower the car, let it settle, record wheel-center-to-fender height on level ground and verify torque, ride height and alignment where required. If a spring lifts off its seat, a lock ring walks, or the shock reaches an internal stop, stop adjusting by feel and identify the underlying fitment issue.
A well-set coilover should have a documented preload, secure spring seating and enough travel for the suspension to do its job. If you cannot establish all three, the sensible next adjustment is a conversation with the kit manufacturer or a suspension specialist—not another turn of the collar.