How to Adjust Torsion Bar Suspension: Ride Height, Safety and Alignment
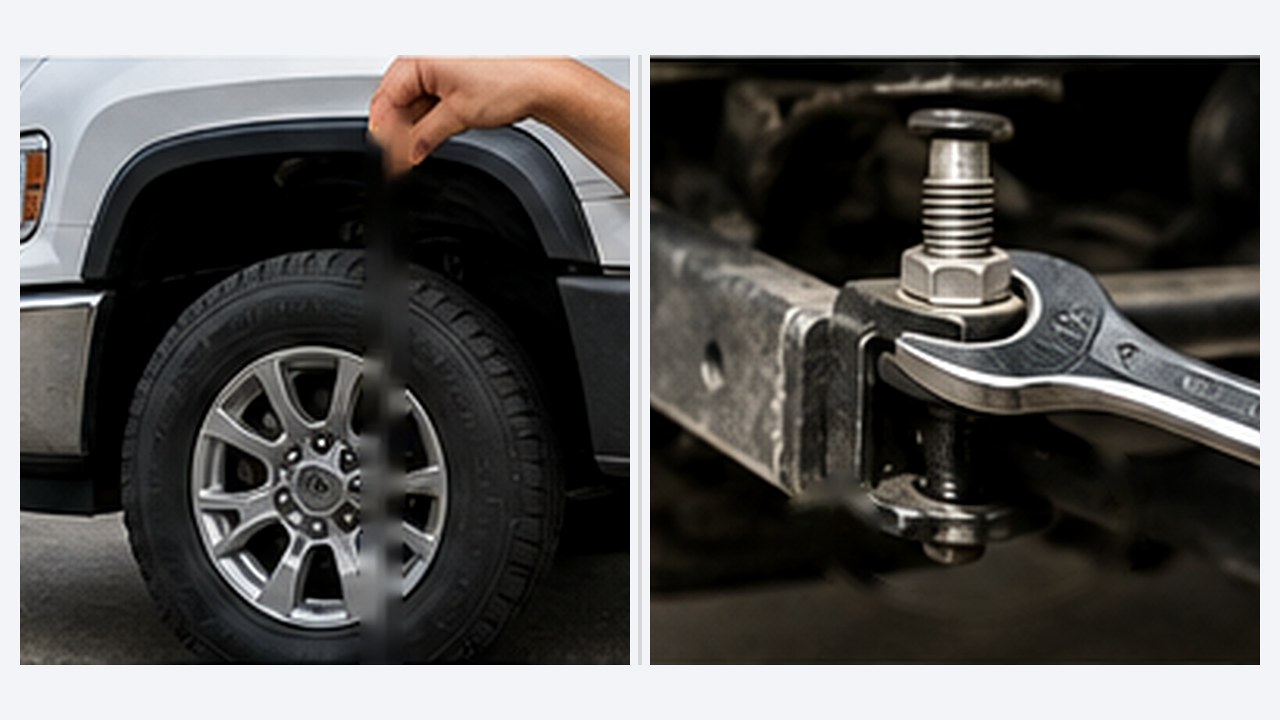
Torsion bar suspension adjustment can raise or lower the static front ride height on many trucks and SUVs, but the correct procedure depends on the vehicle. The basic process is to measure the current ride height, adjust the torsion-bar anchor by a small amount, allow the suspension to settle, measure again, and then check alignment if the height changed.
The important part is what not to assume. There is no universal rule saying one turn of a torsion-bar adjustment bolt equals a specific amount of lift. Adjuster geometry, torsion-bar length, control-arm leverage, vehicle weight, thread pitch, and factory specifications all vary.
Adjustment also has limits. Raising the front suspension changes its resting position but does not create additional total suspension travel. Too much adjustment can reduce droop, increase CV-joint and control-arm angles, affect shock travel, change alignment, and make the suspension work outside the range intended by the manufacturer.
What Does Torsion Bar Adjustment Actually Change?
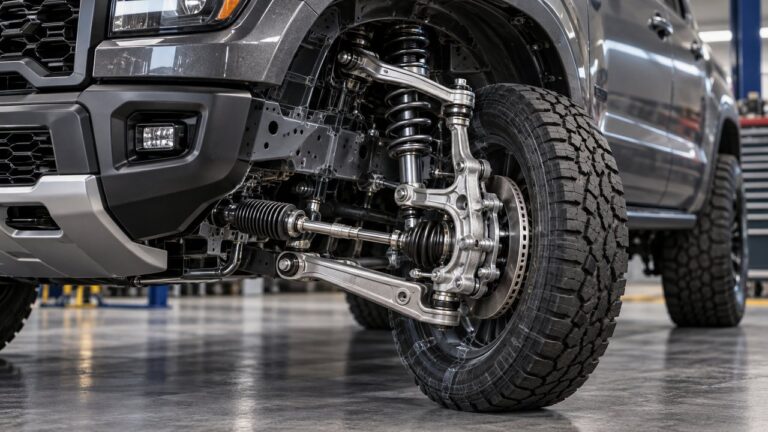
On an adjustable torsion-bar suspension, the torsion bar acts as the spring. One end is connected to a suspension arm and the other is held by an anchor or torsion key.
The adjustment mechanism changes the installed position of that anchor. This changes the amount of initial twist in the torsion bar and moves the suspension to a different static ride-height position.
In practical terms, the vehicle can sit higher or lower even though the torsion bar itself has not changed.
If you want the spring mechanism explained first, our guide to torsion bar suspension covers how the bar twists, stores energy, and works with the control arms and dampers.
Does Adjusting a Torsion Bar Change Spring Rate?
Normal ride-height adjustment does not generally change the torsion bar’s intrinsic spring rate.
The bar still has the same diameter, effective length, material, and basic torsional stiffness. Moving the adjuster changes its installed preload and the suspension’s resting position.
This distinction matters because a vehicle may feel firmer after being raised even though the bar itself has not become a higher-rate spring.
The new sensation can come from reduced droop travel, different control-arm angles, altered shock position, bump-stop engagement, steeper CV-joint angles, or the suspension operating in a different part of its geometry.
Before Adjusting Torsion Bars: Measure First
Do not start by turning the adjustment bolts.
First establish the vehicle’s current ride height and compare it with the correct specification or baseline for that model.
- Park on a flat, level surface.
- Set tire pressures correctly.
- Remove unusual cargo unless the service procedure specifies a particular load condition.
- Make sure the vehicle is not being held up by a jack or suspension component.
- Allow the suspension to settle into its normal resting position.
- Measure both left and right sides using consistent reference points.
- Record the measurements before changing anything.
Factory service procedures often specify dedicated trim-height measurement points rather than simply measuring from the ground to the wheel arch.
That is preferable because fender height can be affected by tire size, tire pressure, body variation, uneven pavement, body damage, or aftermarket panels.
Should You Measure From the Fender to the Ground?
Fender-to-ground measurements can be useful for recording a before-and-after change on your own vehicle, but they should not automatically replace the manufacturer’s ride-height measurement method.
A larger tire can increase the fender-to-ground measurement without changing the suspension position at all. Tire pressure can also move the measurement slightly.
For the most accurate setup, use the suspension or frame reference points specified in the service information for the exact vehicle.
Find the Torsion Bar Adjuster
On many truck and SUV torsion-bar systems, a long torsion bar runs rearward from a front control arm toward a crossmember.
Near that crossmember, the rear end of the torsion bar engages a key or anchor. An adjustment bolt acts on that mechanism to establish the bar’s installed position.
Exact layouts differ. Some systems use different anchor designs, adjustment directions, service tools, measurement procedures, and limits.
Before turning anything, identify the correct adjuster from the vehicle’s service information rather than assuming that any nearby bolt changes ride height.
How to Adjust Torsion Bar Suspension Safely
The following is a general workflow rather than a vehicle-specific repair procedure. The factory service information should take priority because some suspensions must be unloaded in a particular way before the adjuster is turned.
1. Record the Starting Height
Measure both sides before adjustment and write the values down.
If one side sits lower, do not immediately assume the torsion-bar setting is responsible. Uneven tire pressure, vehicle loading, worn bushings, damaged mounts, spring deterioration, collision damage, or other suspension problems can also produce a height difference.
2. Check the Vehicle-Specific Procedure
Determine whether the manufacturer requires the suspension to be unloaded before the adjustment bolt is turned.
Some factory procedures call for lifting the vehicle by the frame so the front wheels are unloaded before changing the torsion-bar setting. That reduces load on the adjustment mechanism and prevents forcing hardware under conditions it was not designed to tolerate.
Do not assume the same lifting points or procedure apply to every vehicle. Use approved lifting points and suitable support equipment for the exact model.
3. Mark or Record the Original Adjuster Position
Before changing anything, record the original position so you have a reference if the result is worse than expected.
You can record the starting ride-height measurements and, where appropriate, the relative adjuster position. Counting turns can help document what you changed on that particular vehicle, but the turn count should not be treated as a universal height formula.
4. Make a Small Adjustment
Adjust only a small amount at a time.
The direction that raises or lowers the vehicle should be confirmed from the service information for the exact suspension. Do not rely on a generic clockwise-or-counterclockwise rule across every torsion-bar design.
A modest change makes it easier to measure the actual result and reduces the chance of overshooting the target height.
5. Return the Vehicle to Normal Ride Position
After adjustment, return the suspension to its normal loaded position using the vehicle-specific procedure.
The suspension needs to settle before the new ride height is meaningful.
Depending on the procedure, this may involve rolling the vehicle, moving it a short distance, or otherwise allowing the tires and suspension bushings to relax into their normal resting position.
6. Measure Again
Repeat the same measurements using exactly the same reference points.
Compare the new height with the starting measurement and the manufacturer’s target range.
If further correction is needed, repeat the process in small increments rather than making one large adjustment.
7. Compare Left and Right Sides
Do not chase perfect visual symmetry without checking the specified measurement procedure.
Road crown, fuel load, vehicle equipment, driver-side weight, body tolerances, suspension wear, and manufacturer specifications can all affect what you see.
The goal is to bring the vehicle within its correct ride-height specification, not simply to make both adjustment bolts appear to be in identical positions.
8. Check Alignment
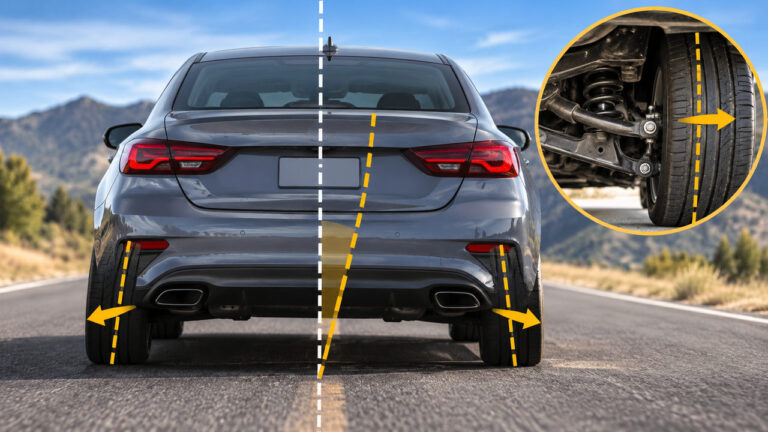
If ride height changed, wheel alignment should be checked because control-arm position has changed with it.
Camber, caster, and toe can all be influenced by suspension position depending on the vehicle’s geometry.
Our wheel alignment cost guide explains typical U.S. pricing if you are budgeting for professional alignment after the adjustment.
How Many Turns Should You Adjust a Torsion Bar?
There is no safe universal number of turns.
You may find advice claiming that a certain number of turns always produces half an inch, one inch, or another fixed amount of lift. That relationship can be useful only when it has been established for a particular suspension and starting condition.
Several factors change the result:
- Adjustment-bolt thread pitch
- Torsion-key geometry
- Control-arm leverage
- Torsion-bar dimensions
- Vehicle front-axle weight
- Current ride height
- Existing bar preload
- Suspension wear
- Aftermarket keys or control arms
Measure the result on the vehicle instead of using turn count as the final specification.
Can You Adjust Only One Torsion Bar?
A left-to-right height difference does not automatically mean one side should simply be tightened until the fenders look level.
First verify tire pressures, loading, measurement points, suspension condition, and the manufacturer’s allowable side-to-side difference.
If the vehicle-specific procedure permits individual side adjustment, each side can be set as necessary to bring measured ride height into specification.
What matters is the resulting suspension position and geometry, not whether the two adjuster bolts have exactly the same number of visible threads.
How Much Can You Raise Torsion Bar Suspension?
The maximum useful adjustment is vehicle-specific and is normally much more limited than the physical travel of the adjuster bolt might suggest.
The suspension needs adequate travel in both directions from its normal resting position.
As the front is raised, the suspension begins closer to its droop limit. Other geometry also changes.
- Control arms operate at steeper angles.
- CV axles can operate at greater angles on 4WD and AWD vehicles.
- Upper ball joints may operate closer to their articulation limits.
- Shock absorbers may have less extension travel available.
- Alignment angles can move farther from specification.
- Steering linkage angles can change.
- Droop stops may be reached sooner.
The correct limit is therefore the one established for the complete vehicle and suspension combination, not the point where the adjustment bolt simply cannot turn any farther.
Does Cranking Torsion Bars Give You More Suspension Travel?
No. Raising the static ride height with the torsion-bar adjuster does not create additional total suspension travel.
Imagine the wheel has a fixed range between maximum compression and maximum extension. Changing ride height moves the resting point within that range.
If the vehicle sits higher, it may gain some distance before reaching full compression, but it generally loses some distance before reaching full extension.
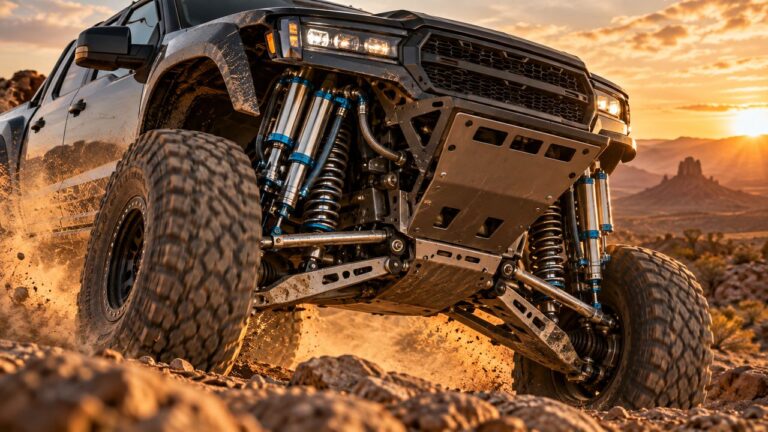
This is why a torsion-bar adjustment should not be treated as equivalent to a complete suspension lift designed around different control arms, shocks, stops, driveline geometry, or other components.
Why Can a Torsion-Bar Adjustment Make the Ride Harsher?
The common explanation is that turning the adjuster made the torsion bar itself dramatically stiffer. That is usually an oversimplification.
A raised vehicle may ride differently because the suspension now has less droop travel or operates closer to a stop. Shock position, control-arm angles, CV geometry, and alignment may also have changed.
If the suspension repeatedly reaches an extension limit over dips or rough surfaces, the ride can feel abrupt even though the torsion bar’s basic rate has not changed.
A large ride-height change can therefore affect comfort without turning the original bar into a different spring.
Torsion Bar Adjustment vs. Installing a Different Torsion Bar
These are two different changes.
Adjusting the anchor changes the installed position and static ride height.
Installing a torsion bar with different dimensions or properties can change spring rate.
A heavier-duty vehicle or one carrying permanently added front weight may sometimes require a different spring specification rather than simply more adjustment.
For example, some manufacturers specify torsion-bar adjustment or different suspension considerations when significant equipment is added to the front of a vehicle.
Torsion Bar Adjustment vs. Coil Spring Ride-Height Changes
Factory torsion-bar systems often make small static ride-height corrections relatively convenient because the anchor is designed to be adjustable.
A conventional coil-spring suspension usually requires a different spring, adjustable perch, coilover, spacer, or other hardware to change static ride height.
That does not mean torsion bars have unlimited adjustment or that coil springs cannot be adjusted. The two systems simply provide different mechanisms for achieving the spring force and setting ride height.
Our torsion bar vs. coil spring suspension comparison covers those differences in more detail.
Do You Need an Alignment After Adjusting Torsion Bars?
If the adjustment meaningfully changes ride height, an alignment check is the sensible next step.
Independent suspension geometry changes as the control arms move through their arcs. Raising or lowering the resting position can therefore change camber, caster, toe, or a combination of those angles depending on the design.
Even when the steering wheel still appears straight, alignment can be outside specification.
Incorrect alignment can contribute to uneven tire wear, steering pull, poor straight-line stability, reduced steering return, and altered handling.
Alignment should be performed with ride height finalized. Otherwise, changing the torsion-bar setting again afterward can move the suspension away from the geometry that was just aligned.
What Alignment Angles Can Change?
Camber
Camber describes the wheel’s inward or outward tilt when viewed from the front.
Because control arms move through arcs, changing static suspension height can move the wheel to a different camber position.
Caster
Caster describes the fore-aft inclination of the steering axis when viewed from the side.
Ride-height changes and resulting control-arm positions can influence caster on some suspension designs.
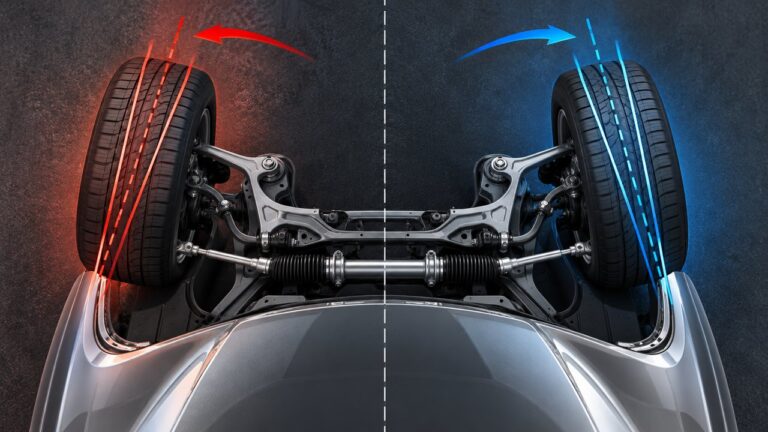
Toe
Toe describes whether the fronts of the tires point slightly toward or away from each other.
Changes in suspension position can alter the relationship between steering linkage and control-arm geometry, which can affect static toe.
Can You Level a Truck With the Factory Torsion Bars?
Some torsion-bar trucks have enough factory adjustment range to reduce a modest amount of front-to-rear rake while remaining within specified suspension limits.
That does not mean every truck can safely be made completely level using only the factory adjusters.
Factory rake may be intentional to account for payload, towing, suspension travel, aerodynamics, handling, headlight aim, and other design requirements.
If leveling requires pushing the front suspension near its extension limit, a properly engineered vehicle-specific solution may be more appropriate than continuing to turn the factory adjusters.
What About Aftermarket Torsion Keys?
Aftermarket torsion keys can change the relationship between the torsion bar, adjuster, and suspension position.
They can make a different ride-height range physically possible, but they do not remove the geometric limits of the rest of the suspension.
Control arms, ball joints, CV axles, steering components, shocks, bump stops, brake hoses, wheel alignment, and tire clearance still need to operate correctly.
A key that allows the adjuster to move farther does not automatically create extra safe wheel travel.
Signs the Torsion Bars Should Not Simply Be Adjusted
Ride-height adjustment should not be used to hide a mechanical fault.
Inspect or diagnose the suspension first if you notice:
- A sudden drop in ride height
- One corner sitting dramatically lower than the other
- Severe corrosion on the torsion bar or anchor hardware
- Damaged or cracked crossmember components
- Loose or damaged adjuster hardware
- Clunking from the torsion-key or control-arm area
- Worn control-arm bushings
- Damaged ball joints
- Evidence of collision or frame damage
- An adjuster already at or near its specified limit
If a vehicle suddenly lost ride height, simply turning the adjuster farther may compensate for the symptom without correcting the failed component.
What If the Adjuster Bolt Will Not Turn?
Do not keep applying more force without understanding why it is stuck.
The adjuster may be heavily loaded, corroded, seized, damaged, cross-threaded, or already at its permitted range. The vehicle may also require the suspension to be unloaded before adjustment.
Torsion-bar hardware can store significant spring force. Removing a torsion key, keeper, anchor, or loaded component is a different and potentially more hazardous operation than making a normal ride-height adjustment.
If the adjustment mechanism needs disassembly or spring load must be released, follow the exact service procedure and use the specified tools.
Should You Lubricate the Torsion Bar Adjustment Bolt?
Do not apply lubricant, anti-seize, or penetrating products as a substitute for the vehicle’s service instructions.
Thread condition, specified lubrication, corrosion protection, and torque behavior can differ between designs.
If corrosion is preventing normal adjustment, inspect the hardware before forcing it. A badly corroded bolt, key, crossmember, or anchor may need repair or replacement rather than lubrication and additional torque.
Torsion Bar Adjustment Checklist
- Confirm the vehicle actually uses an adjustable torsion-bar suspension.
- Check tire pressures and normal vehicle load.
- Find the manufacturer ride-height specification.
- Measure both sides before making changes.
- Identify the correct torsion-bar adjuster.
- Determine whether the suspension must be unloaded first.
- Use the correct lifting and support points.
- Record the original position.
- Make small adjustments.
- Return the suspension to its normal loaded position.
- Allow it to settle.
- Measure again.
- Keep the final height within vehicle-specific limits.
- Check shock, control-arm, ball-joint, CV, and stop clearances.
- Check alignment after the final ride height is established.
Common Torsion Bar Adjustment Mistakes
Using a Universal Turns-to-Lift Formula
A turn count that worked on one truck is not a specification for every torsion-bar vehicle.
Adjusting Before Measuring
Without a starting measurement, you cannot accurately determine what changed or return to the original setup.
Ignoring the Need to Settle the Suspension
Measuring immediately after lowering a vehicle from a jack can give a misleading height because tires and bushings may not yet have returned to their normal positions.
Trying to Get Maximum Lift From the Adjuster
The useful limit is determined by suspension geometry and manufacturer specifications, not by how many threads remain on the bolt.
Skipping Alignment
A vehicle can drive reasonably straight while still having alignment angles that increase tire wear or reduce handling quality.
Using the Adjuster to Hide Worn Parts
A sagging or uneven vehicle should be inspected before an adjustment is used as the cure.
Frequently Asked Questions
How do you adjust torsion bar suspension?
Measure the current ride height, follow the vehicle-specific procedure for loading or unloading the suspension, make a small change at the torsion-bar adjuster, return the vehicle to normal ride position, let the suspension settle, and measure again. Check alignment after the final height is established.
Which way do you turn torsion bars to raise a truck?
The correct direction should be confirmed from the service information for the exact vehicle. Many designs use an adjuster bolt acting on a torsion key, but the safest approach is not to assume one direction applies universally.
How many turns does it take to raise torsion bars one inch?
There is no universal turns-per-inch value. Thread pitch, torsion-key geometry, control-arm leverage, vehicle weight, current position, and suspension design all affect how much ride height changes. Measure the actual vehicle instead of relying on a generic turn count.
Does tightening torsion bars make the ride stiffer?
Normal ride-height adjustment does not usually change the torsion bar’s intrinsic spring rate. The ride can still feel firmer if raising the suspension reduces droop travel or changes shock position, alignment, joint angles, or interaction with suspension stops.
Can you lower a torsion bar suspension?
Some adjustable systems allow the static ride height to be reduced as well as raised, provided the final position remains within the vehicle’s specified range. Lowering can also alter alignment, bump travel, control-arm geometry, and other clearances.
Do you need an alignment after adjusting torsion bars?
An alignment check is recommended when torsion-bar adjustment changes ride height because the control arms and steering components now operate from a different static position. Camber, caster, and toe may change depending on the suspension design.
Can torsion bars be adjusted while the truck is on the ground?
Do not assume so. Some manufacturer procedures require the suspension to be unloaded before the adjuster is turned. Follow the service procedure for the exact vehicle rather than forcing a loaded adjustment mechanism.
Can torsion bars be adjusted too far?
Yes. Excessive adjustment can move the suspension outside its intended ride-height range, reduce available droop or bump travel, change alignment, increase CV and ball-joint angles, alter shock position, and negatively affect ride and handling.
Set the Height, Then Check the Whole Suspension
Torsion bar suspension adjustment is useful because it allows static ride height to be corrected without replacing the spring, but the adjustment should be treated as part of a complete suspension setup rather than a free source of lift.
Start with accurate measurements, follow the manufacturer procedure, make small changes, allow the vehicle to settle, and judge the result by final ride height rather than by the number of turns on the bolt.
Once the height is correct, make sure the vehicle still has suitable suspension travel and joint angles, then verify wheel alignment. A successful torsion-bar adjustment is not simply one that raises the body—it is one that leaves the complete suspension operating correctly.