Strut Tower Brace: Benefits, Types, Fitment & Installation
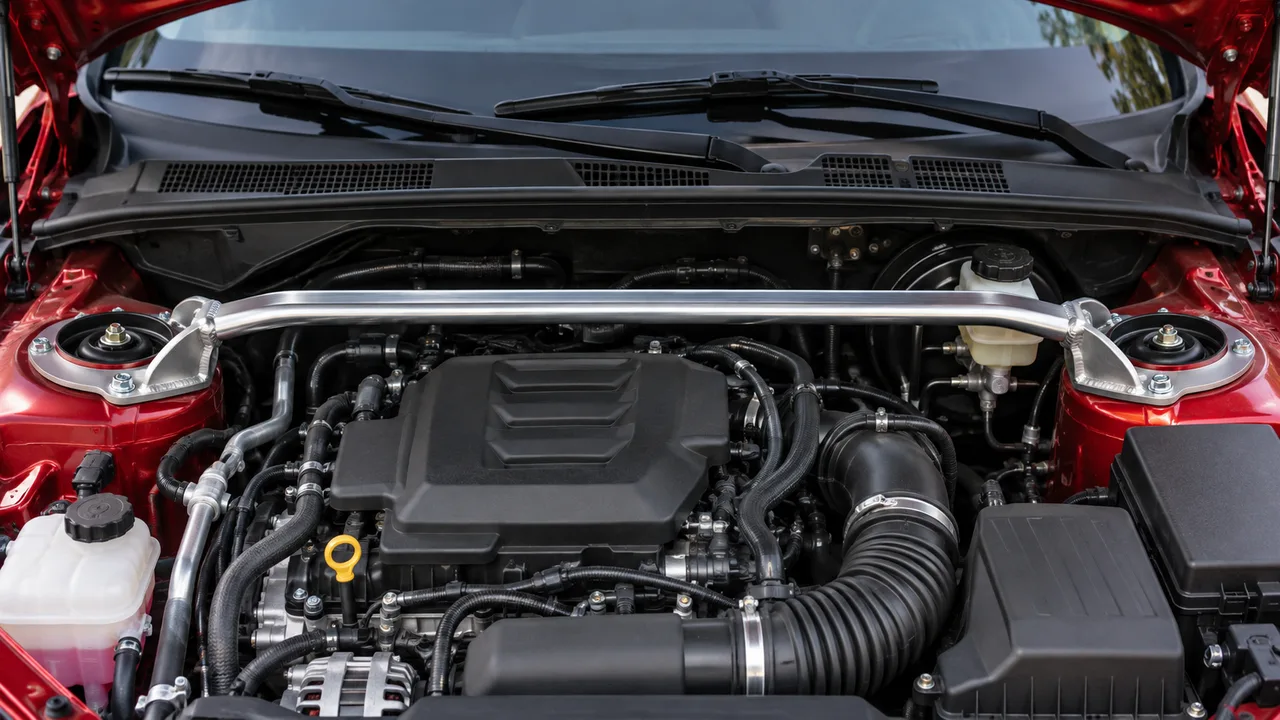
A strut tower brace is a chassis reinforcement that connects suspension tower mounting areas, usually across the front engine bay. Its job is to limit how much those points move relative to each other when the body is loaded through a corner. On a car with enough flex to begin with, a well-designed brace can make steering response feel more consistent. On a stiff modern car driven gently, the difference may be difficult to notice.
That distinction matters before you spend anything. A strut tower brace bar does not increase spring rate, replace a sway bar, correct a bad alignment, or repair a worn strut mount. It adds a structural connection. Whether that connection helps depends on the vehicle, the brace’s mounting points, and how the suspension loads the body.
The quick buying rule: choose a brace engineered for your exact chassis and engine configuration, with rigid and properly supported mounting plates. Verify hood and accessory clearance, confirm whether the installation is bolt-on or requires drilling, and inspect the towers for damage first. If the car already has a factory brace, ask what the replacement changes beyond its appearance.
What Does a Strut Tower Brace Actually Do?
Imagine turning into a fast, sweeping bend. The tires create lateral forces, the suspension reacts, and those forces travel into the body through the suspension mounting points. The body is not an absolutely rigid laboratory fixture. It can deflect slightly, even if the driver never sees the movement.
A strut brace creates an additional connection between the upper left and right suspension structures. It is sometimes called a strut bar, tower bar, stress bar, or shock tower brace. The name can differ by manufacturer, but the intended structural function is similar.
The Load Path Between the Towers
With a two-point front brace, the main bar joins mounting plates at the two towers. When loads tend to shift those locations relative to each other, the brace can resist part of that movement through its own stiffness and its attachments. The towers still connect to the rest of the unibody; the brace supplements that structure rather than replacing it.
A straight line between two towers may be effective at limiting certain relative displacements, but it cannot stop every kind of body twist. How securely the ends attach, the direction of loading, and the stiffness of the surrounding sheet metal all matter. A thick-looking bar attached through flexible joints or thin, poorly supported tabs may deliver less useful reinforcement than its appearance suggests.
Why MacPherson Struts Get So Much Attention
In many MacPherson-strut front suspensions, the upper strut position helps locate the wheel. Loads introduced near the top of the assembly can therefore matter to the relationship between the wheel and the body. A brace may help limit movement of those upper attachment areas under load.
Not every car has a MacPherson front suspension, though. In a double-wishbone design, the upper control arm usually locates the wheel instead. A brace across two upper damper mounts may still reinforce the body, but the mechanical effect is different. Our struts vs. shocks explanation covers that underlying distinction without turning this buying guide into a lesson on damper design.
Does It Change Camber or Improve Alignment?
A brace does not dial in a new static camber number. It may reduce movement of certain mounting points under load, which can help the suspension hold a more consistent relationship to the body on a car that otherwise flexes in that area. That is not the same as adjusting the wheels on an alignment rack.
It also cannot compensate for a bent strut tower, worn joints, or incorrect toe. If the wheel angles are wrong at rest, the fix is to inspect the car and use its approved adjustment method. See our camber adjustment guide for the actual alignment procedure.
Are Strut Tower Braces Worth It?
There is no useful universal answer of “always” or “never.” Two drivers can install similar-looking braces and report very different results because the underlying body structures are different. Think of it as a targeted reinforcement, not a guaranteed performance package.
Where a Brace Is More Likely to Be Noticeable
An older unibody with a comparatively flexible front structure is a more credible candidate than a very rigid modern platform already reinforced around its suspension mounts. Convertibles can be interesting because removing the fixed roof changes how the body carries torsional loads, although each chassis needs to be judged on its own construction.
Higher-grip tires, repeated track cornering, and some suspension upgrades can expose deflection that was not obvious on ordinary tires. That still does not prove a brace will provide a measurable improvement. A properly designed brace and a genuine weakness in the load path must meet for the modification to earn its keep.
A useful test is to ask what problem you are trying to solve. Is the front of the car inconsistent when cornering hard, or does it merely feel soft and lean over? The first complaint might justify researching a brace. The second usually points toward spring, damper, tire, or anti-roll-bar behavior instead.
Where the Difference May Be Small
For a modern performance car with factory bracing, adding another bar may accomplish little. The same can apply to a commuter on standard road tires that never sees sustained high lateral loads. If the existing structure scarcely moves in the direction the brace resists, there is little movement left to remove.
A poorly chosen bar can also add weight, make routine engine service awkward, or create rattles without delivering a useful handling change. There is nothing wrong with choosing an underhood part partly for its appearance. It is only worth separating that preference from a claim of improved cornering speed.
Steering Feel, Turn-In, and Body Roll Are Different Things
People describe a successful brace as a more settled front end, cleaner initial steering response, or a sensation that the nose follows input without delay. Those are subjective descriptions, not measured lap-time gains. Steering feel also changes with tire pressures, tread construction, bushing condition, alignment, and steering-system design.
A brace does not directly control how far the body leans in a turn. Springs and anti-roll bars establish much of the suspension’s roll resistance, while dampers influence the speed of transient movement. If your complaint is excessive lean, our guide to stiffening or softening a car suspension is the better starting point.
What the Trade-Off Looks Like on a Daily Driver
A bolt-on upper brace generally leaves the springs and dampers unchanged, so it need not make a comfortable car suddenly harsh. On some vehicles, however, a stiffer connection can change how vibration and impact noise travel through the structure. That possibility is especially relevant to rigid motorsport-style mounts and cars already fitted with harder bushings.
The practical downside may be less glamorous: a bar positioned across an engine can complicate battery access, spark-plug work, intake removal, or access to coilover adjusters. If you routinely service the car yourself, that matters more than a brochure’s promise of “race-inspired handling.”
Front vs. Rear Strut Tower Brace: Which One First?
Front and rear braces are not interchangeable purchases. They reinforce different portions of the car and can have very different installation requirements. More importantly, not every rear suspension has a pair of true strut towers to connect.
Front Strut Tower Brace
A front strut tower brace usually spans the engine bay and bolts to the upper strut-mount studs or nearby reinforced chassis points. It is the familiar layout on many front-strut passenger cars and performance models.
When choosing one, look closely at its end plates. Do they sit on suitable mounting surfaces? Is there a clear load path into substantial structure? Does the bar clear the intake, engine cover, brake fluid reservoir, and hood? The front brace is often more visible, but the view from above rarely tells the whole fitment story.
Rear Strut Tower Brace
A rear bar may run across the trunk or cargo area, sometimes behind a rear seat or underneath interior trim. On a hatchback, wagon, or coupe, it can connect structurally useful mounting points, but it can also steal the space you use for luggage and create a new obstacle when folding seats.
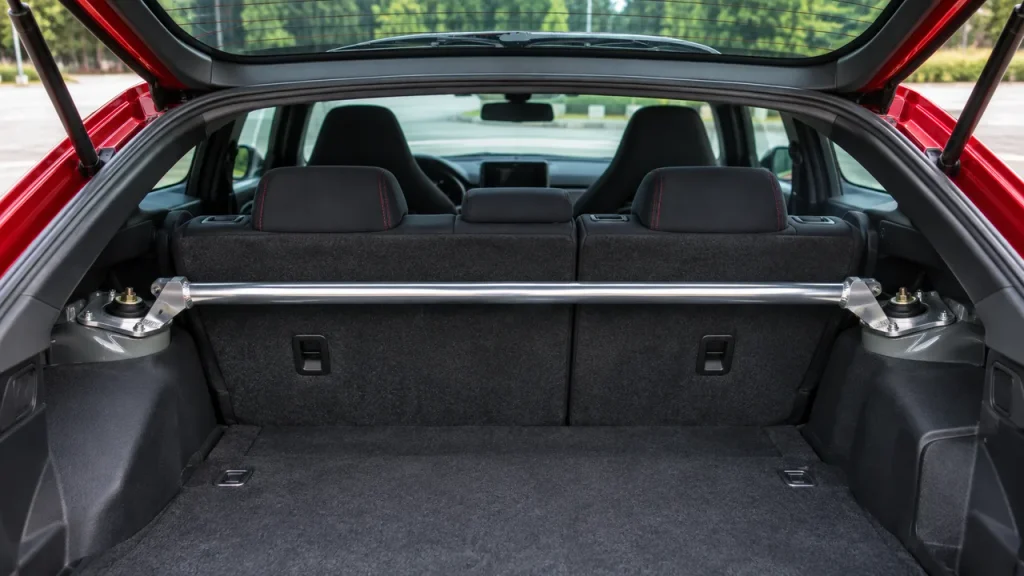
Some rear-brace products connect shock mounts rather than actual suspension-locating strut towers. They can still be sold under the same name. Read the manufacturer’s drawing and mounting instructions instead of assuming that a rear “strut brace” does exactly what a front MacPherson brace does.
Does Fitting Both Ends Give a Better Result?
Only if both locations benefit from reinforcement. An extra rear brace does not automatically improve balance, and fitting bars at both ends does not guarantee a more neutral car. The benefit depends on where the original body flex occurs, how the braces are attached, and the rest of the vehicle’s layout.
Start with a defined concern and a properly fitted part. If a rear kit requires cutting trim, drilling body metal, or restricting cargo space, its real-world compromises deserve the same attention as any possible handling gain.
Two-Point, Three-Point, Solid, and Adjustable Designs
The word “brace” hides several substantially different constructions. A product image may show a bar and two mounting feet, but the stiffness of the whole assembly depends on how its components work together.
Two-Point Strut Tower Brace
The common two-point design joins the left and right tower areas directly. A straightforward shape often makes it easier to clear the hood and service items. It can provide a useful load path between the towers without creating another attachment elsewhere in the car.
The critical detail is not whether the bar looks straight or curved. It is whether the material, cross-section, end joints, and mounting locations can carry the forces it is intended to resist without excessive deflection.
Three-Point and Triangulated Braces
A three-point brace adds an attachment to another structural area, frequently near the firewall or cowl. A properly engineered third point may help resist motions that a simple crossbar handles less effectively. But a third bracket attached to weak sheet metal is not automatically an improvement.
Check whether the kit’s extra point uses an existing reinforced mount or requires drilling, and whether the manufacturer provides the necessary backing plates or other reinforcement. More mounting holes do not, by themselves, prove more useful chassis stiffness.
One-Piece, Hinged, and Multi-Piece Bars
A fixed bar with rigidly joined end plates generally offers fewer potential sources of play. Multi-piece bars can make installation easier and may allow the same basic design to accommodate packaging constraints. Some have pivots or spherical joints at their ends.
Do not assume every hinged brace is useless, or every one-piece brace is superior. A joint may still transmit a useful axial load while permitting rotation, but it can behave differently when the structure tries to twist or bend. The mounting geometry and the complete installed assembly matter more than a single marketing label.
Adjustable Length Is Not Universal Fitment
Threaded adjustment can help with the small amount of length setting allowed by a particular design. It does not make the brace safe for every vehicle with towers approximately the same distance apart. Different cars have different stud spacing, mounting angles, bar heights, and surrounding structure.
An adjustable bar should not be used as a jack or spreader to force a damaged body into shape. Set it only as the manufacturer instructs, and make sure its locking hardware is properly secured.
Steel vs. Aluminum vs. Carbon Fiber Strut Braces
Material affects weight, corrosion resistance, stiffness and price, but the comparison is incomplete without the bar’s shape. A large aluminum section can perform differently from a thin steel tube, and neither tells you how rigid the end plates or mounting studs are.
The following table is a practical buying comparison, not a ranking of materials by performance on every chassis.
| Construction | Main attraction | What to check | Common compromise |
|---|---|---|---|
| Steel or chromoly tube | High stiffness for a given section; straightforward welded designs | Weld quality, corrosion protection, end plates and total weight | Can be heavier if the design is not optimized |
| Aluminum alloy | Low weight and good corrosion resistance | Section size, joint design, fastener interfaces and fatigue design | A thin or poorly supported section may flex |
| Carbon-fiber assembly | Low mass and distinctive construction | Actual fiber load path, metal end fittings and documented application | Expensive; decorative sleeves are not proof of strength |
| Mixed-material or adjustable | Packaging flexibility and service access | Thread engagement, locking hardware and joint movement | More connections that need careful installation |
A bright polished finish does not tell you whether a bar is stiff. Neither does an impressive wall-thickness claim without a drawing of its mounting layout. The right question is how the finished brace behaves in the car, not which material looks best on a product thumbnail.
Is Steel Always Stiffer Than Aluminum?
For components with identical geometry, steel generally has a higher elastic modulus than common aluminum alloys. That does not settle the comparison between real braces. Designers can increase tube diameter or alter cross-section to achieve a useful stiffness at lower mass. The finished assembly, not a raw material property alone, decides the result.
Does Carbon Fiber Make a Brace Better?
Not automatically. Carbon fiber can be engineered for impressive stiffness-to-weight performance, but fibers must be oriented and joined correctly for the expected loads. A composite tube with weak end fittings can still disappoint. Demand meaningful specifications and a legitimate vehicle application rather than paying extra solely for a weave pattern.
Strut Tower Brace Fitment: What Must Match?
The most expensive mistake is not choosing steel instead of aluminum. It is choosing a brace that physically reaches the towers but does not belong on that exact car. Two vehicles from the same nameplate may have different body, engine, or upper-mount packaging.
Before ordering, use the following checks to compare a listing with the actual vehicle. A seller’s phrase “direct fit” should lead to a specific application and part number, not a guess based on an engine-bay photo.
Vehicle Generation, Engine, and Factory Equipment
Match the model year, generation, body style, and engine. Intake plumbing, superchargers, battery terminals, brake components, and factory cowl braces can differ even within one generation. Left-hand-drive and right-hand-drive layouts may also change underhood clearance.
This is why searches for a Mustang strut tower brace, an E36 strut brace, or a WRX tower bar are not interchangeable with the generic keyword. They describe vehicle-specific fitment questions. For example, a manufacturer may list a brace for certain Mustang variants while explicitly excluding an engine or intake configuration. BMR’s STB760 application notes illustrate why those exclusions must be checked before a purchase.
Mounting Studs, Thread Pitch, and Hardware
Count the upper-mount studs and inspect the complete attachment pattern, but do not order solely by the number of studs. The plate must fit the stud locations and seat correctly on the intended surfaces. Some kits use existing strut-mount hardware; others attach to separate chassis studs or supply spacers and replacement nuts.
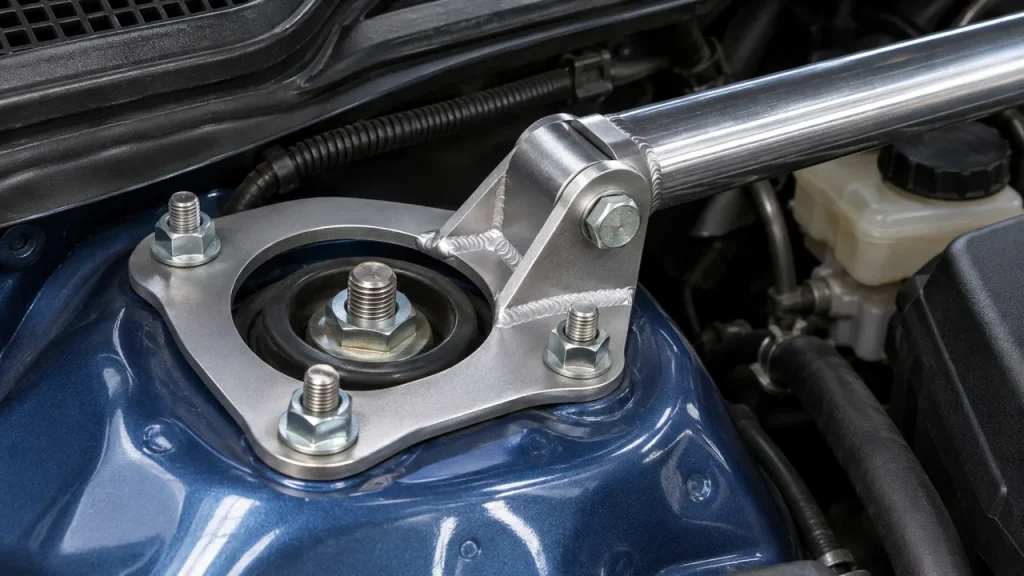
Threads are not interchangeable simply because the same socket fits both nuts. Certain Mustang brace instructions, for instance, distinguish chassis studs from strut studs with different thread pitches. Mixing them risks stripping critical hardware. Use only the supplied or manufacturer-specified fasteners and torque procedure.
Coilovers, Camber Plates, and Strut Top Hats
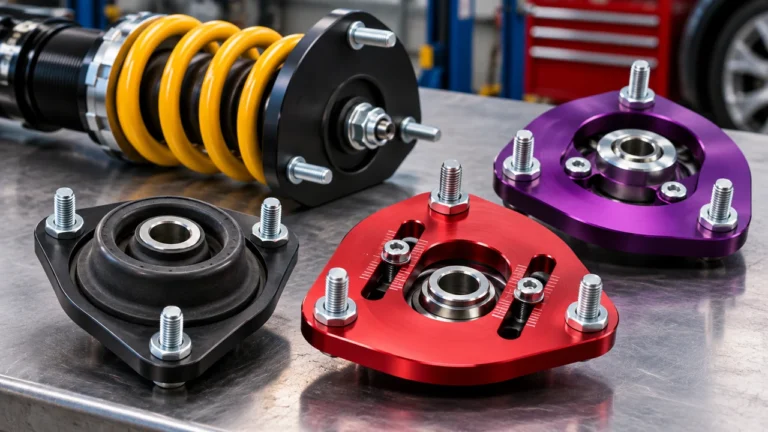
Aftermarket upper mounts can change the height and shape of the mounting area. A camber plate may have protruding adjuster bolts, different studs, or a slotted top plate that needs room to move. A bar that fits the stock strut may block the adjustment mechanism on the modified car.
Check the combination, not merely the vehicle. You need confirmation that the specific brace, coilover kit, top mount, and any supplied spacers are compatible. Our coilover top hats guide identifies the upper-mount and spring-seat parts involved; this page deals with the structural bar fitted around them.
Hood, Intake, and Service Access Clearance
A brace can appear to clear the engine with the hood open and still contact insulation or metal when the hood closes. Engine movement under load also matters around intake pipes, covers, and nearby components. Do not install a brace that touches the brake reservoir, fuel lines, wiring, or battery connections.
Read the manufacturer’s clearance notes for aftermarket intakes and superchargers. Confirm the hood can close without force, and consider whether the brace must be removed to service the engine. If a vehicle has adjustable top-mounted dampers, make sure you can still reach the adjusters.
Rust, Collision Damage, and Weak Sheet Metal
A strut tower brace is not a repair plate. Rust perforation, cracked seams, a pulled-through mounting stud, or a visibly distorted tower needs proper structural assessment and repair before any accessory is attached. A crossbar can mask the problem or place new loads into weakened metal.
The same caution applies if one side will not line up unless the bar is forced into position. A mismatch can be the wrong part, prior body repair, or damage. None of those is a reason to lever the towers together with a threaded adjuster.
A Fitment Checklist Before You Order
Here is the shortest useful list to take from the product listing to the open engine bay:
- Confirm year, chassis generation, engine, body style, and drive configuration against the manufacturer’s fitment chart.
- Match front or rear location, mounting studs, supplied nuts, spacers and any required backing plates.
- Check OEM or aftermarket coilovers, camber plates, hood, intake and brake-component clearance.
- Read whether installation is true bolt-on, requires interior trimming, or involves drilling.
- Verify there are no cracks, major corrosion, loose studs or damaged mounting surfaces.
- Check access for future maintenance and whether the brace can be removed without disturbing alignment-related parts.
The manufacturer’s part-number-specific instructions take priority over any general checklist. If they do not clearly identify what the kit fits, clarify that before buying rather than treating a universal-looking bar as a safe substitute.
How to Install a Strut Tower Brace Safely
Some strut braces really do install with ordinary hand tools and a torque wrench. Others require holes, backing plates, interior trim work, or temporary movement of components. The procedure depends on what the brace attaches to and whether any existing structural fasteners have to be removed.
This is a preparation and verification sequence for a compatible bolt-on kit, not a universal torque specification or permission to loosen suspension hardware at random. Follow the brace manufacturer’s instructions and the vehicle service procedure wherever they differ.
Step 1: Read the Exact Kit Instructions
Locate the part number on the kit, check that it matches the vehicle, and compare every supplied fastener with the parts diagram. Identify which nuts are reused, which are replaced, and whether the kit attaches to upper-mount studs or separate body studs.
Watch for special instructions about battery disconnection, rear interior trim, revised intake clearance, or using new locking nuts. A successful installation begins with knowing the mount arrangement, not with undoing whichever nuts are easiest to reach.
Step 2: Park Level and Inspect the Towers
Work on a stable, level surface with the car secured. Many straightforward upper braces are installed at normal ride height; some vehicle-specific procedures require a different supported condition. Follow the applicable instructions rather than inventing a universal rule.
Look for cracked seam sealer, rust around the studs, torn metal, missing fasteners, or evidence of earlier repairs. Check that the upper mounts are sound. An existing clunk may come from damaged rubber or a bearing rather than from the chassis moving. Our bad strut mount symptoms guide explains the difference.
Step 3: Identify the Correct Nuts—Not the Center Shaft Nut
On many MacPherson struts, the center shaft nut is part of the assembled spring-and-strut unit. Do not loosen or remove that center nut to fit an ordinary strut tower brace. Spring assemblies store substantial energy and can be dangerous if disassembled incorrectly.
Outer upper-mount nuts and separate chassis fasteners perform different jobs. Even with those, removing too much hardware or following the wrong procedure can allow a mount to shift. Identify exactly which fasteners the kit calls for, keep the assembly correctly supported, and stop if the instructions do not match the car.
Step 4: Test-Fit Without Forcing the Bar
Place the brace over the intended mounting points and make sure both feet sit flat. Start its fasteners by hand. If they bind, cross-thread, or require the bar to pull the towers together, stop and recheck the fitment, stud pitch, and mounting surfaces.
Inspect clearance above and around the engine, especially for lines, terminals, covers, and coilover adjusters. A test fit should not damage paint, pinch wiring, or create contact with a fluid reservoir.
Step 5: Tighten to the Correct Specification
Follow the kit’s prescribed sequence and the vehicle’s applicable fastener requirements, using a suitable torque wrench. Do not borrow a torque figure from a different Mustang generation, a different brace, or an online forum. Fasteners with different thread pitches can look nearly identical from above.
If the instructions require thread-locking compound or new lock nuts, use the specified type. A locking nut is not a license to overtighten a mount stud, and a bar that squeaks or rattles later should be inspected rather than repeatedly tightened by guesswork.
Step 6: Verify Hood Closure and Recheck the Install
Before closing the hood fully, confirm there is clear space at the bar’s highest points and around surrounding equipment. Close it gently according to safe practice; do not force the latch against an obstruction. Make sure nothing contacts moving or hot engine components.
After installation, follow any manufacturer-recommended reinspection interval. Look for loosening, new witness marks, chipped contact points, or rattling under ordinary driving. If the brace needs to be removed for a repair, reinstall it using the approved hardware and tightening procedure.
Does Installing a Strut Tower Brace Require Alignment?
A simple bolt-on brace that does not change wheel-location points usually does not, by itself, change static alignment. But that is not universal. Certain kits require separating or moving a strut mount, disturbing adjustment hardware, or modifying the tower. Those operations can justify an alignment check afterward.
If the car pulls, steering is off-center, or the installation procedure disturbed a wheel-locating connection, get the alignment checked before assuming the brace is responsible for the new behavior. A structural bar cannot replace a measured wheel alignment.
Strut Tower Brace vs. Sway Bar: Which Problem Does Each Fix?
These parts both contain the word “bar,” which is enough to cause confusion in shopping results. But they are not equivalent upgrades. One reinforces the body where suspension attaches; the other changes how the suspension resists left-to-right differences in wheel travel.
| Part | Where it acts | Primary purpose | What it does not do |
|---|---|---|---|
| Strut tower brace | Body / upper suspension mounting structure | Reduce relative movement at its reinforced mounting points | Directly increase spring rate or act as an anti-roll bar |
| Sway bar (anti-roll bar) | Left and right suspension via its links and bushings | Add roll resistance when the two sides move differently | Reinforce the upper strut towers like a chassis cross-brace |
| Camber plate | Adjustable upper strut attachment on compatible systems | Change the position of the strut top for alignment | Stiffen both tower areas simply by being adjustable |
| Lower chassis or subframe brace | Selected lower structure or subframe points | Reinforce a different chassis load path | Automatically replace a tower-to-tower brace |
If the car rolls too much, investigate suspension roll resistance and damping before buying a tower bar. If it feels imprecise under high load despite sound tires and suspension components, bracing may be relevant. There is no rule that you must choose one and never fit the other; just be clear about what each component is intended to change.
Can a Strut Brace Reduce Understeer or Oversteer?
It might change feel or consistency on a chassis that flexes, but it does not offer a reliable, universal understeer or oversteer adjustment. Sway bars, tire characteristics, alignment, suspension geometry, and driving conditions are more direct influences on handling balance. Claims that a front brace always reduces understeer are too broad.
Is a Strut Brace the Same as a Chassis Brace?
A strut tower brace is one kind of chassis brace. Subframe braces, K-member reinforcements, lower tie bars, roll cages, and structural chassis modifications address other locations and loads. They cannot be treated as interchangeable simply because manufacturers list them under the same “chassis stiffening” category.
How to Choose Between a Budget Bar and a Premium Brace
Price is a poor stand-in for engineering. Some inexpensive vehicle-specific braces have a simple, sensible design. Some expensive ones emphasize finish or brand identity without explaining the load path or fitment. Work backward from what the car actually needs.
Buy the Correct Geometry Before the Brand Name
First filter for an exact vehicle application and an installation you can carry out safely. Then compare a bar’s end-plate area, mounting layout, material, clearances, and hardware. Look for honest manufacturer notes about excluded engines, factory packages, or aftermarket coilovers.
The names Cusco, BMR, Steeda, Ford Performance, Perrin, and Dinan appear in strut-brace searches, but a reputable name does not make every brace fit every trim. A catalog part number and a real application sheet are more useful than the brand printed across the tube.
What About a Universal or DIY Strut Tower Brace?
A bar that can be cut, bent, or threaded to approximate the distance between towers is not necessarily a properly designed chassis part. The mounting plates, attachment strength, load direction, and fastener selection all have to be engineered for the application. Welding onto thin or damaged body sheet metal also brings structural and corrosion risks.
For a road car, a verified application-specific kit is the sensible default. Custom fabrication belongs with someone who can evaluate the vehicle structure and support the intended loads, not with a guess based on tower-to-tower tape measurements.
When Should You Keep the Factory Brace?
If the car arrived with an OEM strut tower brace, it already has some provision for bracing that area. A replacement may offer different packaging, weight, additional points of attachment, or simply a different appearance. Do not assume a brightly finished aftermarket bar is automatically a performance upgrade over a factory-engineered component.
Check whether a proposed replacement removes any original firewall or cowl connection. Trading a structurally useful OEM assembly for a simpler decorative one can be a step backward, even if the new bar looks substantial.
Common Strut Tower Brace Problems After Installation
Most problems are fitment or fastening issues rather than a mysterious change in suspension behavior. A properly matched brace should not have to grind against surrounding components or work loose every few drives.
Rattles, Creaks, or Metallic Clicking
Check for incorrect hardware, loose joints, a hinged end that has developed play, or contact with an engine cover or cowl. The sound can also come from an existing strut mount fault that became noticeable while attention was focused on the tower area. Locate the actual source rather than tightening every exposed nut.
Hood or Engine Contact
Fresh rub marks, damaged hood insulation, or a new vibration at a particular engine speed can point to insufficient clearance. Engine movement can close a gap that looked generous while parked. Do not reshape a structural brace with a hammer to gain space; consult the manufacturer and use the correct application.
Mounting Holes Do Not Line Up
First verify the part number and year range. Then inspect for omitted spacers, incorrect orientation, or previous body damage. Do not extend mounting holes or pull studs sideways unless the manufacturer’s approved instructions explicitly call for a specified modification.
A Brace Hides a Real Suspension Problem
A bar is not a cure for wandering, uneven tire wear, clunks, or looseness. Those symptoms deserve a mechanical inspection of the joints, mounts, bushings, tires, and alignment. If a noise appeared directly after fitting the brace, stop and inspect the installation before assuming the steering or suspension has suddenly failed for an unrelated reason.
Strut Tower Brace FAQ
A brace can make sense on one car and offer little noticeable benefit on another. These quick answers cover common questions about driving feel, compatibility, installation and what a brace cannot fix.
Do strut tower braces really work?
They can reduce movement between the structural points they connect. Whether a driver notices better turn-in or handling consistency depends on the body’s original stiffness, suspension design, tire grip, brace construction, and conditions. A measurable improvement is not guaranteed on every vehicle.
Is a strut tower brace worth it for daily driving?
Sometimes, particularly on a suitable older or relatively flexible car, but it is usually a lower priority than good tires, sound suspension joints, and correct alignment. A daily driver with no discernible chassis-flex issue may see more practical value in maintenance than a tower brace.
Does a strut tower brace make the ride stiffer?
It does not directly change spring rate or damper settings. It can alter structural vibration paths or perceived feel in some applications, but it is not the same as fitting harder springs or solid mounts.
Is a front or rear strut brace better?
The front is the more common upgrade on MacPherson-strut vehicles. A rear brace may be worthwhile where its actual attachment points reinforce a useful part of the body, but the rear suspension layout and cargo-space compromise need their own assessment.
Can I fit a strut tower brace with coilovers?
Often, but not automatically. Confirm that the bar clears the specific upper mounts, camber-adjustment hardware, damper adjusters and any changed ride-height components. A brace listed for factory struts is not proof of compatibility with an aftermarket top plate.
Do I need to jack up the car to install a strut bar?
Not always. Many compatible upper braces fit with the car safely parked at normal ride height. Other kits require different preparation or support. Use the exact kit instructions and do not loosen the center strut shaft nut.
Does a strut bar increase horsepower or tire grip?
No horsepower is created by a chassis crossbar. It also does not change a tire’s rubber compound or magically add grip. By limiting particular structural movements it may help the suspension behave more consistently on some cars, but that is a different claim.
Can a brace fix a cracked strut tower?
No. A cracked, torn, rusted or displaced tower requires proper structural inspection and repair. Attaching a brace to damaged metal can transfer additional forces into an area that is already compromised.
How much should I spend on a strut tower brace?
Start with correct fitment and documented installation requirements, then compare prices for that exact application. Paying more can make sense for tested construction, weight savings, corrosion protection or superior packaging. Paying extra for a finish alone will not establish better rigidity.
Can I remove a factory brace without problems?
Do not assume so. A factory brace may be part of the manufacturer’s chosen body reinforcement arrangement. If it has to come off for service, reinstall it as instructed. Removing it permanently for appearance or engine clearance should not be treated as automatically harmless.