Leaf Spring Center Bolt: Sizes, Symptoms & Replacement
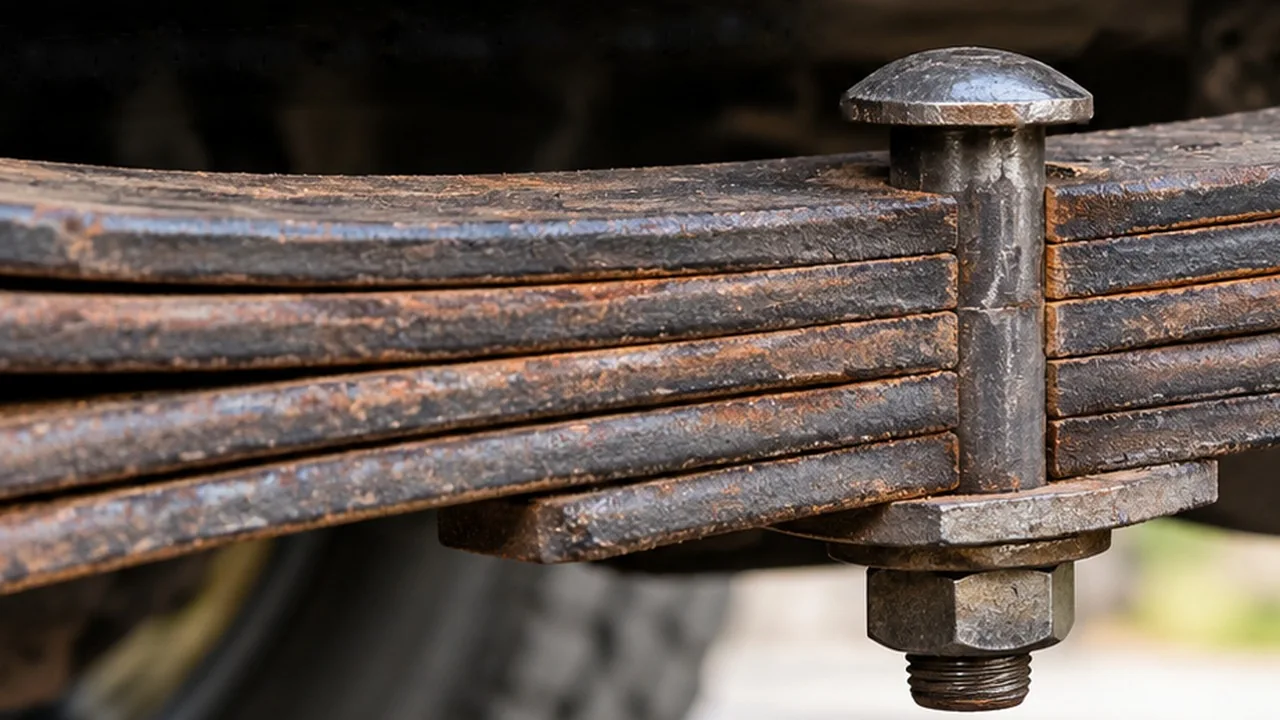
A leaf spring center bolt—also called a center pin or spring tie bolt—passes through the holes in a leaf-spring pack to keep the leaves together and help locate the pack against the axle seat. If you’re replacing one, match the shank diameter, overall length, threaded length, thread pitch, and especially the head diameter and height. The head needs to engage the correct locating hole; a bolt that merely passes through the leaves is not necessarily the right part.
Common catalog diameters include 5/16, 3/8, 7/16 and 1/2 inch, but none is a universal pickup-truck size. If the bolt has broken or the axle has moved on the springs, inspect the U-bolt clamps, spring seat and leaves rather than fitting another center pin and assuming the problem is solved. A broken locator at a moving axle joint is a safety issue, not just a missing fastener.
What Does a Leaf Spring Center Bolt Actually Do?
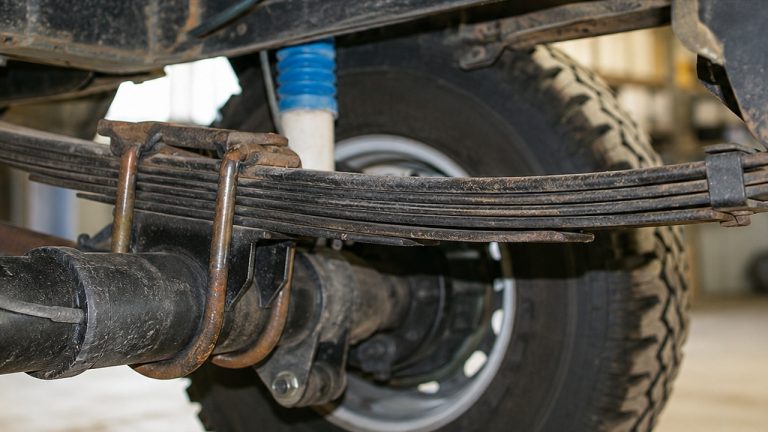
On an assembled multi-leaf spring, the center bolt runs through a row of holes in the individual leaves. Its nut keeps the pack registered during assembly. The rounded, raised head is often the part you cannot see once the axle is bolted down, yet that small detail determines where the axle sits relative to the spring.
The Head Locates the Spring in the Axle Seat
On a conventional solid axle, the center bolt head fits a matching opening in the spring seat, also called a spring perch or axle saddle. When the spring and axle come together, that engagement establishes their intended fore-and-aft position. The head is a locator, not just a convenient place to hold a wrench.
A head that’s too narrow for the opening may provide poor location. A head that’s too tall or the wrong shape can keep the seat from lying flat. This is why the head dimensions deserve the same attention as the bolt’s overall length.
The U-Bolts Supply the Main Axle-Clamping Force
There’s an important division of labor here. The center bolt helps keep the leaves registered and positions the spring at the axle. The heavy U-bolts and spring plate generate the clamp force that holds the axle-to-spring joint together against road and driveline loads.
If that clamp loses preload, the center pin may be subjected to movement and shear loads it wasn’t intended to handle alone. Our leaf spring U-bolt guide covers clamp sizing, replacement and application-specific torque. Here we’ll concentrate on the center fastener itself.
Why the Center Bolt Isn’t Always at the Spring’s Midpoint
The name can be misleading. On many leaf springs, the center hole is centered across the width of the pack but offset along its length. That offset helps place the axle where the vehicle design requires it. In spring catalogs, leaf lengths may even be measured from the center-bolt hole to each spring eye.
Don’t assume a damaged pack was assembled incorrectly because one end is longer than the other. Check the intended front-to-rear orientation and the spring manufacturer’s dimensions before moving anything.
Leaf Spring Center Bolt Sizes: Five Details to Match
The quickest way to buy the wrong center bolt is to shop by one number. Product titles such as “3/8 x 6 leaf spring center pin” usually identify diameter and length. They don’t necessarily tell you the head profile, the length of usable thread or what nut is included.
Use this comparison to work through a parts listing. It is a selection checklist, not a recommendation to substitute one size for another.
| Dimension | What to confirm | What goes wrong if it doesn’t match |
|---|---|---|
| Shank diameter | Diameter that fits the existing leaf holes and approved spring design | A smaller bolt can fit loosely; a larger one may not fit at all |
| Overall length | Length needed for the assembled leaf stack and specified nut engagement | The nut cannot seat properly, or excess bolt interferes with another part |
| Thread pitch and threaded length | Exact thread specification, correct nut and usable threaded portion | A nut binds or runs out of thread before clamping the pack |
| Head diameter | Size required by the spring seat’s locating opening | The head fails to locate correctly or cannot enter the opening |
| Head height and profile | Correct button, fillister or application-specific locating shape | The axle seat may rock, sit high or contact the wrong surface |
5/16, 3/8, 7/16 and 1/2 Inch Are Starting Points, Not Fitment Rules
Those diameters appear repeatedly in U.S. spring-hardware catalogs. Smaller light-duty assemblies may use a 5/16-inch center bolt; other pickup, trailer and heavy-duty packs can use larger fasteners. There is enough variation that year, make and model alone may not identify the correct part, especially after a spring or axle swap.
Measure the existing bolt shank when it’s safe to do so, or use the spring manufacturer’s part number. A worn hole is not a reason to guess the next larger diameter. The leaf pack, its holes and the replacement part must be compatible as an assembly.
Bolt Length Depends on the Entire Leaf Stack
A new add-a-leaf or replacement overload leaf may make the pack thicker. The center bolt must pass through the complete stack, leave the required threaded engagement for its specified nut and fit beneath whatever hardware or clearance limits exist on the nut side.
A common example is a 3/8 x 6-inch replacement pin. That label might sound ample, but it proves neither that a particular pack needs six inches nor that the threaded section starts in the right place. Conversely, a short bolt that just catches a few threads is not acceptable because the outer leaves appear aligned.
Head Diameter and Head Height Can Change Within One Diameter
Stengel Bros lists conventional fillister-head center bolts with separate head diameter and height dimensions. General Spring also carries reduced-head-height and reduced-head-diameter versions. In other words, two bolts of the same shank diameter and length may not position the axle seat in the same way.
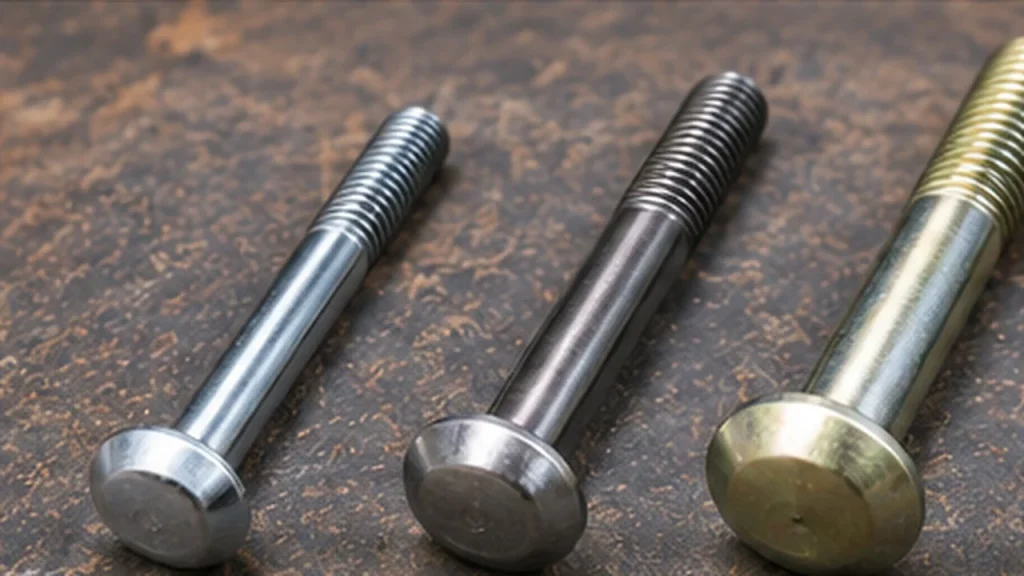
Look at the head’s seating surface and the locating opening, not only its outside diameter. Damage, a worn seat or an aftermarket perch can change what seems to fit. A spring shop may need the axle-seat measurements to identify an approved replacement.
Fine Threads, Matching Nuts and Usable Thread Length
Many center-bolt catalogs list fine-thread fasteners; for example, some 3/8-inch products use 3/8-24 threads. That doesn’t make all 3/8-inch bolts interchangeable. An ordinary 3/8-16 nut is not a substitute just because the first turn seems to catch.
Confirm thread pitch, required nut type and how far the thread extends along the shaft. Some center bolts are threaded for most of their length; others have a shorter threaded section. If the nut stops on an unthreaded shank before the leaves are firmly seated, you have a fitment problem, not a need for more wrench force.
Center Bolt Sleeves and Special Heads Have a Specific Job
You may encounter a center bolt sleeve, stepped locator or head adaptor in heavy-duty parts listings. These parts can be designed to match a particular bolt/head arrangement to a larger locating opening. Their existence does not mean any sleeve can be dropped into a worn axle perch to make a small pin fit.
Use only an adapter or special head specified for the axle and spring combination. A loose homemade spacer can defeat the locating function. The same caution applies to spherical heads, collar heads and other special profiles found in commercial catalogs.
Broken Leaf Spring Center Bolt: What You May Notice
A broken spring center pin isn’t always visible during a quick look under the truck. The head may be trapped between the spring pack and axle seat, and the remaining bolt can be hidden by the mounting hardware. Often it’s the movement around that joint, rather than a clearly visible snapped bolt, that sends a truck to the workshop.
Leaves Shift Sideways or No Longer Form a Neat Pack
A spring pack that used to sit in one straight stack may show leaves protruding unevenly, displaced tips or a retaining clip that no longer sits square. A failed center bolt can allow misalignment, especially after the axle clamp has also lost tension. But damaged clips or a previous incorrect spring rebuild can produce similar signs.
Do not try to shove a visibly displaced leaf back into position while the assembly is loaded. Look for damage to individual leaves, particularly around the center holes, where stress can concentrate.
The Rear Axle Appears to Shift or the Truck Dog-Tracks
If the spring and axle no longer register in their intended positions, the rear axle can sit at an angle relative to the vehicle. From behind, the truck may seem to travel slightly sideways, often described as dog-tracking. A change in thrust angle can also make the vehicle feel unsettled or leave the steering wheel off-center.
That isn’t a diagnosis by itself. Worn bushings, bent parts, incorrect axle seats and collision damage can alter tracking too. A shop needs to inspect the locating joint and measure the axle position before deciding which component failed.
Clunks, Fresh Rub Marks and Rust Dust Around the Seat
A knock during acceleration, braking or a sharp bump may come from the axle seat moving against a spring. Polished metal, fresh scrape marks, rust dust emerging from a contact area or an uneven spring plate can reinforce that suspicion.
None of those signs uniquely identifies the center pin. If the noise is the only symptom, our suspension clunking and rattling guide covers other parts that can sound much the same. Do not tighten an unknown fastener at random just to silence a noise.
The Pin Breaks Again Soon After Replacement
This is the clue you should never dismiss. Repeated center-bolt failure suggests an unresolved condition: insufficient U-bolt clamp load, a damaged spring seat, incorrect locating-head fit, shifting leaves or a mismatched assembly. Impact damage can cause a break as well. There may be more than one fault.
Replacing the center bolt fixes a broken piece of hardware. It does not restore damaged spring holes, straighten a bent axle seat or make a loose clamped joint safe. The reason for the first failure matters more than how quickly the next pin can be installed.
When Should You Replace the Center Pin?
An intact, correctly seated center bolt on an undisturbed spring pack is not generally a routine maintenance item. Most owners will never handle one. Replacement becomes relevant when the spring pack must be opened, modified or repaired—or when there is evidence the locating connection has failed.
A Broken Bolt or Sheared Locating Head
A fractured head, broken shank, severely damaged thread or missing locating feature calls for a correct replacement and inspection of the surrounding assembly. A broken head may remain in the perch while the rest of the bolt appears to be present. That possibility matters when the axle has visibly moved.
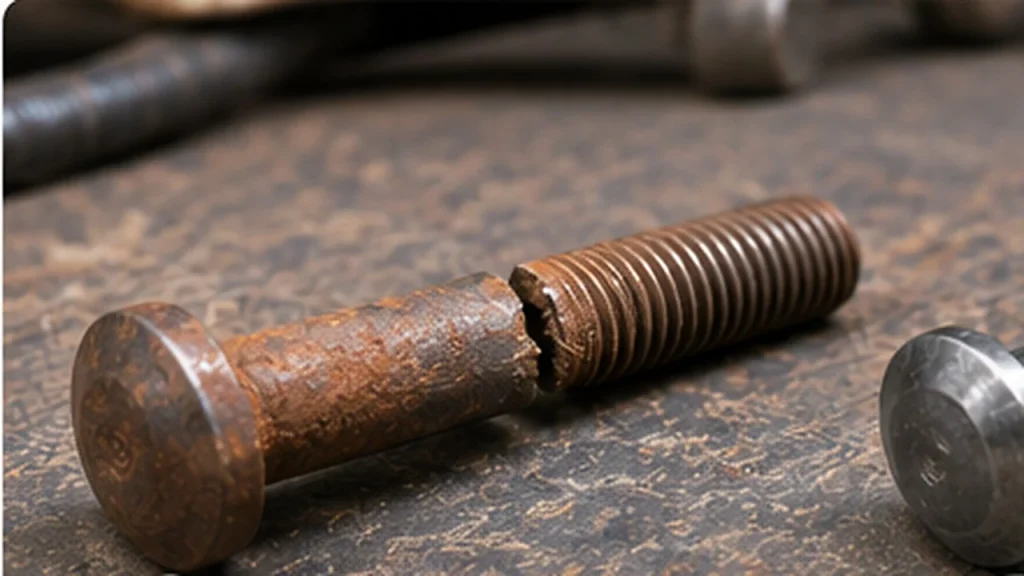
Before choosing the replacement, establish whether the spring leaves and their center holes are still sound. If the pack has cracked through a leaf near its center, a new pin alone won’t solve it.
Add-a-Leaf, Overload Leaf or Spring-Pack Rebuild
When an extra leaf is added, the center bolt may need more length. Replacing a broken individual leaf or rebuilding a pack can also require a new center fastener. In some designs an overload leaf shares that fastener; in others the helper system is separate. Follow the particular spring kit’s construction rather than assuming every add-a-leaf stacks the same way.
A lift or axle-flip kit may also specify a different head orientation or locating component. That’s a kit-specific instruction, not permission to turn any center bolt upside down. Matching the modified assembly is part of fitting the spring correctly.
Spring Replacement, Bushings and Shackles Are Different Jobs
If the entire spring assembly is damaged, replacing a center pin is rarely a substitute for replacing the spring. Our leaf spring replacement cost guide covers complete packs, related hardware and labor, rather than just the price of a small bolt.
At the ends of the spring, the spring-eye bushings and shackles are pivot components. Their wear can cause movement or squeaking without anything being wrong at the center of the pack. See our leaf spring bushings guide if the problem is at a spring eye, not where the axle attaches.
How a Shop Replaces a Leaf Spring Center Bolt
There is no one-size-fits-all procedure for every leaf pack. Some vehicles allow controlled service with the spring still mounted; others require removal and work on a proper bench or in a spring shop. Either way, the crucial issue is the energy stored in the curved leaves. The center bolt must not be used as a makeshift spring compressor.
A professional repair normally involves the following checkpoints. This is an overview of the work, not a substitute for the vehicle’s lifting procedure, spring-service equipment or the exact kit instructions.
- Identify the spring and fastener. Confirm the axle/spring configuration, head location, pack thickness, replacement center bolt, matching nut and any spring-kit requirements.
- Secure the vehicle and support the axle. The frame and axle must be independently supported as the manufacturer’s service procedure requires before the axle clamps are disturbed.
- Control the spring pack before removing the old pin. Use the specified spring clamps, fixtures or shop equipment to retain the curved leaves and their stored load. Never rely on the center-bolt threads alone.
- Inspect the leaves and locating surfaces. Look for shifted or cracked leaves, elongated holes, broken clips, a damaged axle seat and witness marks showing unwanted movement.
- Align the leaf holes and install the correct new bolt. Check orientation and head engagement; ensure the nut and bolt thread correctly without pulling an uncompressed pack together.
- Tighten and finish by the approved instructions. Use the specified center-bolt torque or tightening method, and trim any permitted excess only as the kit directs, protecting the threads and clearances.
- Reassemble and verify the axle clamp. Seat the center-bolt head in the approved locating hole, fit required new U-bolts and hardware, follow the correct clamp torque procedure and complete any specified follow-up check.
Why Clamps Do the Compressing, Not the New Bolt
The leaves aren’t flat strips waiting to be drawn together with a nut. Their arch can leave gaps during assembly, and tightening a relatively small center bolt against that load may strip the threads, snap the fastener or release a spring suddenly. Some add-a-leaf manufacturers expressly warn of violent separation if the bolt is used to pull the pack together.
The correct clamps and fixtures bring the leaves under control while the bolt maintains their final position. Keep hands and body clear of the spring’s release path. If the available tools or instructions are inadequate, a spring shop is the sensible next stop—not a longer bolt and a bigger impact gun.
In the Vehicle or on the Bench?
Working in place may save removing spring-eye and shackle hardware on some designs, but access can be poor and there may be nearby brake lines, cables and brackets. On the bench, a shop has better visibility of the leaves, center holes and clips. The choice should be based on the approved service method and the condition of the pack, not just which option seems faster.
If any leaf is cracked, the center holes are distorted or the pack has been modified several times, a specialist can inspect the assembly as a unit. Merely lining the leaves up visually isn’t enough when a structural component is damaged.
The Nut Spins, the Threads Seize or the Old Bolt Won’t Release
Corrosion and damaged threads are common under a truck. A rounded nut or spinning bolt head can make removal difficult, especially when the head is partly hidden by the axle seat. Repair methods differ depending on whether the pack is safely controlled, the spring remains in the vehicle and the original bolt can be reached.
Do not cut through the center fastener until the pack is securely restrained under the proper procedure. Likewise, don’t use uncontrolled heat around spring steel, brake lines or nearby components. Those choices can make a minor fastener job much more dangerous.
Which Way Should the Center Bolt Head Face?
On a conventional axle-over-spring setup, the head commonly faces up, toward the axle seat. When the axle is beneath the spring, the head commonly faces down, toward that seat. The essential rule is that the correct locating feature must engage the mating hole in the actual suspension design.
Aftermarket axle-flip kits can require reversing a pin or changing related mounting hardware. Follow the kit and vehicle instructions rather than treating the head-up/head-down rule as universal. The nut side must also clear plates, bump stops and other fitted parts.
Leaf Spring Center Bolt Torque, Grade and Thread Safety
Searches for “leaf spring center bolt torque” often turn up isolated figures from old manuals and lift-kit instruction sheets. Those values can be real for the vehicle or hardware they describe, yet wrong for the bolt in your hand. Center-bolt torque is not the same specification as the much larger U-bolt clamp torque.
Why There Is No Safe Universal Foot-Pound Number
Center bolts differ in diameter, thread form, material, nut design and application. Some aftermarket pins are specifically supplied with low tightening loads and warnings against over-tightening. Other OEM assemblies have published torque values for their particular fasteners. Copying one number across those designs is poor practice.
Use the current vehicle service information or the replacement spring/center-bolt manufacturer’s written instructions. If both apply and differ, stop and resolve the fitment with the manufacturer or a specialist before tightening. A bolt that’s too small or incorrectly seated cannot be made right by picking a higher torque.
Why a Hardware-Store Grade 8 Bolt Isn’t Automatically Better
A high-strength marking may sound reassuring, but strength grade isn’t the whole specification. An ordinary hex-head bolt may not have the correct round locating head, head height, usable threads or nut arrangement. Even a bolt with suitable shank diameter could fit the leaf holes but fail to engage the axle-seat opening.
Use a spring-center fastener approved for that application, along with its specified nut. Don’t substitute mixed inch and metric threads, an improvised head washer or a generic bolt chosen only because it looks stronger.
Is It OK to Cut the Excess Thread After Tightening?
Certain replacement center bolts are deliberately supplied long and their instructions permit the excess threaded tail to be trimmed after assembly. That can provide clearance for a spring plate or bump-stop component. Other designs have different requirements, so trimming is not automatic.
Before cutting, verify the specified nut engagement, amount of protrusion and nearby clearances. Protect the threads and check that no cut end can contact other components. The safest purchase is still a bolt whose dimensions and finishing instructions match the job.
Center Bolt, Spring Eye Bolt and Rebound Clip: Three Different Parts
Spring hardware catalogs use similar terms for fasteners that do completely different jobs. An incorrect parts-counter order can turn a simple repair into a disassembled truck waiting for the right bolt.
Center Bolt Versus Spring Eye Bolt
A spring-eye bolt passes through the bushing at the front or rear mounting eye of the spring. It connects the spring to a hanger or shackle and permits the intended pivot motion. The center bolt passes through the stacked leaves near the axle seat and isn’t a pivot at all.
Confusing the two can lead to the wrong thread, head, length and tightening procedure. If the symptom is movement at the frame-side mounting point, inspecting a center pin may miss the real fault.
Center Bolt Versus Rebound Clip or Spring Clip
Spring clips or rebound clips wrap around portions of the leaf pack to help control leaf separation and lateral movement as the spring flexes. They may use their own small clip bolts, collars or rivets. Those components are not the center bolt, and tightening one does not restore the other’s function.
A displaced clip is worth investigating, but a broken clip alone does not prove the center pin is broken. Inspect both in their intended roles and look for damage or evidence the entire pack has moved.
Buying the Right Replacement: What to Tell the Parts Counter
You can often order a standard center pin online, but the shop needs more than “one bolt for a pickup.” If the springs are original and identifiable, start with the exact vehicle and spring assembly. If the truck has custom springs, different axles or a lift kit, the installed dimensions matter more than a generic fitment dropdown.
Have this information ready before comparing listings:
- Vehicle and spring: year, model, axle specification and the spring-pack or kit part number if known.
- Bolt diameter: actual shank size and the correct leaf-hole diameter, not the wrench size of its nut.
- Length and threads: required overall length, thread pitch, threaded portion and specified nut.
- Head details: diameter, height, profile and the mating opening in the axle seat or approved adaptor.
- Installed configuration: axle above or below the spring, number and thickness of leaves, and any add-a-leaf or axle-flip hardware.
- Condition: whether the old bolt broke, the axle shifted, the leaves moved or the perch and plate show wear.
Dorman, Rancho, OEM or a Spring-Shop Center Pin?
Brand names and kit numbers can narrow your search, but they don’t make a part universally interchangeable. Some listings are for a single pin, others include two; a kit may include matching nuts while another lists the fastener alone. A branded center bolt may also be designed for a particular lift or spring pack rather than the stock vehicle.
Match the engineering details and the intended application first. If the head shape or axle seat is unusual, a truck-spring specialist may be better equipped to identify the correct part than a generic auto-parts search page.
Why the Price of the Bolt Isn’t the Whole Repair
The bolt itself is often inexpensive. Labor and risk come from controlling the spring pack, separating the axle connection, handling rusty hardware and checking why the old part failed. A shop quote may properly include new U-bolts, nuts, inspection of the saddle and correction of spring damage.
A quote for “replace center pin” and a quote for “repair shifted rear axle and rebuild leaf pack” are not the same job. Ask what’s actually included, particularly if the truck has already been driven with a loose axle clamp.
Practical Questions Before the Truck Goes Back on the Road
These are the questions most likely to matter once the replacement part is on the bench. The answers depend on whether this was a straightforward spring rebuild or a failure that moved the axle.
Can I Drive With a Broken Leaf Spring Center Pin?
Don’t drive if the center bolt is confirmed broken and the axle-to-spring location may be compromised. A displaced axle can damage the spring, brake lines or nearby components and affect vehicle stability. Arrange proper inspection and recovery rather than assuming the U-bolts will hold an incorrectly located axle in place.
A noise without a confirmed failure still needs diagnosis, but a visibly shifted pack or axle is sufficient reason to stop using the vehicle.
Does Replacing the Center Bolt Require an Alignment?
Not automatically when an undamaged axle is returned to exactly the correct locating position and no geometry-changing parts are disturbed. But if the axle had shifted, the spring pack was modified or the truck dog-tracked, a rear axle position and thrust-angle check is appropriate. A conventional front toe adjustment won’t correct a rear axle sitting crooked on the springs.
Our alignment after suspension repairs guide explains when an inspection is useful and which work can change wheel geometry.
Should I Replace Both Center Bolts if Only One Is Broken?
Not as an automatic rule. If only one spring pack is dismantled, inspect the other side and follow the relevant service instructions. If both packs are being rebuilt or both center bolts removed, use the specified replacement hardware on each. A failure caused by general U-bolt looseness or an incorrect modification may justify inspecting both axle-to-spring joints.
The important thing is to repair the cause on the affected side rather than treating two inexpensive center bolts as a cure for a damaged spring or perch.
Are a Leaf Spring Center Pin and Center Bolt the Same Thing?
In normal U.S. truck-spring parts language, yes. You’ll also see center tie bolt, spring pack center bolt and spring centerbolt. These usually refer to the fastener passing through the middle region of the leaf stack. Just make sure a listing isn’t describing a spring-eye mounting bolt, clip bolt or separate locator sleeve.
Why Doesn’t the Center Bolt Sit Halfway Between the Spring Eyes?
The hole’s position along the leaf can be intentionally offset. The spring designer establishes that position to locate the axle properly, and the measurements to each eye need not be equal. If you’re rebuilding a pack, orient the leaves and the spring correctly instead of assuming the center-bolt hole must divide the main leaf into two equal lengths.
If the Locating Head Doesn’t Seat, Stop Before Tightening the U-Bolts
A spring pack can look straight on the workshop floor and still fail to mate correctly with its axle. The final check happens where the bolt head enters the saddle: it must engage the right opening, with the spring and axle seat lying flat, the leaves correctly aligned and no improvised spacer trapped between the surfaces.
If the seat rocks, the bolt head bottoms out, or the axle sits in the wrong place, applying more U-bolt torque only hides the assembly error. Correct the part mismatch or damaged contact surface first. The center bolt and the axle clamp then get to do their separate jobs—the small fastener locating the spring, the clamped joint holding the axle securely in place.